admin
How to remove mold from bathtub
Mold in your bathtub tends to show up in the same spots — along the caulk line, around the drain, on the overflow plate, and in the corners where the tub meets the wall. These areas stay damp longest and collect the soap residue and body oils that mold feeds on.
Whether you’re dealing with black spots along the caulk, pink slime near the drain, or dark patches creeping up from the tub corners, the cleanup process is straightforward. Here’s how to remove bathtub mold and keep it from returning.
Why Mold Grows in Bathtubs
Bathtubs hold standing water, generate steam, and have multiple joints and seams where moisture gets trapped. Even after the tub drains, a thin film of water clings to surfaces — especially along the caulk, around fixtures, and in any area that doesn’t get direct airflow.
Add in soap scum, shampoo residue, and body oils (all organic material mold feeds on), and your bathtub becomes one of the most mold-prone surfaces in your home. Mold can begin growing in as little as 24–48 hours under these conditions.
Bathtub mold is often connected to mold in the surrounding area. If you see it in the tub, check the tile and grout above the tub, the shower floor (if it’s a tub/shower combo), and the bathroom ceiling directly above.
What You’ll Need
- White distilled vinegar
- Baking soda
- Hydrogen peroxide (3%)
- Spray bottle
- Non-scratch scrub sponge or brush
- Old toothbrush
- Rubber gloves
- Dedicated mold removal spray (for stubborn or caulk-line mold)

Click Here for Our Favorite Mold Remover
How to Remove Mold from a Bathtub (Step by Step)
Cleaning Mold from the Tub Surface
The tub basin itself (whether porcelain, fiberglass, or acrylic) is non-porous, so surface mold comes off easily.
Step 1: Spray the entire tub surface with undiluted white vinegar. Pay extra attention to the waterline, corners, and around the drain and overflow.
Step 2: Sprinkle baking soda over the vinegar while it’s still wet. The fizzing action helps lift soap scum and mold together.
Step 3: Let the mixture sit for 15–20 minutes.
Step 4: Scrub with a non-scratch sponge (important for acrylic and fiberglass tubs — abrasive scrubbers will damage the finish). For porcelain tubs, a slightly stiffer brush is fine.
Step 5: Rinse thoroughly with warm water.
Note for acrylic and fiberglass tubs: Avoid bleach and abrasive cleaners on these surfaces. Vinegar, baking soda, and hydrogen peroxide are all safe. Bleach can cause yellowing and micro-scratches that actually make future mold problems worse by giving mold more texture to grip.
Cleaning Mold from Bathtub Caulk
The caulk line where the tub meets the wall is the most common spot for persistent bathtub mold — and the hardest to clean, because mold grows inside the caulk, not just on it.
For surface-level caulk mold:
Soak cotton balls or strips of paper towel in hydrogen peroxide or undiluted vinegar. Press them against the moldy caulk and leave them for 1–2 hours (or overnight for heavy mold). The extended contact time allows the solution to penetrate the caulk surface. Scrub gently with a toothbrush and rinse.
For mold that’s embedded in the caulk:
If the caulk is dark/discolored even after cleaning, the mold has grown into the material and won’t come out with surface treatment. The fix is to remove the caulk entirely (use a caulk removal tool or utility knife), clean the exposed joint with mold remover, let it dry completely, and re-caulk with mold-resistant silicone caulk.
This sounds like a big job but takes about an hour and is one of the most effective things you can do to eliminate recurring bathtub mold.
Cleaning Mold Around the Drain and Overflow
Remove the drain stopper and overflow plate cover. Clean under both with vinegar and a toothbrush — mold and bacteria build up in these hidden areas and contribute to the musty smell many people notice around bathtubs.
If the drain is slow, clear it. Standing water is the biggest accelerant for bathtub mold growth.
What About Black Mold in the Bathtub?
Dark mold in bathtubs is common but is usually species like Cladosporium or Aspergillus rather than the infamous Stachybotrys chartarum (toxic black mold). Stachybotrys prefers porous materials like drywall and wood, so it’s less likely to grow directly on tub surfaces.
That said, all mold species can trigger health reactions. If you’re experiencing unexplained congestion, headaches, or respiratory issues, review the warning signs of mold toxicity and take any bathroom mold seriously.
How to Prevent Bathtub Mold
Wipe down the tub after use. A quick wipe with a towel after every bath or shower removes the moisture film mold needs. This single habit prevents most bathtub mold.
Ventilate properly. Run your exhaust fan during and for 20–30 minutes after every bath or shower. If your bathroom doesn’t have an exhaust fan, leave the door open and crack a window to get air moving.
Don’t leave wet items in the tub. Wet loofahs, washcloths, soap bars sitting in puddles, and bath toys all hold moisture and grow mold. Hang them to dry outside the tub.
Spray vinegar weekly. A quick spray of undiluted vinegar on the tub, caulk line, and fixtures once a week prevents mold spores from establishing.
Replace caulk proactively. Don’t wait until caulk is visibly moldy. If it’s cracking, peeling, or pulling away from the wall, moisture is getting behind it. Re-caulk with mold-resistant silicone before mold sets in.
Keep humidity low. If your bathroom stays humid long after bathing, consider a dehumidifier. Keeping humidity below 50% makes it very difficult for mold to grow.
When to Call a Professional
Bathtub mold is almost always a DIY fix. However, call a mold removal professional if:
- Mold keeps returning within days despite thorough cleaning and ventilation
- You notice a musty smell coming from inside the wall behind the tub
- The wall behind or around the tub is soft, discolored, or warped
- Mold is spreading to multiple bathroom surfaces — walls, ceiling, window sill
These signs suggest water is leaking behind the tub into the wall cavity, where mold grows on drywall and framing out of sight. Here’s what professional mold remediation typically costs.
Frequently Asked Questions
Q: Why does mold keep coming back on my bathtub caulk?
A: Because mold grows inside caulk, not just on the surface. Once caulk is internally contaminated, no amount of surface cleaning will fully remove it. The lasting fix is to remove the old caulk and replace it with mold-resistant silicone caulk. Going forward, a weekly vinegar spray and proper ventilation will keep new caulk mold-free.
Q: Can I use bleach on an acrylic or fiberglass bathtub?
A: It’s not recommended. Bleach can cause yellowing on acrylic and fiberglass surfaces and may create micro-scratches that make mold problems worse over time. Stick to vinegar, baking soda, or hydrogen peroxide — they’re effective on mold and safe for all tub materials.
Q: Is the pink slime in my bathtub mold?
A: The pink or orange film common around tub drains and waterlines is actually Serratia marcescens, a bacteria rather than a true mold. It thrives in the same wet conditions as mold and should be cleaned the same way. Its presence usually means mold is growing nearby too.
Q: How do I remove mold from bathtub jets (jetted tub)?
A: Fill the tub with hot water until the jets are covered by about 2 inches. Add 2 cups of white vinegar and 1/2 cup of baking soda. Run the jets for 15–20 minutes, then drain and refill with cold water. Run the jets for another 5 minutes to flush. Do this monthly to prevent mold buildup inside the jet lines.
Q: My bathtub smells musty but I can’t see any mold. What should I do?
A: A musty smell without visible mold usually means it’s growing somewhere hidden — inside the overflow drain, under the drain assembly, behind the caulk, or inside the wall behind the tub. Start by cleaning the drain and overflow areas. If the smell persists, the mold is likely behind the wall and you should call a professional.
Final Thoughts
Bathtub mold is one of the most common — and most fixable — household mold problems. In most cases, vinegar, baking soda, and a good scrub get the job done. For persistent caulk mold, a caulk replacement is the permanent fix.
If mold is showing up across multiple bathroom surfaces — on your shower tile, shower floor, shower head, or window sill — that’s a clear sign of a ventilation problem that’s worth addressing at the source before it gets worse.
How to remove mold from shower tile
Mold on shower tile usually starts in the grout — those thin, porous lines between tiles that absorb moisture and never fully dry out. Over time, the mold spreads from grout lines onto the tile surface itself, creating dark patches that look terrible and can affect your health if left untreated.
The good news is that tile itself is non-porous, which means mold sitting on the tile surface wipes off easily. The challenge is the grout, caulk, and the areas behind tiles where moisture hides. Here’s how to handle all of it.
Why Mold Grows on Shower Tile
Shower tile creates a microclimate mold loves. Hot water generates steam that condenses on every surface, soap scum and body oils provide food, and grout lines act like tiny sponges that hold moisture for hours after your shower ends.
Mold can establish itself in 24–48 hours under these conditions. If your bathroom exhaust fan is weak or you don’t run it after showering, the problem accelerates dramatically.
Mold on shower tile rarely stays isolated. If you’re seeing it on the tile, also check your shower floor, shower head, bathtub, and bathroom ceiling.
What You’ll Need
- White distilled vinegar or hydrogen peroxide (3%)
- Baking soda
- Spray bottle
- Stiff grout brush
- Old toothbrush (for corners and edges)
- Rubber gloves
- Dedicated mold removal spray (for deep grout mold and black mold)
Click Here for Our Favorite Mold Remover
How to Remove Mold from Shower Tile (Step by Step)
Cleaning the Tile Surface
Mold on the tile face is the easy part, since tile is non-porous and doesn’t absorb mold the way grout does.
Step 1: Spray the tile surface with undiluted white vinegar or 3% hydrogen peroxide. Cover all discolored areas generously.
Step 2: Let it sit for 10–15 minutes. Don’t rinse early — the dwell time is what kills the mold.
Step 3: Wipe down with a clean cloth or sponge. For textured tile, use a soft brush to get into the surface texture.
Step 4: Rinse with warm water and dry with a towel.
Cleaning Mold from Grout Lines
Grout is where the real work is. Because grout is porous, mold grows into it — not just on top of it.
Step 1: Make a paste of baking soda and water (about 3:1 ratio). Spread it along the grout lines with your finger or an old toothbrush.
Step 2: Spray vinegar over the paste. Let it fizz and sit for 15–20 minutes.
Step 3: Scrub the grout lines with a stiff grout brush, applying firm pressure. Work in small sections so you can see your progress.
Step 4: Rinse and inspect. If dark staining remains, apply a dedicated mold remover directly to the grout, let it dwell for 10–15 minutes, and scrub again.
Step 5: For persistent grout stains, soak paper towels in hydrogen peroxide, press them against the grout lines, and leave them for 1–2 hours. This extended contact time can lift stains that scrubbing alone won’t.
Cleaning Mold from Tile Caulk
Caulk at the corners of your shower, where tile meets the tub, and along the edges of the shower floor is a prime mold target. Unfortunately, mold grows inside silicone and latex caulk — you can scrub the surface clean, but the mold roots remain.
If your caulk is discolored and cleaning doesn’t restore it, the only real fix is removal and replacement. Cut out the old caulk with a utility knife or caulk removal tool, clean the gap with mold remover, let it dry completely, and apply fresh mold-resistant silicone caulk.
How to Handle Mold Behind Shower Tiles
This is the situation that concerns professionals. If tiles are loose, hollow-sounding when tapped, or if you notice a persistent musty smell even after cleaning all visible mold, water may be getting behind the tiles.
Mold behind tiles feeds on the drywall, cement board, or wood framing that supports your shower. You can’t fix this with surface cleaning — it requires removing the affected tiles, treating the substrate, and potentially replacing damaged backing material.
Signs of mold behind shower tiles include tiles that are loose or cracked, grout that keeps crumbling or falling out, a musty smell that won’t go away, and discoloration or warping on the wall behind the shower (visible from the other side). If you notice any of these, contact a mold remediation professional before the damage spreads.
How to Prevent Mold on Shower Tile
Seal your grout. This is the single most effective preventive step. Grout sealer fills the pores in grout so moisture can’t penetrate. Apply it once a year — it takes about 30 minutes for a typical shower and dramatically reduces mold growth.
Squeegee tile walls after showering. This removes the water film that feeds mold. It takes 30 seconds and prevents the majority of tile mold.
Run ventilation for 20–30 minutes post-shower. Your exhaust fan (or an open window) needs to run long enough to drop humidity back to normal levels. If the mirror is still foggy when you leave the bathroom, you’re not ventilating enough.
Clean weekly with vinegar. A quick spray of undiluted vinegar on tile and grout once a week prevents mold from establishing. No scrubbing needed — just spray and let it dry.
Fix leaks immediately. A dripping shower head or leaking handle keeps the tile wet between showers, which is exactly what mold needs. Even a slow drip adds up to a big moisture problem over time.
A good dehumidifier also helps if your bathroom humidity stays elevated despite ventilation, and an air purifier rated for mold can reduce airborne spore counts throughout the space.
When to Call a Professional
Shower tile mold is usually a DIY job. But get professional help if mold keeps returning within days of cleaning, tiles are loose or the wall behind them is damaged, you see mold spreading to walls or the ceiling beyond the shower, or the affected area covers more than about 10 square feet.
Here’s a breakdown of typical mold remediation costs so you know what to expect.
Frequently Asked Questions
Q: What’s the best way to clean mold from colored grout without bleaching it?
A: Use vinegar or hydrogen peroxide instead of bleach. Both kill mold effectively without discoloring pigmented grout. The baking soda paste method is also safe for colored grout — the mild abrasion removes mold without affecting the color.
Q: How do I know if mold is behind my shower tiles?
A: Tap on the tiles — if they sound hollow instead of solid, the adhesive or backing may be compromised by moisture. Other signs include tiles that are loose, grout that constantly cracks or falls out, a persistent musty smell after surface cleaning, and visible discoloration on the wall behind the shower.
Q: Can I paint over moldy grout?
A: No. Painting or applying grout colorant over active mold traps moisture underneath and allows the mold to keep growing hidden from view. Always clean and kill the mold first, let the grout dry completely, and then apply grout sealer or colorant.
Q: Is vinegar or hydrogen peroxide better for shower tile mold?
A: Both work well. Vinegar is slightly better for mineral buildup and soap scum (common on shower tile), while hydrogen peroxide has a slight edge on deep mold stains and is better for light-colored grout. You can use either — just don’t mix them together.
Q: How often should I seal my shower grout?
A: Once a year for most showers. If your shower gets heavy use (multiple people daily), every 6 months is better. You can test whether your seal is still effective by dripping water on the grout — if it beads up, the seal is good. If it soaks in, it’s time to reseal.
Final Thoughts
Mold on shower tile is mostly a grout problem. Once you clean the mold and seal the grout, the problem typically stays gone — as long as you maintain ventilation and keep surfaces dry after showering.
Don’t forget to check the other common mold spots in your bathroom: the shower floor, bathtub, window sill, and shower head. Mold in one spot usually means conditions are right for mold everywhere.
How to remove mold from shower floor
Mold on your shower floor is one of the most common bathroom problems — and one of the most stubborn. The shower floor stays wet longer than any other surface in your bathroom, and water pools in grout lines, corners, and around the drain where mold thrives.
If your shower floor looks dark, slimy, or discolored — especially in the grout or around the drain — you’re almost certainly dealing with mold. Here’s how to remove it safely and stop it from coming back.
Why Mold Grows on Shower Floors
Your shower floor has three things mold loves: constant moisture, warmth, and organic material (soap scum, body oils, dead skin cells). Water pools on the floor after every shower, and unless you actively dry it, mold can begin growing within 24–48 hours.
The most vulnerable spots are grout lines (which are porous and absorb moisture), the caulk seal where the floor meets the wall or tub, corners where water pools, and around the drain.
If mold is also appearing on your shower tile and walls, shower head, or bathroom ceiling, that points to a ventilation problem affecting your entire bathroom.
What You’ll Need
- White distilled vinegar or hydrogen peroxide (3%)
- Baking soda
- Stiff-bristle grout brush or old toothbrush
- Spray bottle
- Rubber gloves
- Dedicated mold removal spray (for stubborn or black mold)
Click Here for Our Favorite Mold Remover
How to Remove Mold from a Shower Floor (Step by Step)
Method 1: Baking Soda + Vinegar (Best for Grout Lines)
Step 1: Sprinkle baking soda generously over the moldy areas, focusing on grout lines and corners.
Step 2: Spray undiluted white vinegar over the baking soda. It will fizz — that reaction helps lift mold out of porous surfaces like grout.
Step 3: Let the mixture sit for 15–20 minutes.
Step 4: Scrub with a stiff grout brush, working along the grout lines. For corners and around the drain, use an old toothbrush to get into tight spots.
Step 5: Rinse thoroughly with hot water and check your results. Repeat if staining remains.
Method 2: Hydrogen Peroxide (Best for Tile Surfaces)
Hydrogen peroxide is a natural antifungal that works well on tile without damaging the finish.
Step 1: Pour 3% hydrogen peroxide into a spray bottle (no dilution needed).
Step 2: Spray generously over all moldy areas on the shower floor.
Step 3: Let it sit for 10–15 minutes. You may see some fizzing — that’s the peroxide killing the mold.
Step 4: Scrub with a grout brush and rinse with warm water.
Method 3: Dedicated Mold Remover (Best for Black Mold or Deep Stains)
When natural methods aren’t cutting it — especially with black mold that’s penetrated deep into grout — a dedicated mold removal product gets the job done faster.
Step 1: Ventilate the bathroom (open a window or turn on the exhaust fan).
Step 2: Apply the mold remover directly to the affected areas per the product instructions.
Step 3: Let it dwell for the recommended time (usually 5–15 minutes).
Step 4: Scrub and rinse thoroughly.
Important: Never mix bleach with vinegar, hydrogen peroxide, or ammonia-based cleaners. This creates toxic fumes.
Removing Mold Around the Shower Drain
The drain area deserves special attention because it stays wet the longest and traps organic debris that feeds mold.
Remove the drain cover and clean underneath it — this is where mold often hides unseen. Scrub the cover and the visible drain channel with a toothbrush dipped in vinegar or mold remover. If your drain is slow, clear the clog first — standing water after showers dramatically accelerates mold growth.
Dealing with Moldy Caulk on the Shower Floor
If the caulk along the base of your shower (where the floor meets the walls or tub) is black or discolored, cleaning alone won’t fix it. Mold grows inside silicone and latex caulk, not just on the surface.
The fix: remove the old caulk completely with a caulk removal tool, clean the area with mold remover, let it dry fully, and re-caulk with a mold-resistant silicone caulk. This is one of the most effective things you can do to prevent recurring mold on shower floors.
How to Keep Mold Off Your Shower Floor
Removing mold is the easy part. Preventing it from returning requires addressing the moisture:
Squeegee or towel-dry after every shower. This removes the standing water mold needs. A 30-second squeegee habit prevents 90% of shower floor mold.
Run your exhaust fan for 20–30 minutes after showering. This pulls humid air out of the bathroom. If your fan isn’t strong enough to hold a piece of tissue paper against the vent, it needs replacing or cleaning.
Spray vinegar weekly. A quick spray of undiluted vinegar on the shower floor after your last shower of the week keeps mold spores from establishing.
Use a dehumidifier. If your bathroom stays foggy long after showering, a dehumidifier helps bring humidity below the 50% threshold.
Seal your grout. Unsealed grout absorbs water and gives mold a place to root. Apply a grout sealer once a year to protect it.
Fix slow drains immediately. A drain that doesn’t clear water within a few seconds of shutting off the shower means standing water — and standing water means mold.
When to Call a Professional
Most shower floor mold is a straightforward DIY fix. However, call a mold remediation professional if:
- Mold returns within a week or two of thorough cleaning
- You notice a musty smell even after cleaning all visible mold
- Tiles are loose, cracked, or the subfloor feels soft — this suggests water is getting under the tile and mold may be growing beneath the shower pan
- Mold is spreading to multiple areas of your bathroom (ceiling, walls, window sill)
Hidden mold beneath shower floors is a common source of persistent musty smells. Here’s what mold remediation typically costs — early action always saves money.
Frequently Asked Questions
Q: Why does my shower floor get moldy so fast?
A: Shower floors stay wet the longest of any bathroom surface and collect soap scum, body oils, and dead skin cells — all of which feed mold. Without proper drainage, ventilation, and routine drying, mold can return within days. Porous grout makes the problem worse because it absorbs and holds moisture.
Q: Is black mold on a shower floor dangerous?
A: Any mold in your living space can trigger health issues including allergic reactions, respiratory irritation, and headaches. While true Stachybotrys (toxic black mold) is less common on tile, other dark molds found on shower floors still produce allergens and irritants. Clean it regardless of the species.
Q: Can I use bleach on my shower floor?
A: Bleach kills surface mold effectively on non-porous tile, but it doesn’t penetrate porous grout well — the mold roots survive and regrow. Vinegar or hydrogen peroxide often work better for grout. If you do use bleach, dilute it (1 part bleach to 10 parts water), ventilate the room, and never mix it with other cleaners.
Q: How do I remove mold stains from white grout?
A: Make a thick paste of baking soda and hydrogen peroxide, apply it to the grout lines, and let it sit for 30 minutes before scrubbing. For deep stains, apply a dedicated mold remover and let it dwell per the product instructions. If staining persists after multiple cleanings, the grout may need to be professionally cleaned or replaced.
Q: Should I regrout my shower floor if mold keeps coming back?
A: If mold persistently returns despite regular cleaning and the grout is crumbling, cracked, or permanently discolored, regrouting is a smart investment. When you regrout, use a mold-resistant grout and seal it once it cures. This gives mold far less opportunity to take hold.
Final Thoughts
Mold on a shower floor is common, fixable, and preventable. The key is addressing both the mold itself and the moisture that feeds it. A quick daily squeegee, proper ventilation, and a monthly vinegar treatment keep most shower floors mold-free permanently.
If mold is showing up beyond just the floor — on your shower tiles, shower head, or bathroom walls — that’s a sign of a ventilation issue worth fixing before it leads to bigger problems.
How to remove mold from shower head
That black or pinkish buildup around your shower head isn’t just hard water — it’s likely mold. Shower heads are one of the most overlooked spots for mold growth because they stay warm and wet constantly, and most people never think to clean inside or behind them.
Left alone, a moldy shower head sprays mold spores directly into the air you breathe every time you shower. If you’ve been dealing with unexplained allergies, headaches, or respiratory irritation, your shower head could be the culprit. (Here are the 10 warning signs of mold toxicity to watch for.)
The good news: cleaning mold from a shower head is a quick job. Here’s how to do it right — and keep it from coming back.
Why Mold Grows on Shower Heads
Shower heads create a perfect environment for mold. Warm water flows through them daily, moisture clings to every surface, and the small crevices around the nozzle and faceplate rarely dry out completely. Mold can start growing within 24–48 hours in these conditions.
The most common types you’ll see on shower heads are black mold (often Aspergillus or Cladosporium) and pink mold (which is actually a bacteria called Serratia marcescens). Both thrive in humid bathrooms — especially if ventilation is poor.
If you’re seeing mold on your shower head, chances are it’s also developing on nearby surfaces. Check your shower walls and enclosure, shower tile and grout, and shower floor as well.
What You’ll Need
You probably already have most of these at home:
- White distilled vinegar
- Baking soda
- A plastic bag (gallon-sized zip-lock works well)
- Rubber band or zip tie
- Old toothbrush or small scrub brush
- Rubber gloves
- A dedicated mold removal spray (for stubborn buildup)
Click Here for Our Favorite Mold Remover
How to Remove Mold from a Shower Head (Step by Step)
Method 1: Vinegar Soak (Best for Light to Moderate Mold)
This is the easiest approach and works well for most situations.
Step 1: Fill a plastic bag with undiluted white vinegar — enough to fully submerge the shower head faceplate.
Step 2: Pull the bag up around the shower head so the faceplate is completely submerged in vinegar. Secure the bag with a rubber band or zip tie around the shower arm.
Step 3: Let it soak for at least 2–4 hours. For heavy buildup, leave it overnight.
Step 4: Remove the bag and scrub the nozzle holes and faceplate with an old toothbrush. Pay attention to the edges and crevices where mold hides.
Step 5: Run the shower on hot for 2–3 minutes to flush out loosened deposits.
Method 2: Remove and Deep Clean (Best for Heavy Mold)
If the vinegar soak doesn’t get it all — or if you can see mold behind the faceplate — remove the shower head for a thorough cleaning.
Step 1: Unscrew the shower head from the arm (turn counterclockwise). Use a cloth between the wrench and the fitting to avoid scratching the finish.
Step 2: Disassemble any removable parts — the faceplate, filter screen, and flow restrictor.
Step 3: Soak all parts in a bowl of equal parts white vinegar and warm water for 1–2 hours.
Step 4: Make a paste with baking soda and a few drops of water. Apply it to any remaining mold spots and scrub with a toothbrush.
Step 5: For stubborn black mold, apply a dedicated mold removal spray, let it sit for 10 minutes, and scrub again.
Step 6: Rinse all parts thoroughly, reassemble, and reattach. Wrap the threads with fresh plumber’s tape before screwing it back on.
What About Black Mold on a Shower Head?
True black mold (Stachybotrys chartarum) is less common on shower heads because it prefers porous materials like drywall and wood. However, other dark-colored molds like Cladosporium and Aspergillus niger are very common in showers and look nearly identical.
Regardless of the species, the cleaning methods above work on all of them. If you’re seeing black mold spreading beyond the shower head to your bathroom ceiling or walls, that suggests a larger moisture problem that may need professional mold remediation.
How to Prevent Mold from Coming Back
Cleaning mold off a shower head is straightforward — keeping it gone requires a few habit changes:
Improve ventilation. Run your bathroom exhaust fan during every shower and for at least 20–30 minutes afterward. If you don’t have an exhaust fan, crack a window. Poor ventilation is the number one reason bathroom mold keeps returning.
Dry the shower head after use. A quick wipe-down with a towel removes the moisture mold needs to grow. This takes 10 seconds and makes a significant difference.
Vinegar spray monthly. Keep a spray bottle of undiluted white vinegar in the bathroom. Spray the shower head (and tile and grout) once a month as a preventive treatment.
Run a dehumidifier. If your bathroom stays humid despite ventilation, a good dehumidifier keeps humidity below the 50% threshold where mold struggles to grow.
Replace old shower heads. If your shower head is heavily corroded or the mold keeps returning no matter what you do, replacement is often the smarter move. Mineral buildup inside old shower heads creates a surface mold loves to grip onto.
When to Call a Professional
A moldy shower head is almost always a DIY fix. But call a professional if you notice mold spreading across your bathroom ceiling, behind tiles, or into the wall cavity behind the shower. These situations suggest hidden moisture damage that surface cleaning won’t solve.
If you’re unsure about the extent of the problem, here’s what professional mold remediation typically costs — catching it early always saves money.
Frequently Asked Questions
Q: Can a moldy shower head make you sick?
A: Yes. Every time you run a moldy shower head, it aerosolizes mold spores into the steam you breathe. This can trigger allergic reactions, sinus congestion, headaches, and respiratory irritation — especially in people with asthma or weakened immune systems. Learn more about the warning signs of mold toxicity.
Q: Is the pink stuff on my shower head mold?
A: Technically, no — pink buildup is usually Serratia marcescens, a bacteria, not a true mold. However, it thrives in the same conditions and should be cleaned the same way. If you see pink, you likely have mold growing nearby too.
Q: How often should I clean my shower head to prevent mold?
A: A vinegar soak once a month is ideal. At minimum, do it every 2–3 months. If your bathroom has poor ventilation or you notice mold returning quickly, increase the frequency and address the ventilation issue.
Q: Can I use bleach instead of vinegar on a shower head?
A: You can, but vinegar is usually better for shower heads. Bleach can damage certain finishes (especially brushed nickel or oil-rubbed bronze) and doesn’t dissolve mineral buildup the way vinegar does. For most shower head mold, vinegar is more effective and safer for the fixture.
Q: Should I replace my shower head if it keeps getting moldy?
A: If mold returns within a week or two despite regular cleaning, the shower head likely has internal buildup that can’t be reached. At that point, replacing it is more practical (and often cheaper) than fighting a losing battle.
Final Thoughts
Mold on a shower head is common, easy to fix, and preventable with basic maintenance. A vinegar soak every few weeks keeps the problem from coming back, and improving bathroom ventilation solves the root cause.
If mold is appearing in multiple spots around your bathroom — your shower floor, bathtub, window sill, or ceiling — that’s a sign of a bigger ventilation or moisture issue that’s worth addressing before it gets worse.
Why Your Septic Tank Smells When It Rains (and What to Do About It)
Have you ever stepped outside after a rainstorm and caught a whiff of sewage in your yard? If you have a septic system, you’re not alone. While a slight odor after a heavy downpour can be normal, a strong or recurring smell is often a warning sign that your septic system isn’t working as it should.
In this guide, we’ll break down why septic tanks sometimes smell worse when it rains, the risks you should know about, and the practical steps you can take to fix the problem before it gets expensive.

Understanding Septic Odors After Rain
A septic system is designed to handle and treat household wastewater safely. Waste flows into the septic tank, where solids settle and bacteria break down organic material. The liquid effluent then drains into the soil through the leach field, where it is naturally filtered.
When it rains heavily, that natural filtering process can get disrupted:
- Soil saturation slows or stops wastewater absorption.
- Gases (like hydrogen sulfide, methane, and ammonia) can get trapped and pushed upward.
- Standing water around the tank or drain field can carry odors into the open air.
The U.S. Environmental Protection Agency (EPA) has noted that up to 20–30% of septic systems experience some level of failure during their lifetime, often due to poor drainage or overload. Rain can highlight those weak spots quickly.
Common Causes of Septic Smells During Rain
- Saturated Drain Field
After prolonged or heavy rain, the soil around your drain field can become waterlogged. When wastewater can’t soak into the ground, gases rise instead, causing foul odors. - Blocked or Short Vent Pipes
Septic systems rely on vent pipes (usually on the roof) to release gases safely above your home. Rain, wind, or debris can push those odors back down—or worse, a clogged vent may force gases out at ground level. - Standing Water Near the Tank or Field
If rain collects around the septic tank lid or in the drain field, odors can escape more easily, especially if there are small leaks or cracks. - System Overload
Using a lot of water in your home during heavy rain (like laundry or long showers) can overwhelm the tank when the drain field is already saturated. - Early Signs of System Failure
Frequent odors after rain, paired with slow drains or soggy patches in the yard, may mean the drain field is no longer filtering properly—a serious warning sign.

FAQs Homeowners Ask
Why does my yard smell like sewage after rain?
Heavy rain can saturate the drain field, pushing septic gases to the surface instead of filtering them into the soil.
Is it normal for my septic tank to smell after a storm?
A faint odor after a major storm can happen, but strong or repeated smells aren’t normal and need attention.
Could rain make my septic tank overflow?
Yes. If the soil is already full of water, the septic tank and drain field can back up. This pressure may force odors—or even wastewater—upward.
Why do I smell it inside my house when it rains?
If your roof vent pipe is clogged or too short, gases may get pushed back inside instead of venting outdoors.
How do I know if it’s just rain or a bigger problem?
If the odor is accompanied by slow drains, gurgling toilets, or wet spots in the yard, it’s likely more than just a rain issue.
Solutions Homeowners Can Try
1. Improve Drainage Around the Septic System
- Redirect gutters and downspouts away from the tank and drain field.
- Regrade the soil so water flows downhill, not into the septic area.
- Consider adding French drains to carry runoff elsewhere.
2. Check and Maintain Vent Pipes
- Clear debris or nests blocking your roof vent.
- Add a charcoal vent filter to trap odors without blocking airflow.
- Extend the pipe higher if rain and wind push odors back down.
3. Reduce Water Use During Storms
- Postpone heavy water use (laundry, dishwashing) until the ground dries out.
- Fix leaky toilets and faucets that add strain to the system.
- Space out showers and chores during rainy weeks.
4. Keep the Tank Healthy
- Pump the septic tank on schedule (every 3–5 years for most households).
- Avoid pouring grease, chemicals, or bleach down drains.
- Use septic-safe treatments to support healthy bacteria and reduce sludge.
5. Inspect the Drain Field
- Walk the area after storms: look for soggy spots, pooling water, or lush grass over the field.
- Never drive or park heavy equipment over the drain field (it compacts the soil).
- If the field is decades old or shows consistent problems, it may need professional rehab or replacement.
When to Call a Professional
If you notice any of the following, it’s time to call a licensed septic professional:
- Persistent or worsening odors, rain or shine.
- Sewage odors inside your home.
- Standing water or surfacing wastewater near the tank or drain field.
- Drains and toilets running slow, gurgling, or backing up.
Catching a failing system early can save thousands of dollars and protect your property’s safety.
Preventing Future Problems
- Stick to a regular pumping schedule.
- Keep landscaping, irrigation, and runoff away from the drain field.
- Don’t flush non-biodegradable items, grease, or harsh chemicals.
- Maintain roof vent pipes and replace worn tank covers.
Conclusion
Septic smells after rain are more than just an annoyance—they’re your system’s way of telling you something is off. While occasional mild odors may not be serious, strong or persistent smells are a red flag.
By improving drainage, checking vents, managing water use, and keeping your tank maintained, you can often stop the smells and keep your septic system running smoothly. And if odors persist, don’t wait: call a septic pro to prevent a small issue from becoming a big, expensive problem.
Water Damage Mitigation
When it comes to water damage in Meridian, you need the best in the business, and lucky for you, there are some fantastic water restoration companies in your area.
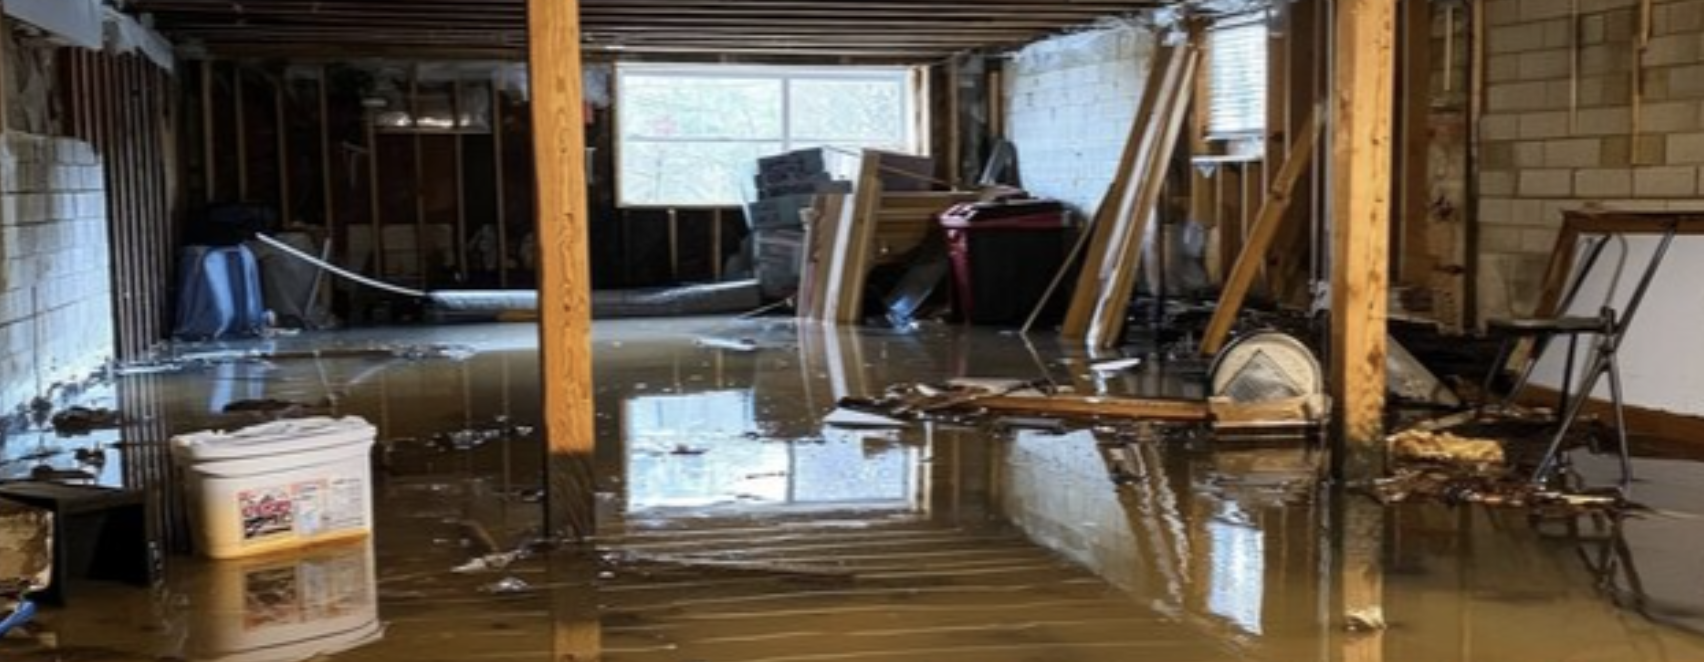
These pros know the ins and outs of water damage like the back of their hand. They’ve got the experience, the gear, and the skills to handle any water disaster, big or small. Whether it’s a burst pipe, a flooded basement, or some other watery nightmare, they’ve got you covered.
And you know what’s even better? They move fast! Time is of the essence when it comes to water damage. They’ll be on the scene pronto, tackling that water and preventing further damage like the superheroes they are.
Water Damage Meridian ID
Water damage restoration is an absolute game-changer when dealing with those pesky water issues. If you’re facing a watery nightmare, don’t fret! I’ve got the inside scoop on how the pros handle it.
Picture this: your place is hit by water damage, and you’re scratching your head, unsure where to begin. That’s when water damage restoration swoops in like a superhero! We’re talking about the whole package here – water remediation, removal, extraction, mitigation, and even flood cleanup.
You might think you can handle it, but water damage is a different beast. It’s like trying to tame a wild lion with a feather duster! DIY won’t cut it, pal. Let the experts with their super cool gear handle the mess.
Oh, and speaking of gear, these guys have some high-tech, severe toys! We’re talking about fancy dehumidifiers, powerful air movers, and all that jazz. You won’t find those babies in your regular toolbox, that’s for sure.
And hey, remember, water damage isn’t just about a little wet carpet. It can mess with your home’s foundation and structure, and that’s serious business. You don’t want to mess around with that stuff. Let the pros assess and fix it properly.
But here’s a pro tip: before they swoop in, take some snaps of the damage. Photos and videos, my friend! It’s like your golden ticket for dealing with the insurance folks. They’ll appreciate the evidence, trust me.
One more thing: drying is more complex than waving a towel around. It’s like a science experiment with all the right calculations and equipment. You want to avoid mold growth like the plague; these experts know how to do it right.
10 Essential Things You Should Know About Water Damage Restoration in Meridian ID
Please don’t take chances with your home; call in the experts and let them work their magic!
Gather ’round because I’m about to drop some wisdom bombs about water damage restoration that you need to know! So listen up and take notes:
- Speed is the Name of the Game: When it comes to water damage, time is your enemy. Act fast! The longer water sits, the more damage it does. So don’t procrastinate; call in the pros ASAP!
- DIY Dilemmas: I know you’re handy, but water damage is a beast. Don’t try to tackle it alone; you’ll likely make things worse. Please leave it to the pros who know the ins and outs.
- Hidden Dangers Lurk: Water can sneak into the tiniest cracks, causing hidden damage. Pros have the eye to spot those sneaky spots and deal with them before they turn into big issues.
- Contamination Can Be Nasty: If floodwater invades your home, it’s not just water you’re dealing with – it’s contaminated water. Yuck! Trust me, you want experts to handle that mess.
- Mold is a Nightmare: Water damage and mold go hand in hand. Mold can grow in as little as 24 hours after water intrusion. Not only that, but it can make you sick! The pros know how to stop it in its tracks and prevent a mold nightmare.
- Insurance Matters: Don’t worry about navigating the insurance maze alone. The experts have dealt with insurance companies countless times and can help you get the coverage you deserve.
- Advanced Tech is a Must: Those pros have high-tech gadgets that make water damage disappear faster than Houdini. You won’t find those tools in your toolbox!
- Restoration is an Art: It’s not just about cleaning up water; it’s about restoring your home to its former glory. The pros are artists when bringing your place back to life.
- Cost-Effective in the Long Run: Yeah, hiring pros may seem like an expense, but trust me, it’s an investment. Their expertise saves you from costly repairs down the road.
- Peace of Mind: When the pros take over, you can finally breathe easy. They handle the entire process, and you get the peace of mind of knowing your home is in good hands.
Water Restoration Process Meridian ID
Now, take your time with the terms; they’re just different names for the same superhero service. The key is understanding what they do and how they save the day.
First off, water damage restoration means a complete water cleanup from start to finish. The pros care for everything, from removing the water and drying up your belongings to putting everything back in its rightful place.
Water removal is like magic; it banishes water from your space with specialized gear like truck mounts, top-notch dehumidifiers, and powerful air movers. They make that water disappear faster than a magician’s trick!
Water extraction? It’s the same trick, my friend! Sometimes, they use that term when dealing with water that is invaded from outside. And boy, they know how to handle that situation like nobody’s business.
Now, water mitigation – this one is crucial. It’s all about preventing and reversing damage caused by water. Think of it as the ultimate solution to save your precious property from destruction.
And when the going gets tough and floodwater barges in, you’ve got flood cleanup to the rescue! When it comes to that contaminated water invading your space, leave it to the experts. They’ll sanitize, dry, and make your place shine again!
So, let me level with you – water damage is no joke. You might be tempted to DIY, but trust me, the pros shine here! They’ve got the knowledge, the tools, and the skills to handle any water disaster like pros.
Wrapping Up Water Damage Meridian ID
Don’t waste another minute. Make the call, get that professional opinion, and let the water damage restoration heroes save the day! You’ll thank me later when you see your place restored to its former glory. So pick up that phone and make the smart move – you won’t regret it.
How to Handle Water-Damaged Wood in Your Home or Business
When water meets wood, the results can be messy—and sometimes downright dangerous. Water can wreak havoc on wood in homes and commercial buildings, whether it’s a leaky pipe, a heavy rainstorm, or a burst appliance. But don’t panic! You can tackle water damage and protect your property from further harm with the right steps.
Why Wood is So Vulnerable to Water
Wood is like a sponge—it absorbs water easily. This is fine in small amounts, but when too much water gets into the fibers, swelling, warping, and even rot can set in. Over time, the damage can weaken the structure, leading to costly repairs or safety risks.
Water damage also creates a perfect environment for different types of mold, which can lead to health issues and unpleasant odors.
Spotting the Signs of Water Damage
Think your wood might be water-damaged? Here’s what to look for:
- Discoloration: Dark spots, streaks, or stains.
- Warping or Buckling: Floors or panels that are uneven or pulling away.
- Soft Spots: Wood that feels spongy or crumbles under pressure.
- Odors: A damp, musty smell, even after cleaning.
If you notice these issues, it’s time to act quickly to prevent further damage.
Stop the Water at Its Source
Before anything else, find out where the water is coming from and stop it. Here are some common culprits:
- A leaky roof
- Burst or damaged plumbing
- Overflowing gutters
- Poor drainage around the foundation
Fix the source of the problem right away. For leaks, shut off the water supply if needed, and for roof issues, cover the area with a tarp to stop more water from getting in.
Dry Out the Area
Drying is the most important first step. Water left to sit will cause more damage faster than you think.
- Ventilation: Open windows and doors to let in fresh air.
- Use Fans and Dehumidifiers: Increase airflow and reduce humidity in the room.
- Consider Professional Equipment: Rent or purchase industrial drying equipment for larger areas.
The sooner you dry out the wood, the better your chances of saving it.
How to Handle Mold
If water sits for a while, mold may already grow. Mold is not just a cosmetic problem—it’s a health hazard.
- Clean It Up: Use a solution of one cup of bleach to a gallon of water or a specialized mold cleaner.
- Wear Protection: Gloves, goggles, and a mask will keep you safe from spores.
- Call in the Pros: For severe mold issues, hire a mold remediation specialist to tackle the problem thoroughly.
Repairing or Replacing Damaged Wood
It’s time to assess the damage when the wood has dried out.
- For Minor Issues:
- Sand the surface and refinish it with a protective sealant.
- Use wood fillers or epoxy to fix small cracks or dents.
- For Serious Damage:
- Replace sections of rotted wood with pressure-treated lumber.
- Consult a structural engineer or contractor for compromised load-bearing elements.
Act quickly—letting damage linger can weaken the structural integrity of your property.
Long-Term Prevention is Your Best Defense
Once you’ve fixed the problem, don’t stop there. Take measures to prevent future water damage.
- Inspect Regularly: Check your roof, gutters, pipes, and appliances for leaks or wear and tear.
- Control Moisture Levels: Use dehumidifiers in damp spaces like basements or commercial kitchens.
- Seal and Protect: Apply waterproof sealants to wood exposed to the elements.
- Install Water Alarms: Leak detectors can alert you to problems early.
Common Questions About Water-Damaged Wood
Can I just let the wood dry naturally?
It’s not a good idea. Wood needs active drying to prevent mold and further damage. Letting it dry naturally can take too long, causing more harm.
What if there’s no visible mold?
Mold can hide inside walls, under floors, or in other hard-to-reach places. If water damage has been ongoing, it’s worth checking for hidden mold.
Do I need a professional for every repair?
Not necessarily. Small, surface-level damage can often be repaired with DIY methods, but calling a professional is the safest option for structural or extensive issues.
The Bottom Line
Water-damaged wood doesn’t have to mean disaster. By acting quickly, drying the wood thoroughly, and addressing the root cause, you can save your property and avoid bigger issues.
If you’re unsure how to tackle the damage—or if you suspect structural problems—don’t hesitate to call the experts. They’ll help you get things back to normal quickly and safely.
How to Prevent and Remove Mold from Pillows: A Complete Guide
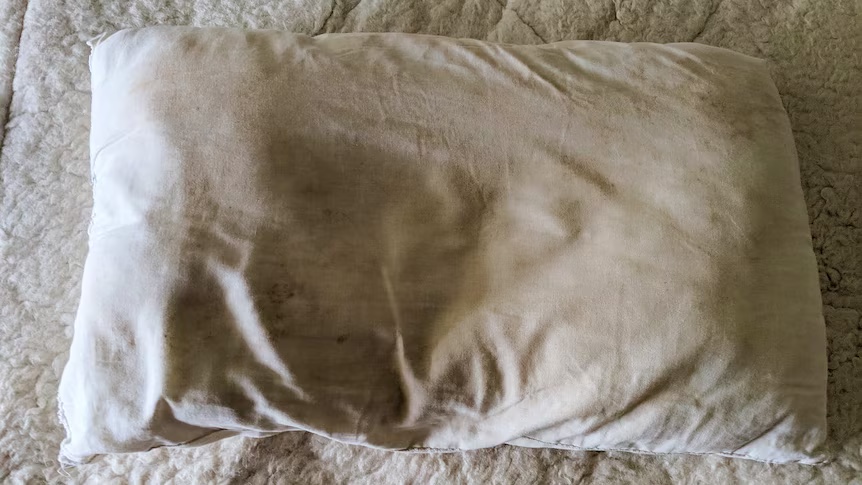
Mold on pillows is not just an unpleasant sight—it can be a serious health hazard. Mold spores trigger allergies, respiratory issues, and even affect your sleep quality. If you’ve noticed signs of mold on your pillows or want to prevent it altogether, this guide will walk you through everything you need to know, including effective cleaning methods and why certain materials, like silk pillowcases, are better for mold prevention.
Why Does Mold Grow on Pillows?
Mold thrives in warm, moist environments, and pillows are a prime target. Sweat, drool, and humidity create the perfect conditions for mold to grow, especially if pillows or pillowcases aren’t cleaned or dried properly. Poor ventilation in the bedroom or high humidity levels can make the problem worse.
Pillows and Pillowcases Prone to Mold
Types of Pillows Prone to Mold
Memory Foam Pillows
- Memory foam is dense, making it prone to trapping moisture. If exposed to spills or high humidity, it can quickly end up as a breeding ground for mold.
Feather and Down Pillows
- Natural materials like feathers and down can absorb moisture, especially sweat and humidity, over time.
Cotton Pillows
- Cotton pillows are breathable, but they can still trap moisture if not dried thoroughly after washing.
Types of Pillowcases
Non-Breathable Fabrics
- Synthetic materials like polyester don’t allow for good airflow, trapping moisture and heat.
Thick or Heavy Fabrics
- Fabrics that retain heat and moisture can encourage mold growth.
Dirty or Damp Pillowcases
- Sweat, skin cells, and moisture left on pillowcases create the ideal space for mold to thrive.
The Benefits of Silk Pillowcases
Naturally Resistant to Mold
Silk pillowcases have hypoallergenic properties that naturally resist mold, mildew, and dust mites. Unlike cotton, silk absorbs much less moisture, which helps keep the pillowcase dry and mold-free.
Breathable and Temperature-Regulating
Silk allows for excellent airflow, minimizing moisture retention. It also regulates temperature, keeping you cool in the summer and warm in the winter. This prevents excessive sweating, which can lead to mold buildup.
Easier Maintenance
Silk pillowcases require less frequent washing than other materials due to their natural resistance to allergens and mold. However, regular cleaning is still essential for hygiene.
How to Remove Mold from Pillows
Natural Cleaning Methods
- White Vinegar Solution
- Mix equal parts white vinegar and distilled water in a spray bottle.
- Spray the moldy areas and let sit for 15 minutes.
- Scrub gently, rinse, and air dry in sunlight.
- Lemon and Salt Paste
- Mix fresh lemon juice with salt to form a paste.
- Apply to moldy spots, let it sit, and rinse thoroughly.
- Sunlight
- Place pillows in direct sunlight for several hours. UV rays naturally kill mold spores and help dry out the fabric.
Machine Washing Techniques
- Hot Water and Vinegar
- Use the hottest water cycle allowed by the pillow’s care label.
- Add detergent and a cup of vinegar for mold removal.
- Bleach Treatment
- For severe cases, add ½ cup of bleach to the wash (if the pillow material allows).
- Rinse thoroughly and ensure the pillow is completely dry.
Tips to Prevent Mold on Pillows
Choose the Right Materials
- Opt for pillows made from moisture-resistant materials like hypoallergenic or bamboo-derived options.
- Use silk pillowcases to reduce mold risk and promote airflow.
Keep Pillows Clean
- Wash pillowcases weekly and pillows every 3–6 months.
- Use protective covers to prevent moisture and sweat from seeping into the pillow.
Control the Environment
- Keep humidity below 50% using a dehumidifier if necessary.
- Ensure good ventilation in your bedroom to prevent moisture buildup.
- Regularly air out your pillows in direct sunlight.
When to Replace Pillows
If mold growth is extensive or odors persist even after cleaning, it’s time to replace your pillows. Pillows should also be replaced every 2–3 years to ensure hygiene and comfort.
Why Is My Carpet Always Wet? A Step-by-Step Guide to Identifying the Source of Moisture
Stepping onto a damp carpet isn’t just uncomfortable; it’s a warning sign that moisture is lurking where it shouldn’t be. Persistent wetness can lead to mold, musty odors, and even structural damage if left unresolved. The good news is, finding the source of the problem is often easier than it might seem.
Below, you’ll find practical tips and checks to help you identify why your carpet keeps getting wet and how to address the issue before it gets worse.
Start with a Basic Inspection
- Check Common Sources: Look around bathrooms, kitchens, and laundry areas for leaks. Peer under sinks, around toilets, and near washing machines or dishwashers.
- Examine Doors and Windows: Ensure weatherstripping is in good shape and look for water stains or discoloration around frames.
Narrow Down the Source
- Spot vs. Spread: Is the wet spot confined to a small area or widespread? A single patch might indicate a minor leak, while larger areas could mean humidity issues or more significant plumbing problems.
- Nearby Plumbing Fixtures: Think about what’s behind the wall with the wet carpet. Is there a bathroom or kitchen close by? Any dripping pipe or loose connection might be to blame.
Check Structural and Exterior Factors
- Inspect the Roof and Attic: Missing shingles, cracked flashing, or clogged gutters can let rainwater seep in. Over time, this can travel down walls and eventually soak into carpets below.
- Look at the Foundation: In basements or ground-level rooms, water may be entering through foundation cracks. If there’s a sump pump, verify it’s working correctly to handle excess water.
Consider HVAC and Indoor Climate Issues
- HVAC Maintenance: A clogged AC condensate drain or a malfunctioning humidifier can lead to constant dampness. Regular maintenance helps keep these systems dry.
- Monitor Humidity: High indoor humidity above 60% can make carpets feel persistently moist. Use a hygrometer, improve ventilation, or run a dehumidifier to keep moisture levels in check.
Testing for Hidden Leaks
- Shut Off the Water Main: If you suspect a plumbing issue, turning off your home’s main water supply briefly can help. If the dampness stops spreading, you’ve likely found your culprit.
- Consider Professional Tools: Moisture meters, infrared cameras, and professional inspections can pinpoint hidden leaks behind walls or under floors.
Know When to Call a Professional
- Plumbers and Restoration Experts: If basic checks don’t explain the dampness—or if you find mold or significant damage—reach out for professional help.
- Home Inspectors: A certified inspector can provide a comprehensive evaluation, ensuring you’re not missing any underlying issues.
Conclusion
A continually wet carpet is your home’s way of telling you something’s off. By checking common leak sources, inspecting structural elements, and monitoring indoor conditions, you can typically identify and fix the root cause.
Don’t wait—address the issue now to protect your home from further damage. If you’ve tried the steps above and still have questions, consider seeking professional advice. And if you found this guide useful, feel free to share it with friends or subscribe to our newsletter for more home maintenance tips.
Signs of Septic System Failure and What It Means for Your Basement
Septic systems are out of sight and often out of mind—until something goes wrong. A failing septic system isn’t just a plumbing issue; it can lead to severe water damage, particularly in basements and crawl spaces. Recognizing the early warning signs can save you from costly repairs and health hazards.
Warning Signs Your Septic System Might Be in Trouble
Your septic system doesn’t fail without warning. These signs are your first clue that something’s wrong:
- Pooling Water in Your Yard
- Have you noticed unexplained wet spots or standing water near your septic tank or drain field, even when it hasn’t rained? This could indicate that the system is overloaded or clogged.
- Unpleasant Odors Indoors or Outdoors
- Another red flag is foul smells coming from your drains, toilets, or outside near the septic tank. These odors occur when the system isn’t processing waste effectively, allowing gas to build up.
- Slow or Backed-Up Drains
- If your sinks, showers, or toilets drain slower than usual or back up entirely, it’s likely a sign of a blockage or excessive buildup of solids in your septic system.
- Lush, Spongy Grass in Unusual Places
- If the grass around your septic area looks greener and thicker than the rest of your yard, sewage might leak into the soil, fertilizing it unnaturally.
How Septic Failures Impact Your Basement and Crawl Space
When your septic system fails, the consequences often extend below ground level, directly affecting your basement and crawl space.
- Sewage Backups Through Basement Drains
- A failing septic system can force raw sewage to back up through floor drains in your basement, leading to unpleasant and dangerous flooding.
- Contaminated Water Damage
- When wastewater enters your home, it carries harmful bacteria, viruses, and mold spores. This contamination can pose significant health risks and requires professional cleanup.
- Structural Damage
- Persistent moisture from septic backups can weaken walls and floors in your basement, causing long-term structural issues that are expensive to repair.
- Mold and Mildew in Crawl Spaces
- Moisture from a failing septic system creates the perfect conditions for mold growth. Mold can spread rapidly, damaging your home further and impacting air quality.
Steps to Prevent Basement Water Damage from Septic Issues
- Routine Septic Maintenance
- Regularly pumping your septic tank and scheduling professional inspections are crucial steps to keep the system running smoothly. It’s also wise to spread out water usage during the day to prevent overwhelming the system.
- Use Septic-Friendly Maintenance Products
- Adding septic maintenance products can help reduce solids and improve waste breakdown. These treatments keep your system functioning efficiently and reduce the risk of backups.
- Keep an Eye on Landscaping
- To prevent root intrusion, avoid planting trees near the septic tank or the drain field. Also, heavy objects like vehicles should be kept off the area to protect the system from damage.
What to Do If Your Basement Shows Signs of Septic Problems
If you suspect septic system failure is causing water damage, quick action is essential:
- Stop Water Usage Immediately
- Reduce water use in your home to minimize additional strain on the system.
- Call a Professional
- Contact a septic service provider to diagnose and fix the problem immediately.
- Begin Water Damage Cleanup
- Contact a water damage remediation company to remove contaminated water, sanitize the space, and repair any structural issues.
Prevention Is Key to Keeping Your Basement Safe
Your septic system is critical in protecting your home from water damage. Recognizing early signs of failure and taking proactive measures—like regular maintenance and septic-safe treatments—can save you from costly repairs and serious health hazards.