admin
How Septic System Maintenance Can Protect Your Home from Water Damage
Most homeowners don’t think about their septic system until something goes wrong, but a neglected septic system can lead to one of the most costly and stressful home repairs: water damage. A properly maintained septic system is essential to prevent sewage backups and protect your home’s foundation, floors, and walls from water-related issues.
How Septic Problems Lead to Water Damage
When a septic system isn’t maintained, problems can quickly arise. Over time, solids build up in the tank, and without regular pumping, they can clog the system. This often results in overflows that flood your yard or cause sewage backups inside your home.
These backups can lead to:
- Contaminated water seeping into basements or living spaces.
- Structural damage to floors, walls, and foundations.
- Mold and mildew growth are creating additional health and repair concerns.
Ignoring septic maintenance doesn’t just risk your plumbing—it puts your entire home at stake.
Why Regular Maintenance Is Your Best Defense
Routine care for your septic system is the easiest way to avoid clogs, overflows, and water damage. Maintaining the system involves several steps:
- Regular Pumping: Removing built-up solids every 3-5 years ensures the system doesn’t get overwhelmed.
- Smart Usage: Avoid flushing non-biodegradable items or pouring grease down the drain, as these can create blockages.
- Water Conservation: Spreading out water usage prevents the tank from being overloaded.
In addition to these practices, specialized products are available to help keep your septic system efficient. Oxygen-releasing or bacteria-boosting solutions can break down organic waste, reduce the smell, and improve overall system performance, minimizing the risk of backups.
Practical Tips to Prevent Septic-Related Water Damage
- Inspect Regularly: Check for signs of leaks or damage inside your septic tank and drain field.
- Landscaping for Protection: Direct water away from the septic area to avoid additional strain, especially during heavy rains.
- Use Maintenance Solutions: Monthly use of septic-friendly treatments can keep your system running smoothly by preventing solids from accumulating too quickly.
What to Do If the Worst Happens
If you experience a sewage backup or septic-related flooding, it’s crucial to act quickly:
- Stop using water to prevent further strain on the system.
- Call a septic professional to assess and repair the issue.
- Begin immediate water damage cleanup to minimize structural and health risks, such as mold or bacteria.
Addressing the problem promptly can save your home from more extensive damage and costly repairs.
Keeping Your Septic System in Check Saves More Than Money
By staying proactive about septic maintenance, you’re not just avoiding unpleasant odors or plumbing issues but protecting your home from serious water damage. Simple steps, like regular pumping, careful water use, and incorporating maintenance treatments, can make all the difference.
My Septic Tank Smells Outside
Noticing septic tank odors outside your home? Outdoor septic smells can be unpleasant and are often signs of a problem in your septic system. The good news is that in many cases, these odors can be managed or even eliminated with regular maintenance and some straightforward troubleshooting. In this post, we’ll walk you through the common causes of outdoor septic tank smells, practical steps you can take to troubleshoot, and helpful tips for preventing future issues. You can also take the septic tank smell test here.
Common Causes of Septic Tank Smells Outdoors
Click here for my favorite septic smell preventative
Septic tank odors outside your home can stem from several underlying issues. Here are the most common causes:
- Full Septic Tank: One of the top reasons for septic odors is a tank that’s too full. When the septic tank reaches capacity, waste can accumulate and produce strong odors. Scheduling regular pumping, typically every 3-5 years, keeps waste levels manageable and helps prevent smells.
- Blocked or Damaged Vent Pipes: Vent pipes are essential for releasing gases safely into the air. When they’re blocked by debris, nests, or other obstructions, or if they’re damaged, gases can be released closer to the ground, causing noticeable smells in your yard.
- Leach Field Issues: The leach field is designed to filter effluent from the septic tank into the soil. If it becomes clogged or oversaturated, untreated waste can rise to the surface, creating unpleasant odors.
- Damaged or Leaking Septic Tank Components: Cracks, broken seals, or other damage in the septic system can lead to leaks. When this happens, waste escapes into the surrounding soil, resulting in strong, unpleasant smells.
- Improper Waste Disposal: Flushing non-biodegradable items or excessive grease can cause clogs that disrupt the system’s natural processes. These materials don’t break down easily, leading to odor issues.
- Excessive Water Use: Overloading the septic system with too much water can dilute beneficial bacteria and reduce their efficiency, causing odors to emanate from the system or leach field.

Troubleshooting Outdoor Septic Odors
If you’re noticing septic odors outdoors, here are some troubleshooting tips.
- Inspect the Septic Vent Pipes: Start by checking the vent pipes, usually located on the roof or near the septic system. Make sure they’re clear of debris, leaves, or any blockages, as these can cause gases to release closer to ground level.
- Check for Leach Field Saturation: Walk around your leach field area and look for signs of excess moisture, puddling, or unusually lush grass. These could be signs of a clogged or oversaturated leach field. If you notice these signs, it may indicate that wastewater isn’t dispersing properly.
- Look for Cracks or Leaks: Inspect the area around your septic tank for signs of leaks, like wet or damp patches in the soil or visible cracks on the tank cover. Leaks can allow odors to escape, so if you spot any, further inspection or repairs may be needed.
- Reduce Water Usage Temporarily: Try cutting back on water usage for a few days to reduce the strain on the system. Avoid doing laundry or taking long showers during this time to see if reducing water flow helps alleviate the odor problem.
When to Call a Professional
Sometimes, outdoor septic odors persist despite your best efforts to troubleshoot. In these cases, calling a professional septic service can provide the assessment and repairs needed to resolve the issue. Here’s when to consider bringing in a pro:
- Persistent Odors: If you’ve tried troubleshooting and the smell is still strong, a professional inspection can help pinpoint the source and offer a solution.
- Visible Signs of Leach Field Failure: If there’s consistent puddling, bright green patches of grass, or any visible waste near the leach field, it’s a sign of leach field failure that requires immediate attention.
- Suspected Leaks or Damaged Components: If you find any signs of structural damage, like cracks or damp patches, it’s best to have a professional assess and repair these issues before they worsen.
Preventing Future Outdoor Septic Odors
Click here for my favorite septic odor treatment
To avoid septic tank smells in the future, consider adopting a few preventative practices to keep your system in top shape:
- Regular Septic Tank Pumping: Keep a regular maintenance schedule with pumping every 3-5 years. This helps manage waste levels and reduces the risk of odors caused by buildup.
- Proper Waste Disposal: Only flush biodegradable items and avoid pouring grease or non-biodegradable items down the drain. Materials like wipes and feminine products can clog the system and lead to odor issues.
- Conserve Water: Reduce water waste by fixing leaky fixtures, spacing out high-water-use activities like laundry, and using water-saving appliances to prevent system overload.
- Inspect and Clear Vent Pipes Regularly: Periodically check that vent pipes are clear of obstructions, as blocked vents can cause gases to escape near the ground.
- Consider Installing a Carbon Filter on the Vent: Carbon filters can absorb odors from vent pipes, reducing smells without blocking airflow. This can be a useful solution if vent odors are noticeable even when everything else is working properly.
Conclusion
Outdoor septic tank smells are a sign that something may be off with your system, and it’s essential to address these issues promptly. Regular maintenance and mindful septic system use can help keep these odors at bay, maintaining a fresh and healthy environment around your home. While many odors can be managed with DIY troubleshooting, don’t hesitate to call a professional for persistent issues or major repairs. A well-maintained septic system is essential for a safe, odor-free outdoor space.
What to Do if Your Septic Tank Overflows After Heavy Rain
Septic tank overflow after heavy rain can be a messy and challenging issue. When rainfall saturates the ground, it can prevent your septic system from working correctly, leading to potential overflows. In this guide, we’ll explain why septic tanks overflow in heavy rain, what steps you can take, and answer common questions to help you manage and prevent future issues.
Why Septic Tanks Overflow After Heavy Rain
When heavy rains soak into the ground, the soil surrounding a septic tank and drain field can become saturated. This saturation prevents wastewater from dispersing effectively, causing it to back up in the tank. As a result, the tank may overflow, creating potential health hazards and even damage to your septic system if left unchecked.

Steps to Take if Your Septic Tank Overflows After Heavy Rain
Click here to prevent your septic system from overflowing
Limit Water Usage
Reducing water usage inside your home is one of the most immediate actions you can take. Cutting back on water-intensive activities—like laundry, dishwashing, and long showers—will prevent additional stress on your already overwhelmed system. Until the ground dries out and the septic system stabilizes, limit water use to essential needs.
Inspect the Drain Field for Flooding
Take a walk around your drain field (the area where wastewater is dispersed) to check for standing water. If you see pooling, this is a sign of saturation, meaning the soil can’t absorb more water. Avoid walking on the area, as this could compact the soil further, making it harder for the water to drain.
Look for Signs of Overflow Around the Tank
Examine the area around your septic tank for any signs of overflow, such as visible wastewater or damp soil. Indoors, you might also notice slow drains or unusual gurgling sounds from your plumbing. Both are indicators that the system is backed up and struggling to function.
Wait for Ground Saturation to Decrease
Once the rain stops, give the ground a few days to dry out. As the soil recovers, the septic system may return to normal. During this time, monitor the drains in your home to see if they begin working efficiently again. In most cases, waiting for the ground to dry will alleviate the issue.
Avoid Pumping the Septic Tank Right Away
While it may seem logical to pump the tank immediately, doing so in saturated conditions could make things worse. If the ground is still waterlogged, the tank may refill quickly, or worse, the tank itself could shift or even float if the surrounding soil is too wet. Instead, wait until the ground has dried before considering pumping.
Preventative Steps for Future Rains
To prevent future issues, consider improving the drainage around your septic system. Adding swales or French drains can help divert rainwater away from the drain field, reducing the risk of saturation. Additionally, regular septic system inspections and maintenance will help your system stay in peak condition and better equipped to handle heavy rainfall.

FAQ: Common Questions About Septic Tank Overflow After Rain
Is it normal for a septic tank to overflow after heavy rain?
Yes, it’s not uncommon for septic tanks, especially in older systems or those in poor drainage areas, to overflow during heavy rain. Saturated soil can prevent the system from functioning correctly, causing a temporary backup.
How long should I wait before using water heavily in my home again?
It’s best to wait for several days of dry weather to allow the ground to recover. If the drains in your home start functioning normally again, this usually indicates that the system is stabilizing, and you can resume regular water use.
Should I pump the tank if it’s overflowing?
Generally, no. Pumping during or immediately after heavy rain can lead to further issues. If the ground is still saturated, the tank may refill quickly, and pumping could potentially damage the system. It’s best to wait until the soil dries out.
How can I tell if my septic tank needs professional attention after an overflow?
If the overflow persists even after dry weather returns or if sewage begins backing up into your home, it’s time to contact a septic professional. They can assess any damage to the system and determine if repairs are needed.
Can heavy rain permanently damage my septic system?
Repeated overflows or prolonged saturation can cause long-term damage to a septic tank and drain field. Over time, this can lead to reduced efficiency, clogs, and costly repairs. Regular maintenance and drainage improvements can help protect your system.
What’s the best way to prevent my septic system from overflowing in future storms?
Improving drainage around the drain field, reducing water usage during heavy rains, and scheduling routine septic inspections can help prevent overflows and ensure your system remains in good working condition.
How to Remove Mold from Bedding
Discovering mold on your bedding—whether it’s on your sheets, pillowcases, or even pillows—is never a pleasant experience. Mold on bedding not only looks and smells bad, but it can also trigger allergies and other health issues if not addressed. Thankfully, removing mold from bedding is manageable with the right steps, and by taking a few preventive measures, you can keep it from coming back.
Immediate Action: Remove and Isolate Affected Bedding
- Quickly Remove Affected Items: As soon as you notice mold on your bedding, take action. Remove the affected sheets, pillowcases, or pillows to prevent mold spores from spreading to other items.
- Shake Off Spores Outside: Take the moldy bedding outside, if possible, and give it a gentle shake to release any loose spores. This prevents spores from spreading indoors and prepares the items for a thorough cleaning.
Step-by-Step Guide: Washing Moldy Bedding
- Pre-Treatment (Optional):
- Spot Clean Visible Mold: For visible mold spots, apply a pre-wash stain remover, vinegar, or hydrogen peroxide directly to the affected area. Let it sit for about 15 minutes to help loosen the mold.
- Washing Process:
- Use Hot Water: Set the washing machine to the hottest water recommended for the fabric, as hot water is effective for killing mold spores.
- Add Mold-Fighting Agents:
- White Vinegar: 1 cup of white vinegar to the wash to help kill mold and remove odors.
- Bleach: For white or bleach-safe bedding, add 1/2 cup of bleach to kill stubborn mold. Be sure to check fabric care labels.
- Borax: Add 1/2 cup of Borax for an extra boost, especially for bedding with persistent mold spots.
- Double Rinse: For a thorough clean, consider a second rinse cycle to ensure all cleaning agents and mold spores are washed away.
- Drying:
- Sun-Dry if Possible: Dry bedding in direct sunlight to take advantage of UV rays, which naturally kill mold spores.
- Use a Dryer as Needed: If you can’t sun-dry, use a dryer on the highest heat setting safe for the fabric. Make sure items are completely dry, as any leftover moisture can lead to mold regrowth.
- Inspection:
- Check for Mold or Odor: After drying, inspect each item. If you still see mold spots or notice a musty smell, repeat the washing and drying process until the mold is fully removed.
Special Care for Pillows
Mold on pillows requires specific cleaning techniques depending on whether the pillow is washable or non-washable. Click here to learn more about removing mold from pillows.
Washable Pillows
- Check Care Labels: Ensure the pillow is machine-washable and suitable for hot water.
- Follow Bedding Washing Process: Use hot water and add vinegar or Borax as outlined above. Be sure to dry pillows thoroughly, as moisture inside a pillow can lead to further mold growth.
Non-Washable Pillows
- Prepare a Cleaning Paste: Mix equal parts lemon juice and salt to create a natural mold-removing paste.
- Apply the Paste and Sun-Dry: Rub the paste onto the moldy areas, then place the pillow in direct sunlight for several hours. The sunlight helps to kill mold and lighten stains.
- Rinse and Final Drying: Wipe off the paste with a clean sponge using clean water. Let the pillow dry completely in sunlight or in a well-ventilated area.
Extra Tips for Delicate Bedding or Specialty Fabrics
- Spot Treat with Care: For delicate bedding, consider using enzyme-based mold removers or natural options like vinegar or lemon juice for a gentler treatment.
- Test on Small Areas First: Always test any cleaning solution on an inconspicuous area to ensure it won’t damage the fabric.
- Seek Professional Help for Delicate Items: For valuable or fragile items, professional cleaning may be the safest way to remove mold without risking fabric damage.
Preventing Mold on Bedding and Pillows
- Control Moisture in the Bedroom:
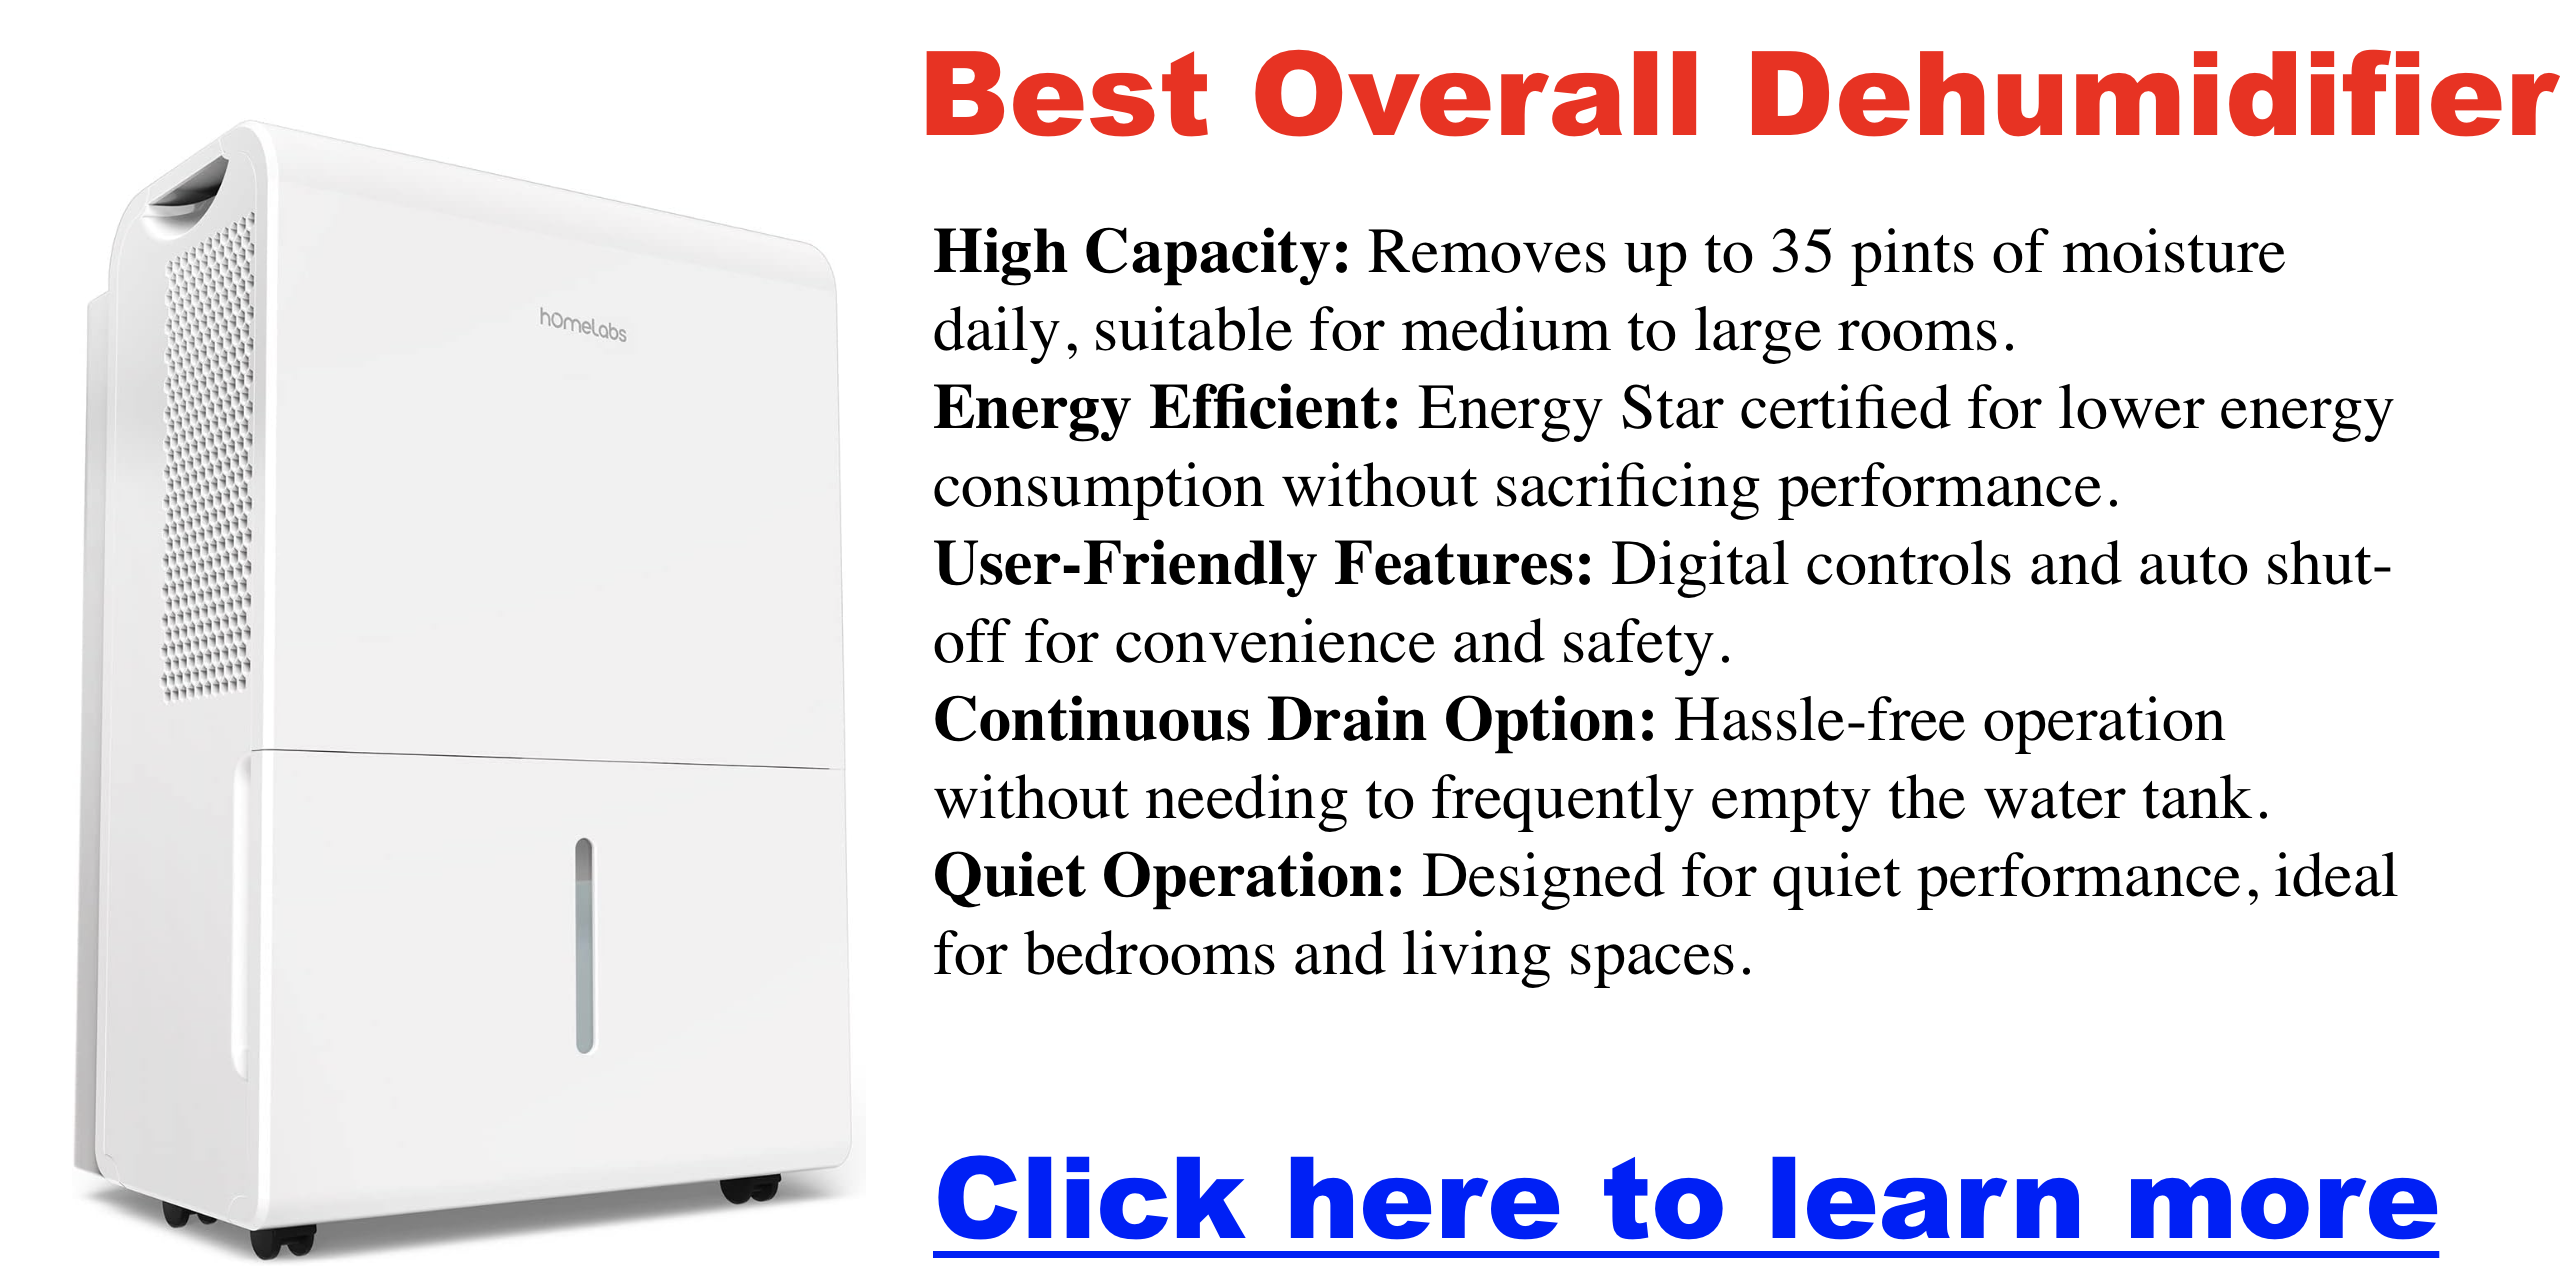
- Use a Dehumidifier: Maintain humidity levels below 50% to prevent mold growth.
- Avoid Leaving Damp Items on the Bed: Towels, damp clothes, or other items with moisture can quickly lead to mold growth on bedding.
- Wash Bedding Regularly:
- Weekly Washing: Regularly washing bedding in hot water prevents mold and mildew buildup.
- Rotate Pillows: Rotate pillows regularly to allow them to air out and prevent moisture from settling in one spot.
- Ensure Good Airflow:
- Ventilate the Bedroom: Open windows or use fans to keep air circulating. Monitor humidity levels, and use a dehumidifer as needed.
- Bed Placement: Avoid pushing the bed directly against the wall, allowing airflow around the bed.
- Use Protective Covers:
- Waterproof and Hypoallergenic Covers: Use these on pillows and mattresses to protect against moisture buildup and dust mites, which can lead to mold growth.
- Inspect Bedding Regularly:
- Check for Mold or Moisture: Periodically inspect bedding and pillows, especially during humid seasons or if your bedroom is prone to dampness.
Conclusion
Removing mold from bedding is straightforward when you act quickly and follow the right steps. By washing thoroughly, drying completely, and taking preventive measures like controlling humidity, ensuring airflow, and using protective covers, you can keep your bedding fresh, clean, and free of mold. A little extra care goes a long way in maintaining a healthy sleep environment.
Dealing with Septic Tank Smell in House
If you’re noticing septic tank smells in your home, you’re not alone—and it can be both alarming and unpleasant. Luckily, in most cases, you can resolve these odors with a little troubleshooting and some routine maintenance. Here, we’ll go through the common causes of septic tank smells, what you can do to troubleshoot, and how to keep your septic system running smoothly to avoid future problems.

Common Causes of Septic Tank Smells Indoors
Understanding the cause of septic tank odors is the first step toward resolving the problem. Here are some of the most common culprits:
- Full or Overly Full Septic Tank: This is one of the top causes of septic odors. When a septic tank isn’t pumped regularly, it can reach capacity, causing solids to back up into your plumbing and leading to smells in the home. A regular pumping schedule (usually every 3-5 years, depending on usage) is essential for preventing this.
- Clogged Drains: When drains are clogged, they can block the system’s airflow, allowing gases to escape into your home rather than out through the vent system.
- Blocked Vents: Vents are crucial for releasing gases safely outside. If a vent is blocked, pressure can build up and push gases back into the house. Vents can be blocked by debris, nests, or even snow in colder months.
- Dried Out or Damaged Toilet Wax Seal: The wax seal between your toilet and the drainpipe creates an airtight barrier to prevent gases from leaking into the bathroom. If this seal is cracked or compromised, it can allow sewer gases to enter.
- Loose or Missing Sewer Trap Plugs: Sewer trap plugs prevent gases from escaping at access points in your plumbing system. If these plugs are loose or missing, you may experience unpleasant odors in your home.
- Broken Septic Tank Pump: The pump in your septic system helps move sewage to the leach field. If the pump breaks down, it can cause sewage to back up, leading to strong odors both indoors and outdoors.
- Improper Tank Chemistry: A healthy bacterial balance is crucial for your septic system to break down waste effectively. The ideal pH for a septic tank is between 6.8 and 7.6; when this balance is off, it can lead to the production of hydrogen sulfide, which smells like rotten eggs.
- Leaks in Plumbing: Even small leaks in pipes or drain lines can allow septic gases to enter the home, creating unpleasant odors.
Troubleshooting Steps for Homeowners
If you’re experiencing septic tank smells in your home, try these troubleshooting steps to see if they resolve the issue:
- Check for Clogs: Clogged drains can lead to nasty odors. Try using a plunger or snake to clear any slow-moving drains. This can often help improve the airflow and reduce smells.
- Inspect Vent Pipes: Take a look at your home’s vent pipes, usually located on the roof. Clear away any debris, leaves, or blockages that might be preventing gases from venting properly.
- Inspect the Toilet Seal: Check for signs of wear or damage around the base of your toilet. If the wax seal looks compromised, consider replacing it, as a new seal can prevent odors from seeping into your bathroom.
- Check Sewer Access Points: Make sure that all sewer access points in your home have secure plugs to keep gases contained within the system.
- Run Water in Seldom-Used Fixtures: Dry traps in unused sinks or drains can allow gases to escape. Running water in these fixtures can refill the trap and create a barrier that keeps gases out.
Preventing Septic Tank Smells
Click here for my favorite septic treatment product
To avoid septic tank odors in the future, there are a few simple steps you can take to keep your system healthy:
- Regular Maintenance: Schedule routine septic tank pumping every 3-5 years to prevent buildup and ensure your system operates efficiently.
- Proper Waste Disposal: Avoid flushing non-biodegradable items like wipes, feminine hygiene products, and grease. These items don’t break down and can lead to clogs, reducing your system’s efficiency.
- Conserve Water: Excessive water usage can overwhelm the system and dilute beneficial bacteria, making it harder for them to break down waste. Be mindful of your water use, fix leaks, and consider using water-saving appliances.
- Use Septic-Safe Products: Many household cleaners contain harsh chemicals that kill the beneficial bacteria in a septic tank. Opt for products labeled septic-safe to protect the bacterial balance.
- Consider Bacterial Additives: Bacterial additives can help maintain a healthy bacterial balance in a septic tank. These supplements promote waste breakdown and help control odors.
When to Call a Professional
If you’ve tried troubleshooting and still smell septic odors, it may be time to bring in a professional. Here’s when to call for help:
- Persistent or Severe Odors: If the smell remains strong or doesn’t go away despite your efforts, a professional plumber or septic service can help identify the source and offer a solution.
- Signs of Sewage Backup: If you notice gurgling sounds, slow drainage, or sewage coming up through drains, this is a clear sign of a more serious issue. Call a professional immediately.
- Uncertainty About the Septic System: If you’re unsure about the age, condition, or maintenance history of your septic system, it’s best to schedule an inspection to get a full assessment.
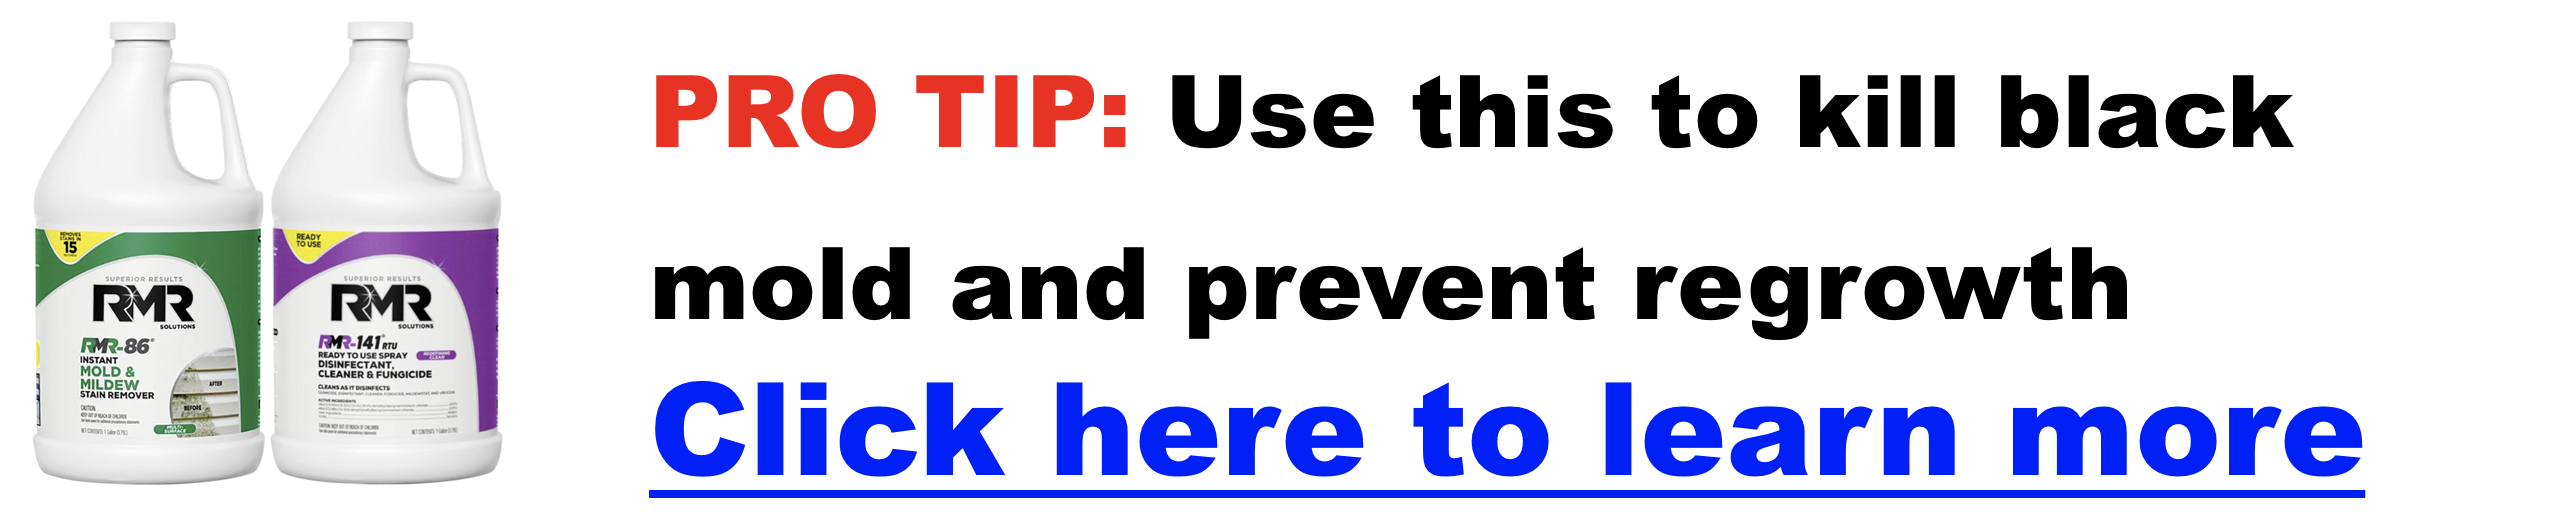
Use This To Fix Septic Smells
Conclusion
If you notice a septic tank smell in your home, don’t ignore it. Addressing odors early can prevent more serious issues from developing and keep your home environment comfortable and healthy. Regular maintenance and mindful system use are key to keeping septic tank smells at bay. If simple troubleshooting steps don’t resolve the issue, don’t hesitate to call in a professional. A well-maintained septic system will serve you well for years to come, odor-free.
Septic Tank Maintenance Products
Maintaining a septic tank is not a glamorous task, but it’s essential to keeping your system running efficiently, extending its life, and preventing costly repairs. With the right septic tank maintenance products, you can avoid unexpected backups, minimize odors, and keep your septic system in top condition. In this guide, we’ll explore the different types of septic tank maintenance products, how they work, and tips on choosing the best one for your needs.
Why Perform Septic Tank Maintenance
Click here for my favorite septic tank maintenance product
A well-maintained septic system ensures smooth operation, saves money, and even helps protect the environment. Regular maintenance is crucial for:
- System Health and Efficiency: Septic tanks rely on beneficial bacteria to break down waste, and keeping these bacteria balanced ensures smooth waste flow and prevents issues like clogs and backups.
- Preventing Costly Repairs: Regular treatment can help catch minor issues before they become expensive.
- Environmental Protection: Eco-friendly septic products protect groundwater and surrounding areas from harmful chemicals, making them safer for the environment.
Key Types of Septic Tank Maintenance Products
With various products available, it can be challenging to determine which is best for your system. Here’s a breakdown of the main types of septic tank maintenance products and how each serves a unique purpose.
Biological Additives
Biological additives add beneficial bacteria and enzymes to your septic tank to naturally break down waste. These products are great for maintaining a balanced bacterial ecosystem, especially after exposure to household cleaning agents that might disrupt it.
- Popular Options: RID-X, Green Gobbler, and Septifix tablets are known for their effectiveness in introducing bacteria that help digest waste, prevent backups, and reduce odors.
- Best For: Regular maintenance and homes that use many household cleaning products.
Chemical Additives
Chemical additives are often more powerful and can clear clogs quickly, but they may harm the beneficial bacteria your septic tank relies on. These are best used sparingly, as they can disrupt the tank’s natural bacterial balance if overused.
- Popular Options: Instant Power Septic Shock is a powerful choice for immediate clog relief.
- Best For: Situations requiring quick fixes for blockages; however, caution is advised, as these products can impact the tank’s long-term health.
Enzyme Treatments
Enzyme-based products focus on breaking down organic materials like fats, oils, and grease. While they don’t add bacteria, enzymes help by accelerating the breakdown of organic matter, aiding the tank’s natural bacteria.
- Popular Options: Bio-Clean and Doctor Drain are known for their natural enzyme-based formulations that work well on organic clogs.
- Best For: Tanks experiencing frequent grease buildup or organic material clogs.
Pre-Measured Treatment Pods
Pre-measured treatment pods are designed for convenience. These dissolvable packets or pods are typically monthly treatments that are made up of a blend of bacteria and enzymes.
- Popular Options: Walex Bio-Active Septic Tank Treatment and Green Gobbler Septic Saver come in easy-to-use pod forms, preventing clogs and maintaining a balanced bacterial environment.
- Best For: Busy homeowners who want a simple, no-fuss way to maintain their septic systems.
Drain Field Cleaners
Drain field cleaners are specially formulated to maintain the health of your drain field. If not properly cared for, drain fields can be prone to clogs or pooling. These products help keep the wastewater flowing through the drain field efficiently, preventing issues that can lead to expensive repairs.
- Popular Options: Dr. Pooper Drain Field Cleaner Tablets are designed to support both the septic tank and drain field by reducing clogs and odors.
- Best For: Homes with older drain fields or systems that experience pooling issues.
Choosing the Right Product for Your Needs
Selecting the right septic tank maintenance product depends on your system’s unique needs. Here are a few things to consider when making your choice:
- Assess Your System’s Needs: Consider your septic system’s size and any recurring issues, like slow drainage or odors. Biological or enzyme-based treatments are ideal for regular maintenance, while chemical additives are better suited for immediate blockages.
- Usage Frequency: Some products require monthly treatments, while others may only need seasonal use. Consider how often you’re willing to treat your system and choose a product that fits your schedule.
Tips for Effective Septic Tank Maintenance
Beyond using maintenance products, a few simple habits can keep your septic system in great shape:
- Schedule Regular Inspections: Annual inspections by a professional can catch issues early, ensuring your septic system stays healthy.
- Avoid Harmful Chemicals: Products like bleach and strong cleaning agents can kill the bacteria your septic system needs. Stick to septic-safe cleaners whenever possible.
- Conserve Water: Overloading your septic system with too much water can disrupt its balance. Fix leaks, avoid excessive water usage, and space out laundry loads to prevent system damage.
Conclusion
Maintaining a septic system doesn’t have to be difficult; with the right products, you can keep it running smoothly for years. From biological additives to pre-measured pods, there are options to suit every system and homeowner’s needs. Regular maintenance is the key to a healthy, odor-free, and efficient septic system. Choosing the right product and following a consistent maintenance routine’ll save you time, money, and the hassle of unexpected repairs.
How to Remove Mold From Ceilings
Finding dark spots creeping across your bathroom ceiling or noticing a strange discoloration in the corners of your basement ceiling can be unsettling. Mold on ceilings is a common problem in areas prone to humidity, and it’s more than just a cosmetic issue. If left untreated, ceiling mold can pose health risks and even lead to structural damage over time. Luckily, with the right approach, you can remove ceiling mold safely and effectively—and prevent it from coming back. This guide will walk you through each step to tackle ceiling mold and keep your home healthy and clean.
Preparing to Remove Ceiling Mold
- Wear Protective Gear:
- Mask or Respirator: Helps prevent inhaling mold spores.
- Gloves: Protects your skin from contact with mold and cleaning agents.
- Goggles: Shields your eyes from mold spores and any splashes from cleaning solutions.
- Prepare the Area:
- Protect Furniture and Floors: Cover the area beneath the moldy ceiling with plastic sheeting to protect your belongings from falling debris and cleaning solution.
- Ensure Good Ventilation:
- Open windows and doors to improve airflow in the room, which helps reduce the concentration of airborne mold spores and keeps the cleaning process safer.
Choosing the Right Cleaning Solution for a Ceiling
- White Vinegar: A natural, highly effective mold remover. Spray vinegar directly onto moldy areas.
- Bleach Solution: For non-porous ceiling surfaces, bleach can be a powerful mold killer. Mix 1 part bleach with 3 parts water for general use, but only use bleach if the ceiling material can handle it. Warning: Never mix bleach with vinegar or any other cleaning products to avoid producing toxic fumes.
- Commercial Mold Removers: There are mold-specific cleaning products available in most stores.
- Hydrogen Peroxide: A gentler alternative that’s safe for most surfaces. Use 3% hydrogen peroxide and apply directly to the moldy area to kill spores and lighten stains.
Step-by-Step Guide: Removing Mold from Ceilings
- Apply the Cleaning Solution:
- Spray your chosen cleaning solution directly onto the moldy spots on the ceiling.
- Let It Sit:
- Allow the solution to sit for 15–30 minutes. This gives it time to kill the mold and loosen any stains.
- Scrub the Mold Away:
- Use a soft brush or a sponge to gently scrub the mold in circular motions. Avoid excessive pressure that could damage the ceiling material.
- Rinse and Dry:
- Wipe the cleaned area with dampened cloth with clean water to remove any residue from the cleaning solution.
- Dry the ceiling thoroughly using fans or a dehumidifier to prevent moisture buildup and mold regrowth.
Additional Tips for High Ceilings
Removing mold from high ceilings presents extra challenges, so here are some tips for making the process safer and easier:
- Secure Access: Use a sturdy ladder or scaffolding and ensure it is stable. Have someone nearby to help if needed.
- Good Lighting: Use a portable light source to illuminate the area, especially if the ceiling is poorly lit.
- Extended Reach Tools: Use a spray bottle with an extended nozzle or a pump sprayer with a long wand to apply your cleaning solution. For scrubbing, attach a sponge or soft brush to an extension pole to reach high spots comfortably.
Preventing Mold from Returning
Mold thrives in damp, poorly ventilated spaces, so managing these conditions can help keep your ceiling mold-free.
- Improve Ventilation:
- Use fans in areas prone to humidity, like bathrooms and kitchens.
- Consider installing additional vents or simply open windows more often to reduce moisture buildup.
- Repair Leaks Promptly:
- Fix any roof or plumbing leaks as soon as possible to prevent moisture from reaching your ceilings.
- Control Humidity:
- Use a dehumidifier in damp rooms or basements to maintain humidity levels below 50%, which discourages mold growth.
- Use Mold-Resistant Paint:
- Consider repainting the ceiling with a mold-resistant primer and paint, especially in high-humidity rooms like bathrooms and kitchens.
When to Call a Professional
For larger mold patches (more than 10 square feet) or if the mold is spread across a large area, it may be best to call in professionals. They have the equipment and expertise to handle extensive mold issues safely. Additionally, if the ceiling material is porous or heavily damaged, you may need to replace it altogether.
Conclusion
Removing mold from ceilings can be manageable with the right tools, precautions, and steps. By following this guide, you can tackle ceiling mold effectively and prevent it from coming back. Address mold early, maintain good ventilation, and fix moisture issues promptly to keep your home safe, clean, and mold-free.
How to Remove Mold From Clothes
Imagine reaching for a favorite shirt only to discover mold spots, or opening the washing machine and smelling a musty odor. Mold on clothes isn’t just an eyesore—it can damage fabrics and even cause health issues.
Safety First: Protect Yourself While Removing Mold
Before tackling moldy clothes, it’s essential to take precautions. Mold spores can easily become airborne and may irritate your skin or lungs.
- Wear Gloves: Protects your skin from contact with mold and cleaning agents.
- Wear a Mask: Helps prevent breathing in airborne mold spores.
- Consider Goggles: Shields your eyes, especially if you’re using strong cleaners.
- Work in a Well-Ventilated Area: Ideally, work outside or in a space with good airflow to keep mold spores from lingering indoors. If indoors, use fans to direct airflow away from you.
Step-by-Step Guide to Removing Mold from Clothes
Step 1: Inspect and Separate Affected Items
- Check for Spread: Examine other garments stored nearby to see if mold has spread.
- Contain the Mold: Place moldy clothes in a plastic bag to prevent spores from spreading in your home.
Step 2: Shake Out Loose Mold
- Take Clothes Outside: Bring the bagged clothes outdoors to keep spores from spreading indoors.
- Gently Shake or Brush: Shake garments lightly or use a soft brush to remove loose mold. Avoid vigorous shaking to minimize airborne spores.
Step 3: Pre-Treat Mold Stains
- Choose a Soaking Solution:
- Vinegar: 1 cup of white vinegar with a bucket of hot water. Vinegar kills mold and helps loosen stains.
- Borax: Dissolve ½ cup of Borax in hot water. Borax also fights mold effectively.
- Soak Time: Submerge moldy clothes in the solution for at least one hour to thoroughly kill the mold and loosen stains.
Step 4: Wash the Clothes
- Set Water Temperature to Hot: Use the hottest water the fabric can handle (check care labels).
- Add Mold-Fighting Boosters:
- Borax: Add ½ cup to the wash cycle for extra cleaning power.
- White Vinegar: Add 1-2 cups during the rinse cycle to neutralize musty odors.
- Optional Baking Soda: Add ½ tablespoon to the wash to help remove odors.
Step 5: Dry Completely
- Sun-Dry if Possible: If the weather permits, line-dry clothes in direct sunlight; UV rays help kill mold spores naturally.
- Use the Dryer if Needed: If line drying isn’t possible, use the highest heat setting safe for the fabric and ensure clothes are fully dry to prevent mold from returning.
Step 6: Inspect and Repeat if Necessary
- Check for Stains and Odors: After drying, check to see if any mold or musty smell remains.
- Repeat Steps if Needed: If mold persists, repeat the soaking and washing steps until the stains and odors are gone.
Extra Tips for Special Cases
- Delicate Fabrics: For delicate materials, try spot-treating with a mixture of lemon juice and salt or using a commercial enzyme-based mold remover.
- Check Care Labels: Always read garment care labels before applying any solution or using high heat.
- Consider Professional Cleaning: For valuable or delicate items, a professional cleaner may be your best option.
- Address Severe Mold Issues: If mold is widespread in your home, it might be time to call in professionals for mold remediation.
FAQs: Tackling Mold on Clothes
What’s the best solution to use?
- White Vinegar: Effective and natural. Soak moldy clothes in 1 cup of vinegar and water, or add vinegar during the rinse cycle.
- Borax: Adds extra mold-fighting power. Use ½ cup for soaking or add to the wash cycle.
- Detergent: Use your regular laundry detergent and combine it with vinegar or Borax for best results.
- Baking Soda: Helps neutralize odors. Add ½ tablespoon to the wash.
- Lemon Juice and Salt: Great for delicate fabrics; use as a spot treatment.
- Enzyme-Based Mold Removers: Effective for delicate items.
- Bleach: Powerful for white clothing; use only on whites, as bleach can discolor other fabrics.
What water temperature should I use?
Use the hottest water the fabric can tolerate to effectively kill mold spores.
How long should I soak moldy clothes?
A one-hour soak is recommended to kill mold and loosen stains.
Can I dry moldy clothes in a dryer?
Sunlight is ideal for drying, as UV rays help kill mold. If needed, use a dryer on the highest heat setting safe for the fabric.
What if mold stains or odors persist after washing?
If mold remains, repeat the soaking and washing steps until it’s completely gone.
What if I can’t wash the item?
For delicate or valuable items, take them to a professional cleaner.
How can I prevent mold on clothes?
- Dry Clothes Thoroughly: Always ensure clothes are fully dry before storing them.
- Store in Ventilated Spaces: Choose well-ventilated areas, and use breathable containers.
- Control Humidity: Use dehumidifiers or moisture absorbers in damp areas.
- Promote Airflow: Avoid overcrowding closets to improve air circulation.
- Regular Maintenance: Clean and organize clothes regularly, checking for moisture or mold.
- Prompt Washing: Wash damp clothes promptly and avoid leaving wet clothes in the washer.
- Natural Mold Deterrents: Cedar hangers or lavender sachets can help keep mold at bay.
- Fix Moisture Issues: Repair leaks and improve ventilation in areas prone to dampness.
Removing mold from clothes doesn’t have to be complicated. With these easy steps and preventive measures, you can restore your clothes and keep mold from returning. Address mold as soon as you spot it, and maintain good storage practices to keep your wardrobe fresh and mold-free.
How to Remove Mold From Shower
Imagine stepping into your shower only to be greeted by unsightly black spots in the grout or a musty smell. This common scenario signals an unwelcome guest: mold. Mold in the shower is not just a visual nuisance—it can also pose health risks. This guide will provide you with a comprehensive, step-by-step process for effectively removing mold from your shower and keeping it from coming back.
Mold In The Shower
Mold thrives in warm, damp environments. Showers offer ideal conditions for mold growth due to high humidity and the presence of soap scum and organic debris. Common types of shower mold include Alternaria, Cladosporium, and Penicillium. While you don’t need to identify specific types, knowing that mold poses potential health risks—such as allergies, asthma, and respiratory issues—emphasizes the importance of prompt action.
Safety First: Gearing Up for Battle
Mold spores can be irritating, so use protective gear:
- Gloves: Protect your skin from both mold and cleaning agents.
- Goggles: Shield your eyes from splashes and spores.
- Mask or Respirator: A mask helps prevent inhaling spores, especially in larger mold infestations.
- Ventilation: Good airflow is essential. Open windows, doors, or use an exhaust fan to minimize exposure to spores and fumes.
Assembling Your Arsenal: Mold-Busting Cleaning Solutions
Click here for my favorite mold-busting solution for a shower
Choose a cleaning solution based on your preferences and the severity of the mold:
- Natural Solutions:
- White Vinegar: This household staple is acidic and effective at killing mold. Spray undiluted vinegar on moldy areas for best results.
- Baking Soda: This mild abrasive works well on surfaces and also neutralizes odors. It’s very easy to make a baking soda paste by mixing it with water for easy application.
- Other Options: Hydrogen peroxide, lemon juice, borax, and tea tree oil are also effective and can be used for lighter mold infestations.
- Bleach Solution:
- Bleach: Though powerful, bleach is best for non-porous surfaces like tile and grout. Dilute bleach (1 part bleach to 3 parts water) and never mix it with other cleaners, especially vinegar. Ensure good ventilation due to the fumes.
- Commercial Mold Removers:
- Specialty Products: Commercial products are available specifically for mold removal. Follow the instructions carefully to maximize safety and effectiveness.
- Choosing the Right Solution:
- Surface Type: Bleach is best for non-porous surfaces, while vinegar is versatile for various materials.
- Severity of Mold: Natural solutions may work for light mold, while bleach or commercial removers may be necessary for stubborn growth.
The Battle Plan: Step-by-Step Mold Removal
- Prepare the Shower Area: Remove all toiletries, towels, and shower accessories to clear the area.
- Apply Your Cleaning Solution: Spray or apply your chosen cleaner directly onto the moldy areas. Let it sit for 10-15 minutes to allow it to penetrate and loosen the mold.
- Scrub the Mold Away: Use a scrub brush or sponge to scrub the affected areas thoroughly. A stiff-bristled brush is ideal for grout, while a non-abrasive sponge is better for delicate surfaces.
- Rinse and Dry: Rinse with clean water to remove any cleaning residue, then dry the shower thoroughly using a towel, fan, or squeegee to prevent moisture from encouraging mold regrowth.
Winning the War: Preventing Mold’s Return
Prevent mold from reappearing by taking these moisture-control measures:
- Ventilation: Always run the exhaust fan during and after showers to reduce humidity.
- Dehumidifier: For bathrooms with persistent dampness, use a dehumidifier to keep humidity levels below 50%.
- Regular Cleaning: Clean the shower weekly with a mild cleaner or vinegar solution to discourage mold buildup.
- Promptly Address Leaks: Repair any leaks immediately to prevent water accumulation and mold growth.
Special Considerations: Caulk and Grout
Click here for an easy way to clean mold on grout
Mold often clings to caulk and grout, requiring specific attention:
- Caulk:
- Bleach Soak: For mold on caulk, soak cotton balls in bleach and press them against the affected areas overnight. In the morning, scrub the caulk with an old toothbrush and rinse thoroughly.
- Re-caulking: If the caulk remains discolored or deteriorated, consider removing and replacing it with fresh caulk.
- Grout:
- Baking Soda Paste: Apply the paste to grout lines, let it sit, then scrub with a grout brush.
- Commercial Grout Cleaner: For stubborn mold, a commercial grout cleaner can be effective. Follow the manufacturer’s instructions for best results.
How to Remove Mold From Walls
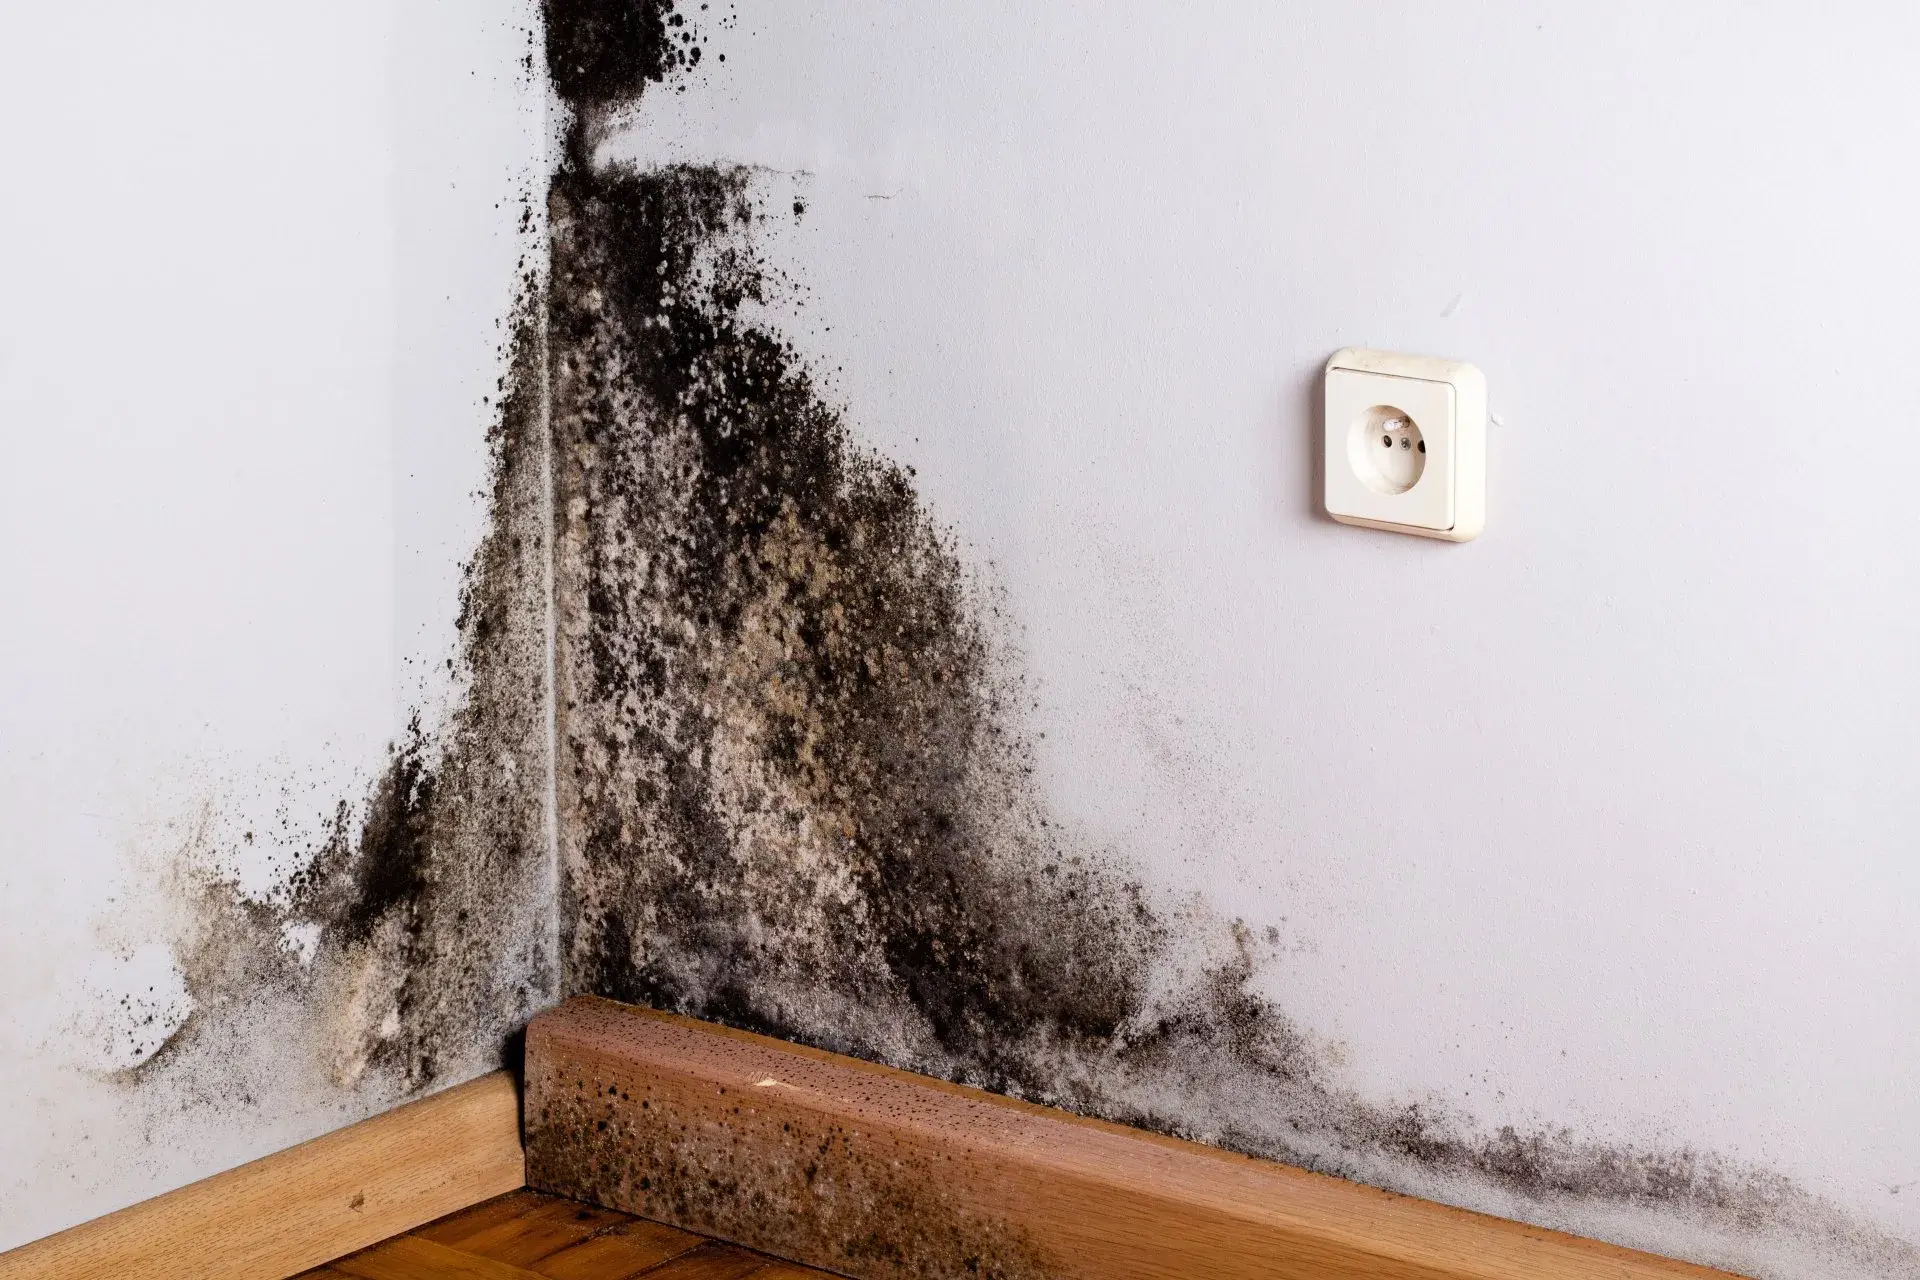
If you’re seeing mold on your walls, you’re probably thinking one thing:
“How do I get rid of this right now?”
Good news — most small patches of mold are completely manageable without expensive remediation.
The key is simple:
Remove it safely → fix the moisture → prevent it from coming back.
This guide walks you through exactly what to do, when DIY is safe, and when it’s smarter to call a professional.
Is Mold on Walls Dangerous?
Most household wall mold isn’t immediately dangerous — but it’s not something you should ignore either.
It can:
-
Trigger allergies
-
Cause musty odors
-
Irritate asthma
-
Spread if moisture continues
You may hear scary terms like “toxic black mold,” but for most homes, the removal process is the same regardless of the type.
You don’t need to panic — you just need to act quickly.
Should You Remove It Yourself or Call a Professional?
Before grabbing cleaner, decide if this is a DIY job or not.
You can safely DIY if:
-
The area is smaller than ~10 square feet (about a small wall patch)
-
Mold is only on the surface
-
No soft drywall or water damage
-
It’s not recurring constantly
Call a pro if:
-
Large or spreading areas
-
Mold inside walls or insulation
-
Musty smell won’t go away
-
Water leaks or flooding
-
HVAC involvement
-
Health issues (asthma, immune conditions)
If you’re unsure, start small. If it comes back quickly, that usually means there’s a deeper moisture problem.
How to Get Rid of Mold on Walls (Step-by-Step)
Here’s the exact process most homeowners should follow.
Step 1 – Protect Yourself
Don’t skip this.
Wear:
-
Gloves
-
N95 mask (or better)
-
Old clothes
-
Eye protection
Open windows and ventilate the room.
Avoid dry scrubbing — that spreads spores into the air.
Step 2 – Choose the Right Cleaner
Not all cleaners work the same.
Best options:
-
White vinegar (kills most household mold naturally)
-
Hydrogen peroxide (3%)
-
Commercial mold removers
Avoid bleach on drywall or painted walls.
Bleach only cleans the surface and doesn’t penetrate porous materials like drywall, which means mold often returns.
Bleach works better for tile or non-porous surfaces only.
Step 3 – Clean the Area
-
Spray the cleaner generously
-
Let sit 10–15 minutes
-
Gently scrub with a soft brush or sponge
-
Wipe clean
-
Dry completely
Drying is critical. Moisture left behind = mold returns.
Use fans if needed.
Step 4 – Dispose Properly
Throw away:
-
Sponges
-
Paper towels
-
Heavily contaminated materials
Seal in a trash bag to avoid spreading spores.
Why Mold Grows on Walls in the First Place
This is where most people mess up.
Cleaning mold without fixing moisture is like mopping up water without turning off the leak.
Common causes include:
-
High indoor humidity (above 50%)
-
Bathroom or kitchen steam
-
Poor ventilation
-
Condensation on cold exterior walls
-
Leaks behind drywall
-
Basement moisture
-
Poor insulation
If mold keeps coming back, moisture is the real problem.
How to Stop Mold From Coming Back (Prevention Checklist)
This is what actually solves it long term.
Keep humidity under 50%
Use a dehumidifier if needed.
Run exhaust fans
Bathrooms and kitchens especially.
Improve airflow
Don’t block vents or push furniture tight against cold walls.
Fix leaks fast
Even tiny drips create mold fast.
Insulate cold exterior walls
Condensation often forms here.
Clean regularly
Especially bathrooms and basements.
Consider mold-resistant paint
If repainting, it adds protection.
Prevention is always easier than removal.
Do You Need to Test the Mold?
Short answer:
Usually no.
Testing is only helpful when:
-
Health symptoms are severe
-
Insurance claims
-
Legal or real estate situations
-
Large infestations
For small household patches, it doesn’t matter what type it is — treat and remove it.
Testing often just adds cost without changing the solution.
Can You Paint Over Mold?
Not directly.
If you paint over mold without cleaning it first, it will grow back underneath.
Correct method:
-
Clean mold completely
-
Let dry
-
Use a mold-blocking primer
-
Then paint
Otherwise you’re just hiding the problem.
When Mold Means a Bigger Problem
If you notice any of these, skip DIY and get help:
-
Soft or crumbling drywall
-
Bubbling paint
-
Warped baseboards
-
Ceiling stains
-
Persistent musty smell
-
Mold returning within days
These usually mean moisture inside the wall.
Frequently Asked Questions
Does vinegar really kill mold?
Yes — it kills most common household molds and penetrates porous surfaces better than bleach.
Is bleach bad for mold?
Not bad, just ineffective on drywall and wood. It only cleans the surface.
How fast does mold grow?
It can start within 24–48 hours if moisture is present.
Why does mold keep coming back?
Humidity or leaks weren’t fixed.
Is black mold toxic?
Most black molds aren’t dangerous for healthy people, but all mold should be removed.
Should I leave the house while cleaning?
Not necessary for small areas, but ventilate well.
How much does professional remediation cost?
Typically $500–$3,000+ depending on severity.
Final Thoughts
Most wall mold problems are totally fixable.
Remember the formula:
Clean it → Dry it → Fix the moisture → Prevent it
If you do all four, it usually doesn’t come back.
Ignore the moisture, and it always does.