Uncategorized
Evaluating Mold Remediation Costs: What to Do When the Price Seems Too High
Getting a quote for mold remediation can be a shock. Many homeowners are surprised by just how expensive it can be to remove mold from their homes. You’re not alone if you’re staring at a high estimate and wondering if the cost is justified. The good news? Mold remediation doesn’t have to break the bank.
In this post, we’ll help you understand what drives mold remediation costs, how to evaluate estimates when DIY options might be possible, and how to negotiate to get a fair price. Ultimately, we aim to show you that dealing with mold doesn’t always require the most expensive solution.
Is the Price Fair? Understanding Mold Remediation Costs
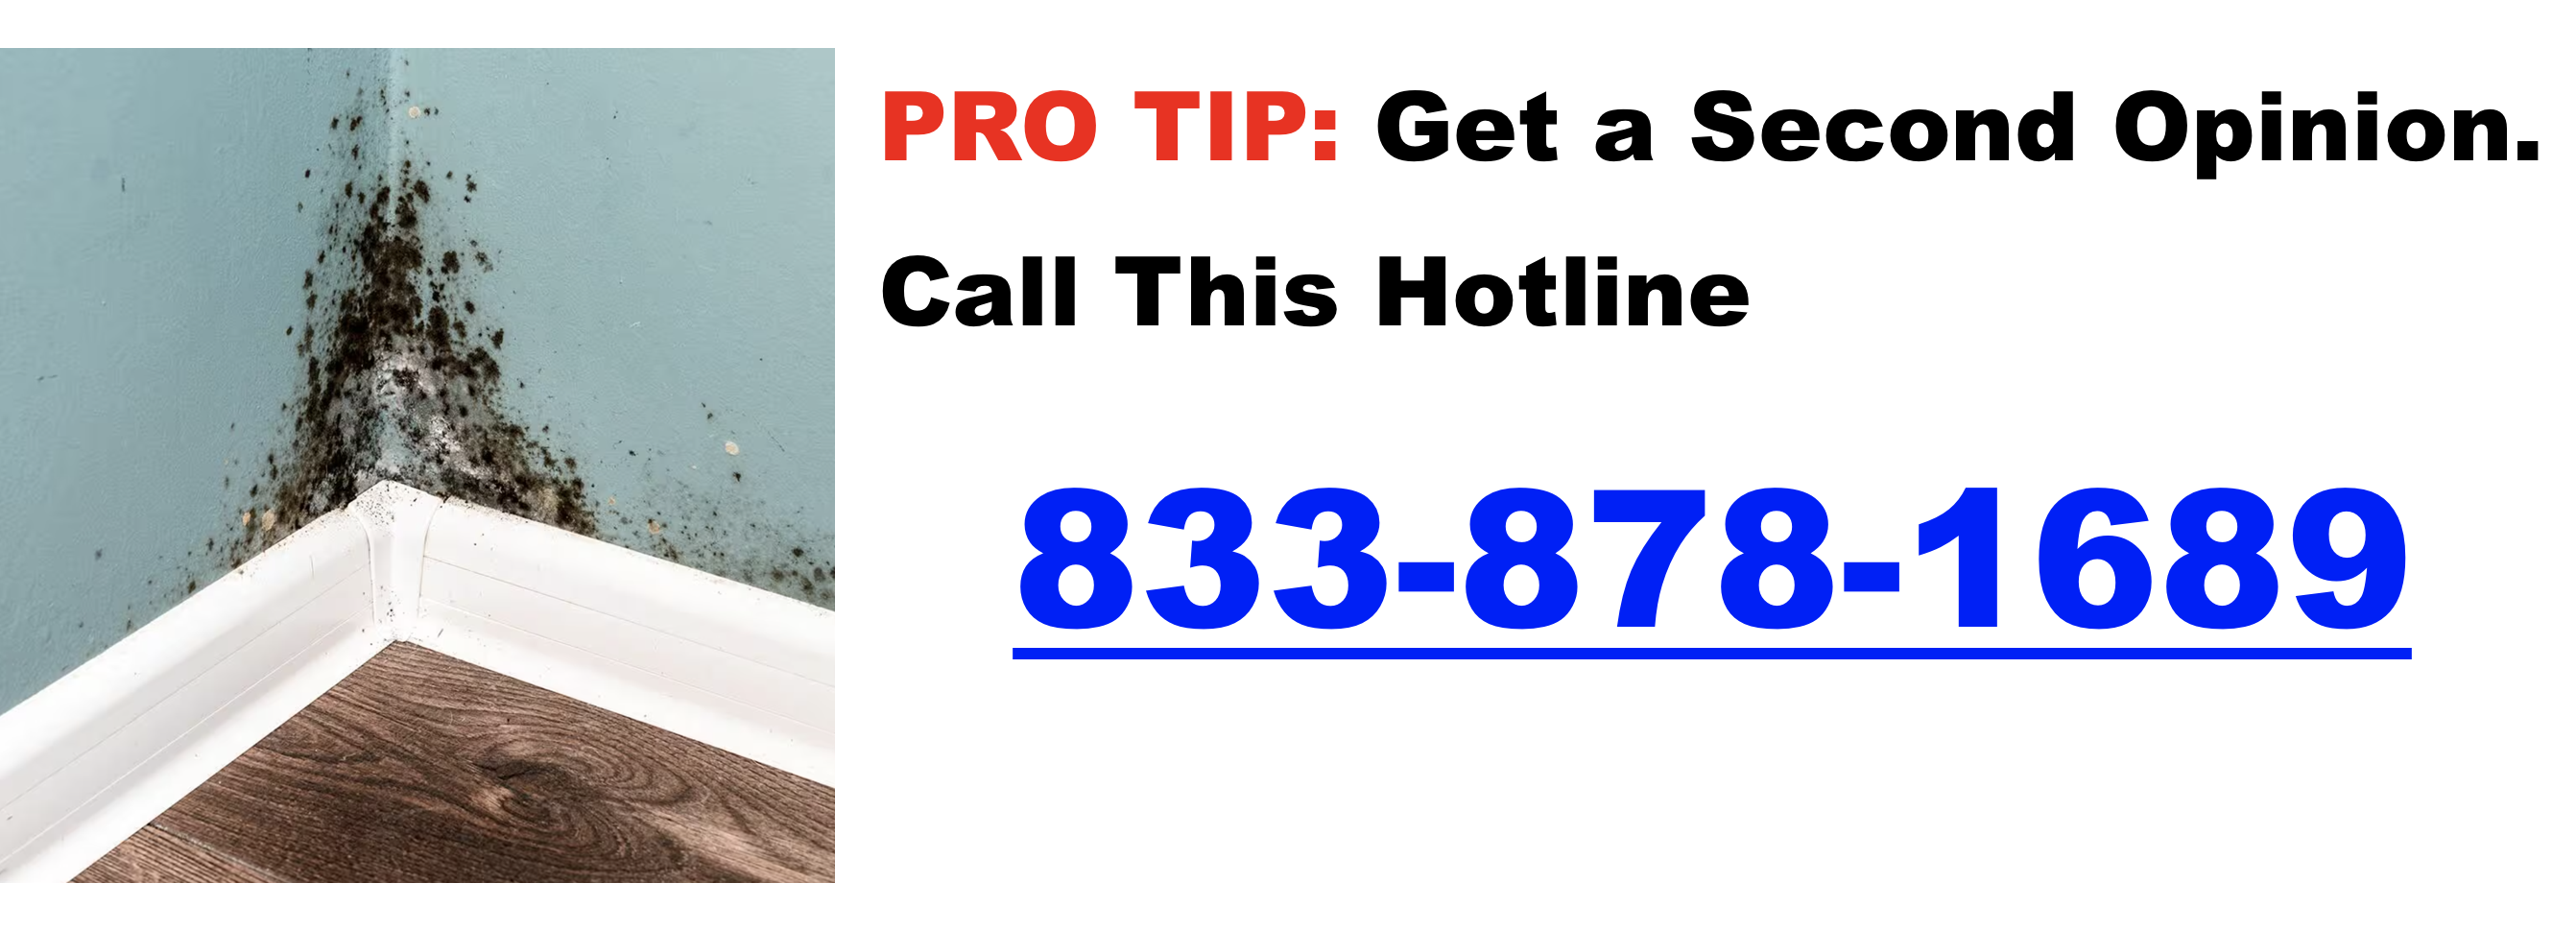
Click for a free estimate by calling 833-878-1689 – Works Anywhere in US
Mold remediation costs vary significantly depending on the situation. It’s essential to understand why mold remediation might seem expensive and whether the price you’ve been quoted is fair.
- Typical Cost Breakdown:
- Small to medium jobs (e.g., a single room): $500 – $6,000.
- Large-scale remediation (e.g., mold in multiple rooms or extensive structural repairs): Up to $30,000 or more.
- High-end estimates ($20,000 – $60,000): These usually involve extensive demolition, rebuilding, and post-remediation repairs.
- Factors Driving Costs Up:
- Containment Procedures: Preventing mold from spreading to other areas of the home requires careful planning and equipment like plastic sheeting, negative air machines, and HEPA vacuums.
- Specialized Equipment: Professional mold remediation companies use air filtration systems and other equipment to eliminate mold spores from the air.
- Extent of the Mold: Hidden mold behind walls or in the HVAC system is more labor-intensive to remove, raising the cost.
- Understanding “Good/Better/Best” Estimates: Some contractors may offer a tiered pricing structure. The “best” option might include services that aren’t necessary for every situation, such as air purifiers or post-remediation treatments that go beyond what’s essential for your home.
| Room/Area | Cost Range |
|---|---|
| Attic (Partial) | $1,500 – $6,000 |
| Attic (Full) | $6,000 – $15,000 |
| Basement (Partial) | $1,500 – $6,000 |
| Basement (Full) | $6,000 – $15,000 |
| Bathroom | $500 – $2,000 |
| Crawl space | $1,500 – $4,000 |
| HVAC system / air ducts | $2,000 – $10,000 |
| Air conditioner air duct system | $1,000 – $2,000 |
| Walls | $1,000 – $20,000 |
| Whole house | $10,000 – $30,000 |
Getting a Second Opinion and Comparing Estimates
If the price feels too high, the first step is to get multiple estimates. Different companies may take different approaches, and comparing them can help you find the best value for your money.
- Why Multiple Estimates Matter:
- Always get at least two or three quotes, especially for large jobs. This helps you compare pricing, approaches, and services offered.
- Each company may recommend different methods—one might suggest demolition, while another might offer less invasive remediation. Comparing these can help you avoid unnecessary costs.
- What to Look For in a Proposal:
- Containment Plans: How will the company ensure mold doesn’t spread to other areas of your home?
- Materials to Be Removed: What materials (e.g., drywall, flooring) will need to be replaced?
- Post-Remediation Testing: Will they test the air or surfaces to confirm the mold is completely gone?
- Red Flags:
- Watch for estimates that seem to include unnecessary services or overly aggressive upsells. Look for any steps in the proposal that seem excessive and don’t match the scale of the problem.
Can You Do It Yourself? Partial DIY Mold Remediation
While professional help is often necessary, there are situations where you can safely handle some or all of the remediation yourself, saving you significant money.
- When DIY Might Be Appropriate:
- Small, localized mold problems, such as mold on bathroom tiles or a single wall, can often be managed without professional help.
- Safe DIY Steps:
- Dehumidify and Ventilate: Rent dehumidifiers and fans to dry out affected areas. Mold thrives in moisture, so controlling humidity is essential.
- Containment: Use plastic sheeting to isolate the moldy area from the rest of your home.
- Inspection: Consider hiring a licensed mold inspector to identify the extent of the mold growth.
- Cleaning: For minor mold on non-porous surfaces, clean with a bleach solution or other mold-killing products. Avoid areas with extensive or hidden mold growth.
- When to Call Professionals:
- Larger mold infestations, mold hidden behind walls, or mold in your HVAC system require specialized equipment and professional expertise.
- If the mold is toxigenic (e.g., black mold), professional remediation is crucial due to the health risks involved.
Negotiating and Exploring Cost-Saving Options
If your estimate is high, there are several strategies you can use to lower the cost or make it more manageable.
- Negotiating with Contractors:
- Ask for Discounts: Some companies may be willing to offer discounts, particularly for larger jobs.
- Request an Itemized Breakdown: Get a detailed breakdown of costs. This transparency can help you identify areas where costs might be reduced.
- Consider a Phased Approach: For very large projects, ask if the work can be broken down into phases, allowing you to spread the cost over time.
- Local vs. National Companies:
- Local contractors often have lower overhead costs than national companies and may be able to offer more competitive pricing.
Assessing Health Risks and Severity of Mold
Not all molds are equally harmful, and understanding the type of mold you’re dealing with can help you decide how urgent and extensive remediation needs to be.
- Common Household Molds:
- Penicillium and Aspergillus: These allergenic molds are common in homes and can cause respiratory issues, especially in individuals with allergies or asthma.
- Stachybotrys (Black Mold): This toxigenic mold is more serious and can produce harmful mycotoxins.
- Mold Testing:
- If you’re unsure about the type of mold, or if there are health concerns in your household, testing may be a good idea. Testing options include air sampling, surface testing, and ERMI (Environmental Relative Moldiness Index) tests.
Integrating Mold Remediation with Planned Renovations
If you’re already planning a renovation, integrating mold remediation into those plans can be a smart way to save money.
- Leverage Renovations:
- Mold can cause long-term damage if not addressed, especially in areas like basements or kitchens. If you’re planning a renovation in one of these areas, it’s a good idea to handle the mold issue first.
- Combining mold remediation with planned renovations can reduce labor costs by bundling the work.
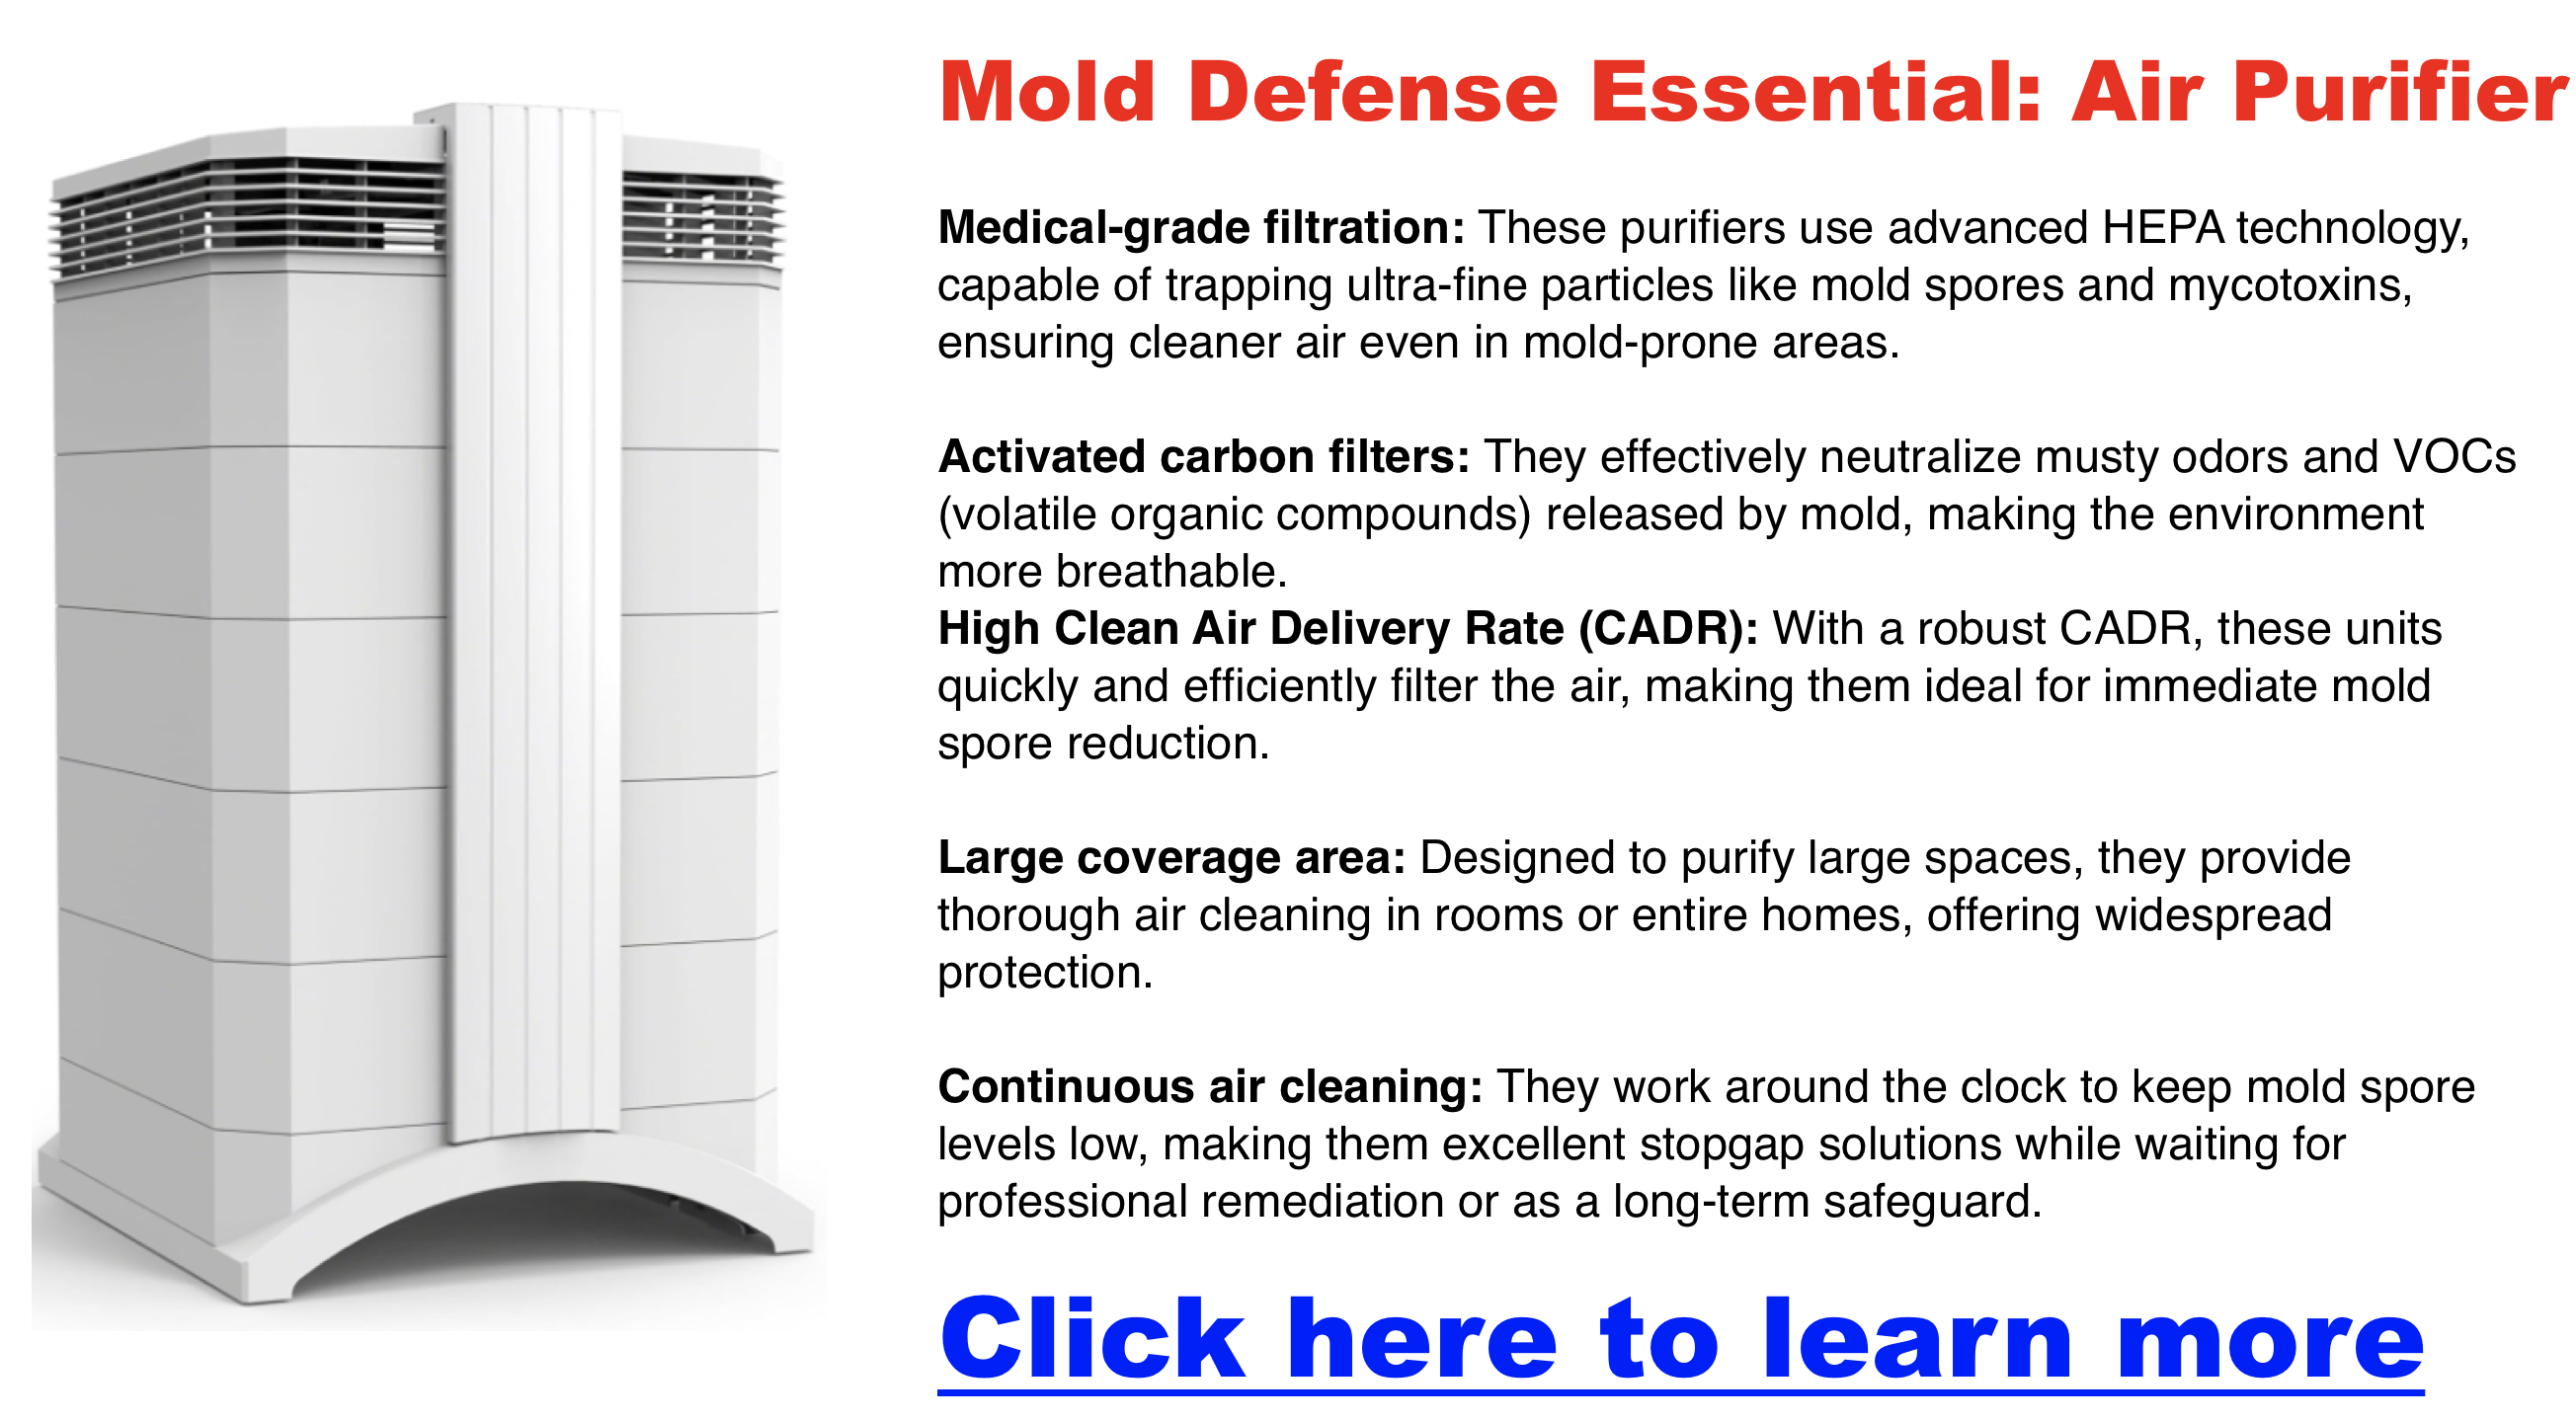
Air Purifiers for Mold Control
Air purifiers can help manage mold spores in the air, improving air quality during and after remediation.
- Key Features of Effective Air Purifiers:
- True HEPA Filters: These capture 99.97% of particles, including mold spores.
- Activated Carbon Filters: These are useful for removing mold-related odors and volatile organic compounds (VOCs).
- UV-C Light Technology: This kills mold spores, preventing them from reproducing and spreading.
- High ACH Rating: Aim for an ACH (Air Changes per Hour) rating of 4-5+ to ensure the air purifier cycles air frequently enough to capture mold spores effectively.
- CADR (Clean Air Delivery Rate): Measures how quickly the purifier cleans the air, taking both filter efficiency and airflow into account.
- Ozone-Free Technology: Avoid air purifiers that generate ozone, which can irritate the lungs.
- DIY Air Purifier Options:
- For a cost-effective solution, consider building a CR box using a MERV 13 filter and a box fan. This DIY air purifier can be surprisingly effective at removing mold spores from the air.
- Dehumidifiers for Humidity Control:
- Pairing an air purifier with a dehumidifier is key to preventing future mold growth. Maintaining indoor humidity below 50% is crucial for stopping mold from thriving.
Best Air Purifier for Moldy Home
If you’ve ever dealt with mold in your home, you know it’s more than just an unpleasant sight—it can seriously affect your health and well-being. Mold spores can trigger health problems like allergies, asthma, and other respiratory issues. One of the most effective ways to do this is by using in a high-quality air purifier specifically designed to tackle mold. But with so many options on the market, how do you choose the best one?
In this guide, we’ll break down the essential features to look for in an air purifier, warn you about common air purifier scams, and provide you with top recommendations so you can make an informed purchase.
Best Air Purifiers for Mold
Dealing with airborne mold requires a high-performance filtration system, and HyperHEPA technology with medical-grade filtration offers several key benefits:
Superior Particle Capture
HyperHEPA technology excels at capturing ultrafine particles, including mold spores. It filters particles that are as small as 0.003 microns and has a minimum efficiency of 99.5%. This is vital for mold control since mold spores typically range in size from 1 to 30 microns.
Comprehensive Filtration
HyperHEPA filters remove up to 99.97% of airborne particles as small as 0.3 microns, such as mold spores, dust, pollen, and allergens. This thorough filtration helps create a cleaner indoor environment, reducing the risks associated with mold-related health issues.
Health Benefits
For those exposed to mold, HyperHEPA filtration offers significant health advantages:
- Allergy and Asthma Relief: Removing mold spores from the air alleviates symptoms for individuals with mold allergies or asthma.
- Respiratory Protection: The ability to filter ultrafine particles helps shield the respiratory system from the harmful effects of mold exposure.
Long-lasting Performance
The HyperHEPA filter usually lasts up to 4 years when the air purifier operates for 10 hours a day at speed 3, providing long-term protection against airborne mold.
Medical-Grade Filtration
As a medical-grade technology, HyperHEPA filtration is suitable for critical environments where mold control is essential, making it particularly valuable in situations where mold contamination poses serious health risks.
Comprehensive Mold Management
While HyperHEPA filtration is highly effective in removing airborne mold spores, it should be part of a broader mold management strategy. Addressing the source of mold growth, controlling humidity, and ensuring proper ventilation are also crucial to mitigating mold issues.
| Air Purifier | Key Features | Pros | Cons | Best For |
|---|---|---|---|---|
| IQAir HealthPro Plus | HyperHEPA filtration, activated carbon, multi-stage | Medical-grade filtration, large coverage (up to 1,125 sq ft), high CADR, long-lasting filters | High price, bulky design | Large homes, severe mold issues |
| Coway Airmega 400S | True HEPA, activated carbon, smart features | High ACH for large spaces, real-time air quality monitoring, energy-efficient | Expensive filter replacements, large footprint | Large spaces, tech-savvy users |
| Dyson Purifier Cool Formaldehyde TP09 | HEPA filter, formaldehyde removal, UV-C light, quiet operation | Removes VOCs, real-time sensors, sleek design, quiet | Pricey, not ideal for very large spaces | Medium to large rooms, low noise preference |
| Levoit Core 300 | True HEPA, compact, budget-friendly | Affordable, effective in small spaces, quiet operation | Limited coverage, lacks smart features | Small rooms, budget-conscious users |
| Blueair HealthProtect 7470i | HEPA Silent, activated carbon, smart features | High filtration efficiency, whisper-quiet operation, Wi-Fi enabled | Expensive, smaller coverage area compared to other high-end units | Medium rooms, quiet, and smart tech-focused users |
| Molekule Air Pro | PECO technology, destroys mold, VOCs, and bacteria | Destroys mold spores, smart sensors, large coverage | Very expensive, filter replacements are costly | Large rooms, advanced air quality control |
| Austin Air HealthMate HM400 | Medical-grade HEPA, activated carbon, large coverage | Durable, captures chemicals, VOCs, odors, long filter life | Basic design, lacks smart features | Whole-house air purification, allergy sufferers |
| Winix 5500-2 | True HEPA, PlasmaWave technology, activated carbon | Affordable, PlasmaWave for extra protection, washable filters | Slightly louder at high settings, limited coverage | Medium-sized rooms, budget option with solid features |
| Medify MA-112 | H13 HEPA, activated carbon, large coverage | Powerful HEPA filtration, large coverage, easy-to-use touch panel | Bulky, expensive filter replacements | Large rooms, severe allergy sufferers |
| Honeywell HPA300 | True HEPA, multiple fan speeds, large coverage | Great for large rooms, strong airflow, affordable for its power | No smart features, filter replacements can add up | Large rooms, mold and allergens control |
| Alen BreatheSmart 75i | True HEPA, customizable panels, whisper-quiet | Very quiet, customizable design, long-lasting filters | High cost, larger footprint | Bedrooms, quiet operation and design-focused users |
| GermGuardian AC4825E | HEPA filter, UV-C light, affordable | Affordable, includes UV-C for extra mold protection, compact | Not ideal for large rooms, filters need frequent replacement | Small to medium rooms, UV-C light for mold spores |
| Rabbit Air MinusA2 | HEPA filter, customizable panels, six-stage filtration | Highly customizable, ultra-quiet, wall-mountable | Expensive, lower CADR compared to bulkier models | Design-conscious users, quiet spaces |
| Coway AP-1512HH Mighty | True HEPA, energy-efficient, compact | Compact design, energy-efficient, affordable | Lower coverage area compared to larger models | Medium rooms, budget-conscious, space-saving option |
| Levoit LV-PUR131 | True HEPA, smart features, budget-friendly | Affordable, smart air quality monitoring, large coverage for the price | Filters need to be changed more frequently | Medium rooms, budget-conscious, smart features |
Best High-End Air Purifiers for Moldy Homes
Here are some of the top-performing air purifiers that can handle mold in any environment:
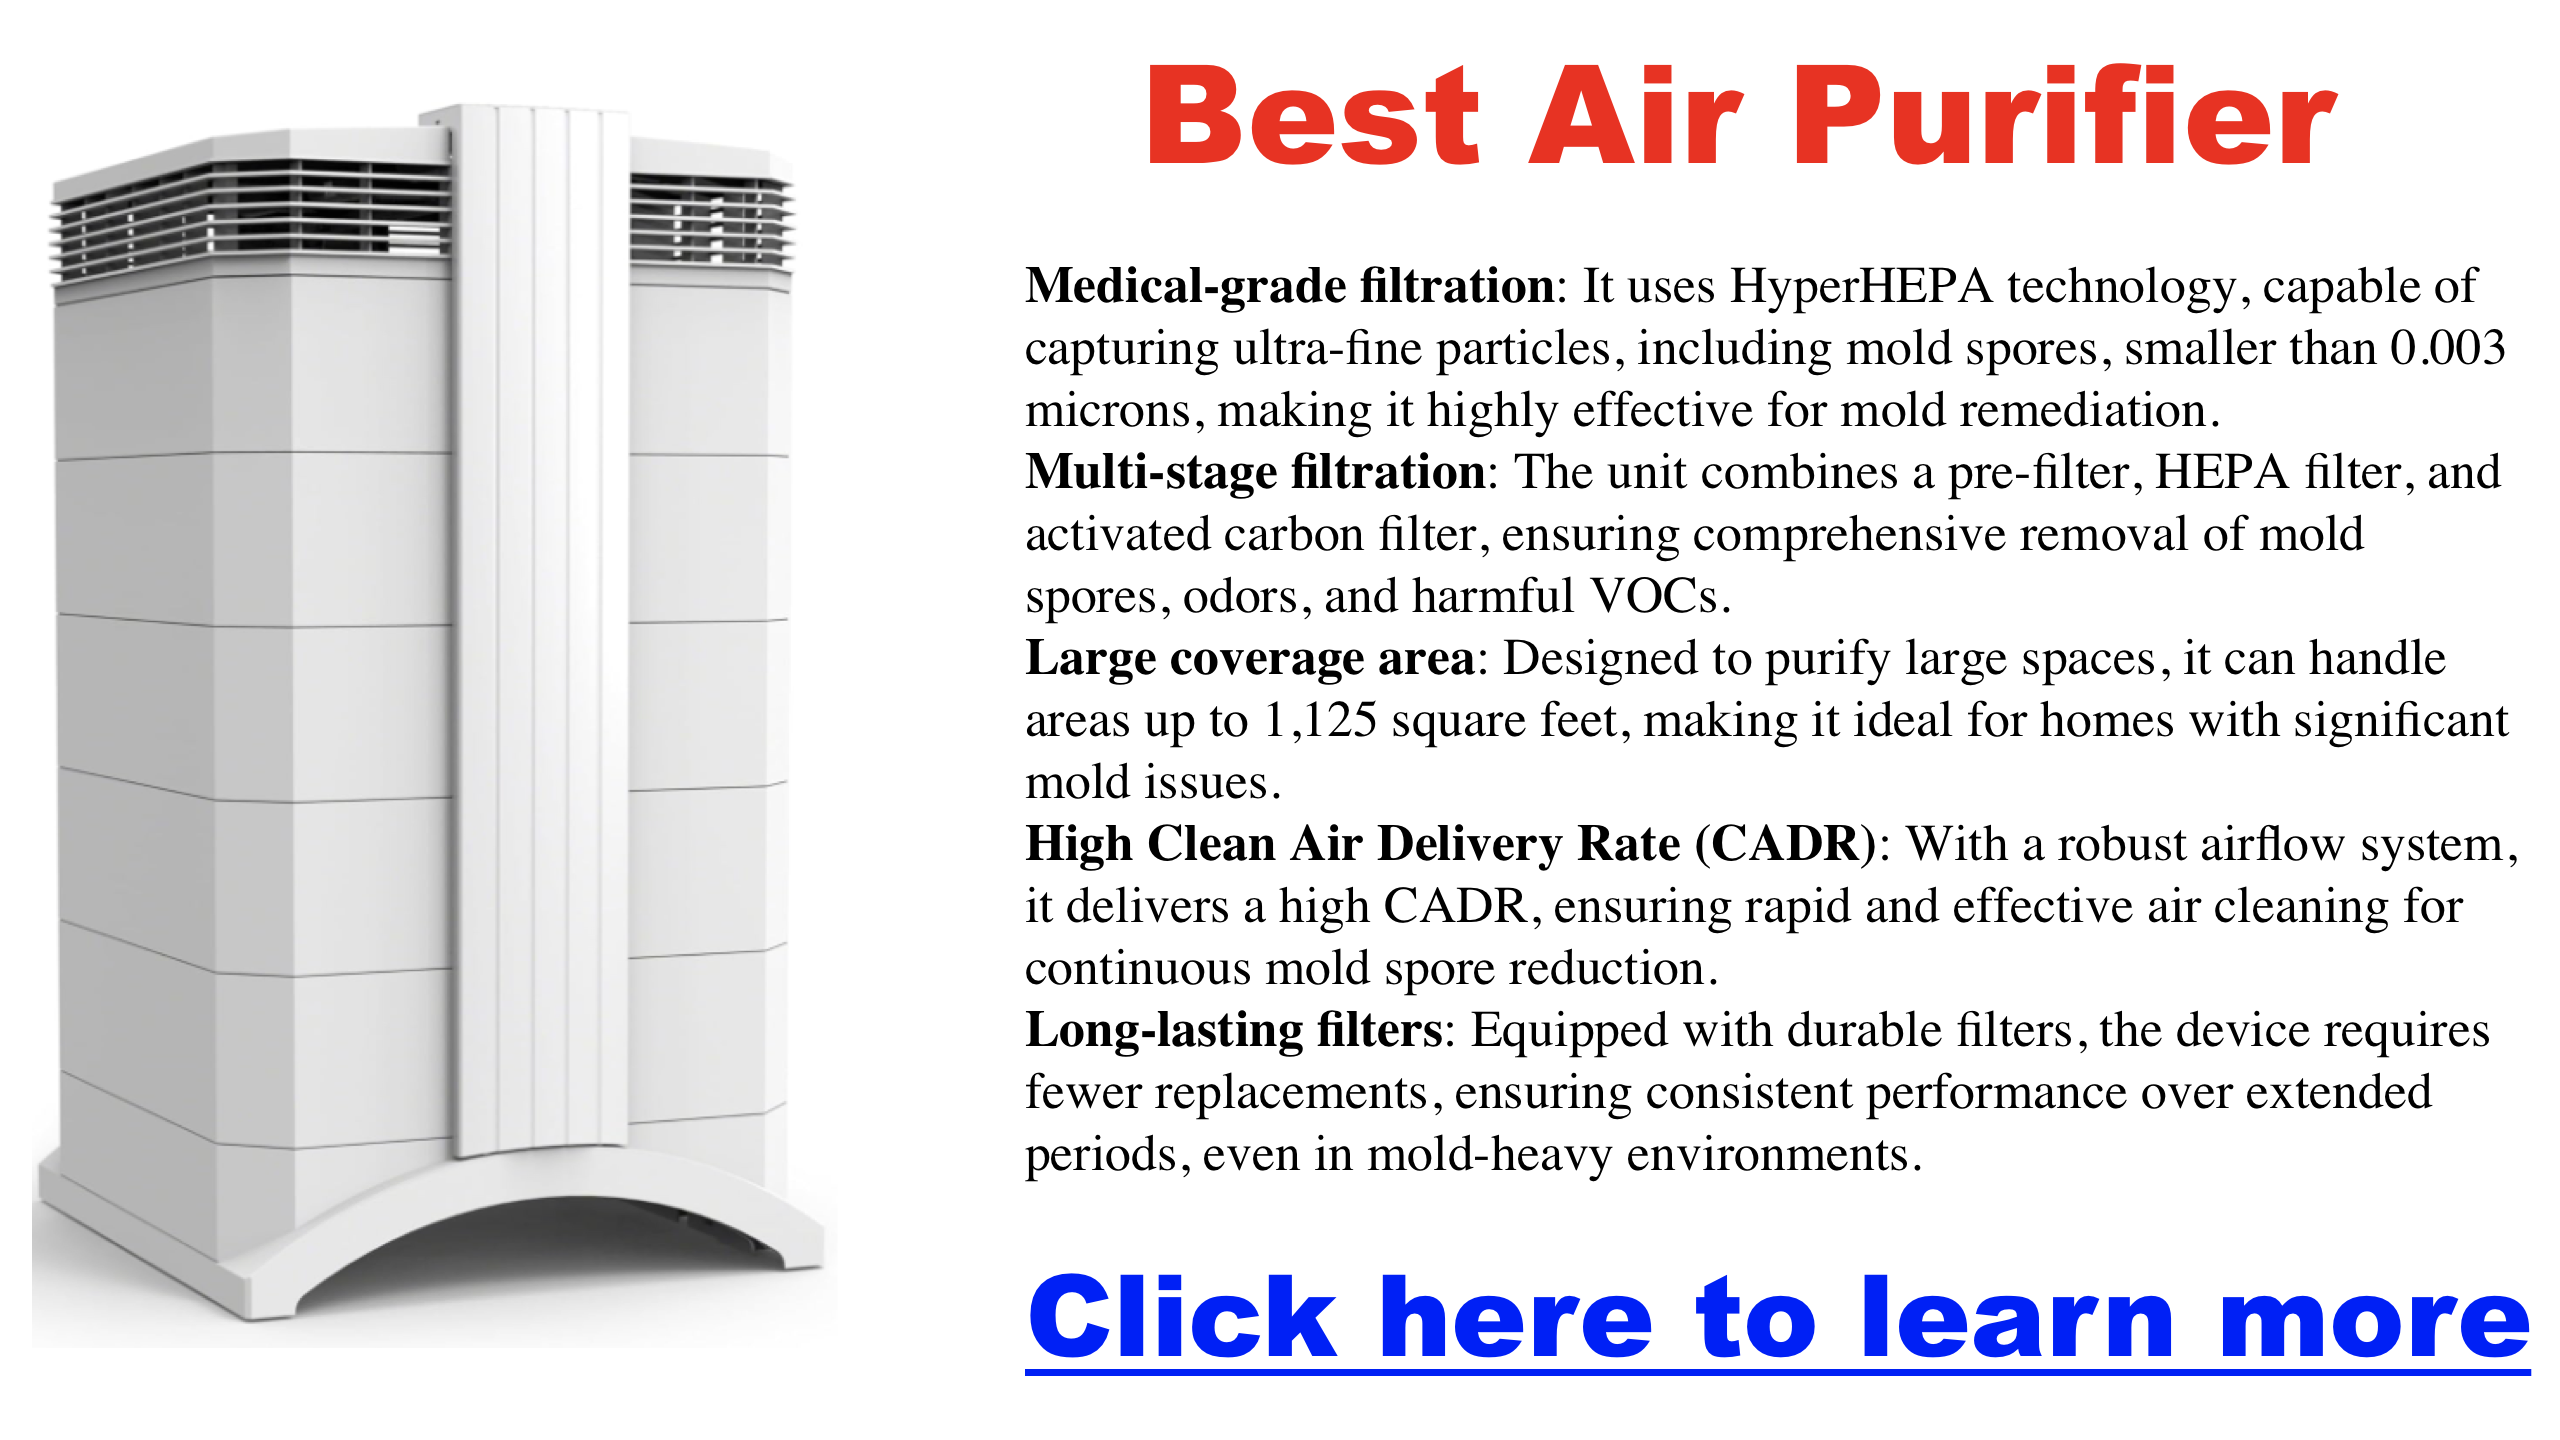
IQAir HealthPro Plus
The IQAir HealthPro Plus is a powerful air purifier for mold and general air quality. It features a medical-grade HyperHEPA filter that captures ultra-fine particles, including mold spores, and a large activated carbon filter for odor reduction and VOC removal.
In independent laboratory tests, the HyperHEPA filter was shown to be over 99.9% effective at filtering Staphylococcus aureus bacteria, and the HealthPro series air cleaner with the HyperHEPA filter was over 99.9% effective at filtering Staphylococcus albus bacteria, as well as at least 99.52% effective at filtering Escherichia coli bacteria.
In additional testing, the HealthPro series air cleaner with the HyperHEPA filter achieved a 99.9% reduction in the Influenza A (H1N1) virus, over 99.9% reduction of Human coronavirus HCoV-229E (ATCC VR-740), and over 99.9% reduction of Human enterovirus 71 (ATCC VR-1432).
- Coverage area: Up to 1,125 sq ft.
- Best for: Large rooms, severe mold issues, and comprehensive air purification.
Coway Airmega 400S
The Coway Airmega 400S has a True HEPA filter and a robust activated carbon filter for effective mold and odor control. It’s known for its high ACH rating and real-time air quality monitoring.
- Coverage area: 1,560 sq ft.
- Best for: Large spaces, mold-prone areas, and tech-savvy users who want smart features.
Dyson Purifier Cool Formaldehyde TP09
The Dyson Purifier Cool Formaldehyde TP09 not only captures mold spores with its HEPA filter but also eliminates formaldehyde, a harmful chemical that can be released by mold and other household pollutants.
- Coverage area: Medium to large rooms.
- Best for: Mold, VOCs, and users who prioritize aesthetics and low noise.
Understanding the Dangers of Mold in Your Home
Mold can grow in any damp environment, whether it’s your basement, bathroom, or kitchen. Once it starts, it can release thousands of tiny spores into the air. These spores not only cause unpleasant odors but also pose significant health risks. Breathing in mold spores can trigger allergies, aggravate asthma, and cause more serious respiratory conditions over time.
While air purifiers are not a substitute for removing the source of the mold, they can help drastically reduce airborne mold spores, improving indoor air quality.
Key Features to Look for in an Air Purifier for Mold
Here’s what you should focus on when choosing an air purifier for moldy environments:
True HEPA Filter
A True HEPA filter can capture mold spores. These filters are designed to trap 99.97% of airborne particles as small as 0.3 microns, including mold spores. Without a HEPA filter, smaller particles could escape, continuing to circulate in your home.
Activated Carbon Filter
Mold releases spores and produces unpleasant odors and volatile organic compounds (VOCs). An activated carbon filter can absorb these odors and chemicals, ensuring that your air smells fresh and is free of potentially harmful gases.
UV-C Light Technology
While a HEPA filter captures mold spores, UV-C light technology kills them. UV-C light disrupts the DNA of mold spores and other microorganisms, preventing them from reproducing and continuing to affect air quality.
Air Changes per Hour (ACH) Rating
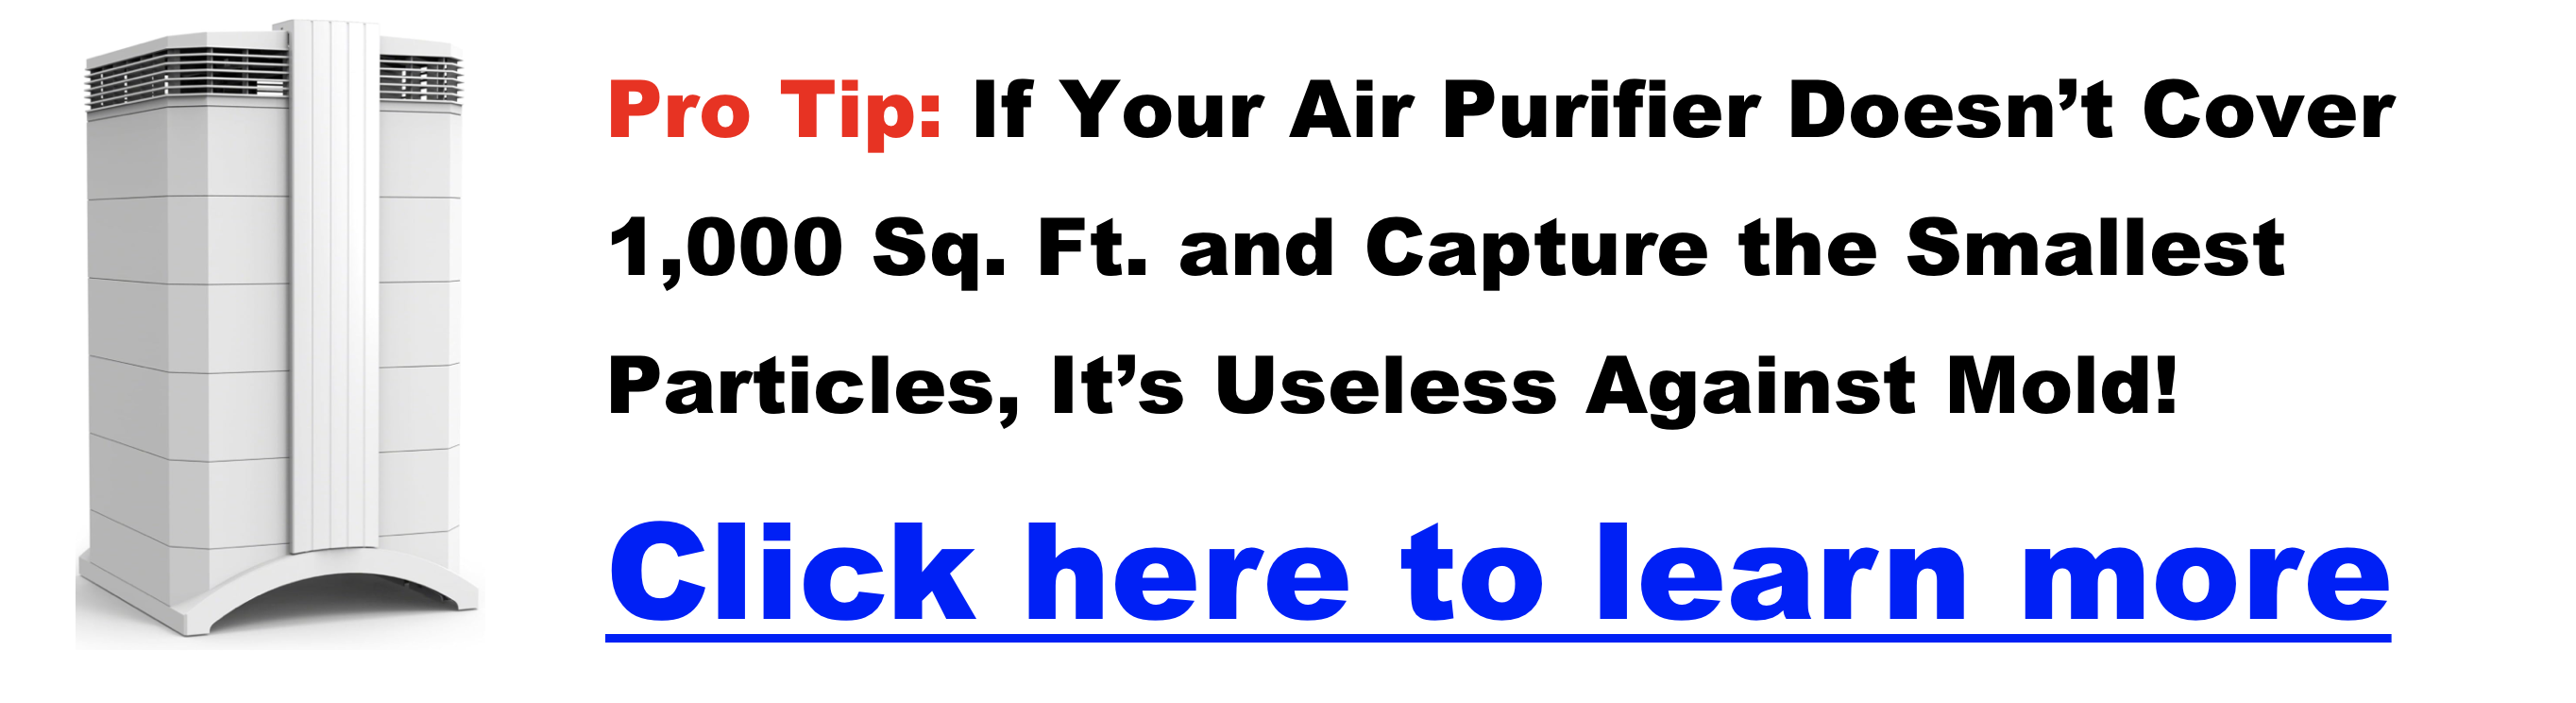
The ACH rating tells you how many times an air purifier can filter the air in a room per hour. For moldy environments, you’ll want an air purifier that can perform at least 4-5 air changes per hour. This ensures that the purifier constantly cleans the air and removes new mold spores as they appear.
Coverage Area
Make sure the air purifier you choose is designed for the size of the room where it will be used. A purifier that’s too small won’t be able to handle the spore load in larger spaces like basements or living rooms.
Ozone-Free Technology
Some air purifiers use ionizers or ozone generators, which can produce ozone as a byproduct. Ozone can irritate lungs and exacerbate respiratory issues, especially in a moldy environment. Look for ozone-free air purifiers to ensure your air is not only mold-free but also free of harmful ozone.
Air Purifier Scam Awareness
When considering air purifiers, be aware of misleading marketing tactics, especially concerning HEPA filters. While HEPA filters are effective at capturing particles, some manufacturers might overemphasize their single-pass efficiency without addressing the more critical measure of Clean Air Delivery Rate (CADR).
- Focus on CADR, not just HEPA: CADR measures how quickly an air purifier can clean the air in a given space, taking into account both the filter’s efficiency and the volume of air it processes. A high single-pass efficiency doesn’t guarantee clean air if the purifier doesn’t move enough air. Look for air purifiers with a high CADR that’s appropriate for your room size.
- Consider DIY options: DIY air purifiers, like those using MERV 13 filters and box fans (commonly known as CR boxes), can achieve higher CADRs at a lower cost than many commercially available HEPA purifiers. These units, while less aesthetically pleasing, can be more energy-efficient and quieter, especially those using PC fans.
- Be skeptical of unreported CADR: If a manufacturer doesn’t provide CADR information, it could indicate a low CADR, meaning the purifier might not effectively clean the air.
- Evaluate noise levels: Some manufacturers advertise high CADR numbers but only at the loudest and most impractical fan settings. Be sure to check if the noise level is acceptable for everyday use.
- Understand the limitations of carbon filters: Carbon filters can absorb odors and VOCs, but they don’t remove particulate matter like mold spores. Their effectiveness depends on the size and saturation level, so always check product specifications.
DIY Alternatives for Mold Removal
For those who are budget-conscious or want to try a more hands-on approach, DIY air purifiers like the CR box can be a cost-effective solution. These air purifiers use MERV 13 filters combined with a simple box fan to filter the air, achieving high CADR at a fraction of the cost of commercial models. They may not look as polished, but they often outperform pricier options.
Placement and Use Strategies for Maximum Effectiveness
Where you place your air purifier is just as important as which one you choose. Mold tends to accumulate in damp areas like basements, bathrooms, and kitchens. Place your air purifier in the areas with the highest mold presence for optimal results.
Running your air purifier continuously is essential in moldy environments to keep mold spores at bay. Pairing your air purifier with a dehumidifier is also recommended to control moisture levels, which should be kept below 50% to inhibit mold growth.
Frequently Asked Questions (FAQs)
- Can an air purifier completely eliminate mold spores?
- No, but an air purifier can significantly reduce airborne mold spores, improving air quality and making your home safer to breathe in. However, mold sources must be addressed directly to stop growth.
- How often should I change the filters?
- In moldy environments, it’s best to replace HEPA filters every 3-6 months and carbon filters every 2 months, depending on usage and air quality.
- What size air purifier should I get?
- Check the CADR of the air purifier and ensure it’s rated for the size of the room where mold is most problematic. Larger spaces will require higher CADR and ACH ratings.
Conclusion
When it comes to tackling mold in your home, investing in the right air purifier is essential. The IQAir HealthPro Plus, Coway Airmega 400S, and Dyson Purifier Cool Formaldehyde TP09 stand out as top contenders, each offering unique benefits for different needs. However, if you’re looking for a budget-friendly, effective alternative, consider a DIY air purifier with a MERV 13 filter.
Regardless of which model you choose, keep in mind that air purifiers are just one part of the solution. Addressing the root cause of mold, controlling humidity, and running your purifier continuously will ensure the best results for a healthier, mold-free home.
Navigating Minor Water Damage Claims: When to Go Through Insurance vs. Paying Out-of-Pocket
Water damage is one of the most common problems homeowners face, often stemming from burst pipes, faulty appliances, or leaks. However, even minor water damage can leave you with a tricky decision: should you file an insurance claim or just pay for repairs out of your own pocket? While your homeowners insurance policy might cover water damage, there are several factors to consider when deciding whether a claim is the right move. This article will walk you through the pros and cons of each option to help you make the best choice.
Understanding Your Insurance Policy
Before making a decision, it’s important to understand what your homeowners insurance covers when it comes to water damage. Policies usually cover “sudden and accidental” damage, such as burst pipes or appliance leaks. However, they often exclude gradual damage caused by poor maintenance or neglect, like seepage from long-term leaks or damage resulting from ignoring small problems over time.
Understanding the difference between actual cash value (ACV) and replacement cost coverage is really important. ACV takes depreciation into account when calculating payout, whereas replacement cost covers the expense of replacing damaged items with new ones. Some policies also include sublimits for certain types of water damage, meaning you could have less coverage than you think in specific situations. Always review your policy carefully to know what’s included.
Cost-Benefit Analysis: Filing a Claim vs. Paying Out-of-Pocket
The decision to file a claim or pay out-of-pocket often boils down to cost and long-term financial implications. Here’s what to consider:
Deductible Considerations
Homeowners insurance typically requires you to pay a deductible before coverage kicks in. For minor water damage, it’s essential to compare the cost of repairs against your deductible. If the repairs cost less than or only slightly more than your deductible, it may make sense to handle the expenses yourself.
Impact on Premiums
Filing a claim, even for minor damage, could lead to an increase in your insurance premiums. This is particularly concerning if you’ve made other claims recently, as insurers often raise rates or even refuse to renew policies if they see a pattern of frequent claims. While insurance is there for major issues, using it for smaller problems could cost you more in the long run.
Claim Frequency and Insurance History
Each time you file a claim, it’s recorded in your insurance history. Multiple claims can signal to insurers that you’re a higher risk, which could impact your coverage and premiums. Therefore, if you’ve already filed several claims, avoiding another one for minor damage may be the wiser option.
Other Considerations
| Factor | Filing an Insurance Claim | Paying Out-of-Pocket |
|---|---|---|
| Cost of Damage | Typically beneficial if damage exceeds deductible | Better if repair costs are below or near the deductible |
| Deductible | Must pay the deductible before insurance covers anything | No deductible; you pay the full cost but avoid claim impacts |
| Premium Impact | May increase premiums in future policy renewals | No impact on future premiums |
| Claim History | Multiple claims can lead to higher premiums or policy non-renewal | Keeps insurance history clean, reducing future risks |
| Speed & Control of Repairs | Must work with insurance-approved contractors, potentially slowing the process | You have complete control over contractors and repair timeline |
| Scope of Damage | Ideal for major or hidden damage like mold or structural issues | Suitable for small, isolated damage that doesn’t risk spreading |
| Access to Experts | Insurance often provides access to vetted contractors for high-quality repairs | You can choose your own contractor or even handle DIY repairs |
| Documentation Requirement | Extensive documentation (photos, reports) is needed for a claim | Less formal documentation, but always recommended for future reference |
| Long-Term Financial Impact | Potential for higher costs due to premium hikes in the future | Short-term financial hit, but savings on premiums long-term |
| Hidden Issues (Mold, Structural) | May uncover hidden problems and provide coverage for those | Could lead to future costs if hidden damage isn’t addressed early |
When to File an Insurance Claim
- Costly repairs that significantly exceed the deductible.
- Potential for hidden damage, such as mold or structural issues.
- You prefer working with insurance-approved contractors and want coverage for professional services.
When to Pay Out-of-Pocket
- The damage is minor and repair costs are below or close to the deductible.
- You want to avoid premium increases and protect your insurance history.
- You prefer speed and control over the repair process and are comfortable managing the repairs yourself.
Thorough Assessment and Documentation
Before deciding whether to file a claim, it’s important to assess the full extent of the damage. Even minor water damage can hide serious issues, like mold growth or damage to your home’s structure. A small leak today could turn into a much larger and more expensive problem down the road if not properly addressed.
- Steps to Take:
- Inspect the area thoroughly, and if needed, hire a professional to assess the damage.
- Document the damage with lots of photos and videos, and keep records of all communications with contractors and your insurance company. Proper documentation is key for both insurance claims and out-of-pocket repairs.
- Get Multiple Quotes:
- Always get multiple quotes from licensed contractors to accurately compare the cost of repairs. This helps ensure you’re not overpaying, whether you’re covering the cost yourself or through insurance.
Proactive Measures and Maintenance
One of the best ways to avoid water damage and future insurance dilemmas is to be proactive.
- Preventative Steps:
- Regularly inspect plumbing and household appliances for signs of wear, leaks, or damage.
- Make sure gutters and downspouts are clear and functioning, directing water away from your home’s foundation.
- Consider installing water leak detectors, especially in areas prone to leaks, like under sinks or around the water heater.
- Emergency Actions:
- In the event of water damage, it’s important to act quickly. Drying out affected areas and fixing leaks immediately can prevent damage, such as mold growth, which may not be covered by insurance.
When Paying Out-of-Pocket Makes Sense
For minor damage, paying out-of-pocket often provides long-term savings. Here’s why:
Small-Scale Damage
If the cost of repair is lower than your deductible, there’s no benefit to filing a claim. Handling minor repairs independently can prevent future premium increases and insurance complications.
Long-Term Savings
Paying for repairs out-of-pocket means avoiding the short-term benefit of having your insurance cover the repairs but risking a long-term increase in your premium. Over time, avoiding claims for small issues can result in a net savings, as premium hikes often outweigh the immediate repair costs.
Flexibility and Speed
When you handle the repair yourself, you have more control over the process. You can choose the contractor, negotiate prices, and often resolve the issue more quickly than waiting for the insurance claims process to conclude.
Making an Informed Decision
- Pros and Cons: Take into account the cost of repairs, your deductible, the impact on your premiums, and your overall insurance history.
- Consult with Your Insurance Agent: If you’re unsure about your coverage or the consequences of filing a claim, speak with your insurance agent. They can help clarify the details of your policy and advise on the best course of action.
- Assessing Future Risk: Think about the likelihood of similar damage happening again. If you’re dealing with an aging plumbing system or appliances, additional coverage like sewer backup or flood insurance might be worth considering.
Conclusion
Water damage, no matter how small, requires prompt action and careful consideration of your options. Understanding your insurance policy, comparing the costs of repairs to your deductible, and thinking long-term about potential premium increases will help you make an informed decision. Whether you file a claim or pay out-of-pocket, being proactive with maintenance and keeping a clear documentation process are crucial for avoiding bigger issues down the road.
Cost-Effective Alternatives to Professional Services for Water Damage Remediation
Water damage is usually a costly and stressful problem for homeowners. When it happens, immediate action is important to prevent further structural damage, mold growth, and health hazards. While professional water mitigation companies offer comprehensive services, their costs can be prohibitive. Fortunately, for non-emergency situations, more cost-effective alternatives can still provide quality water damage restoration through licensed professionals.
This post will explore various affordable options, including local restoration companies, DIY approaches with professional guidance, specialized contractors, and more.
Local Restoration Companies
Call 833-878-1689 to learn about your options
Why Choose Local Companies?
Local restoration companies often offer the same services as national chains but at more competitive prices. Since they have lower overhead costs, they can provide closely similar results at a fraction of the cost. In addition to potential savings, they often offer more personalized service and flexibility in their approach to water damage restoration.
How to Find a Reliable Local Restoration Company:
- Look for certifications like IICRC (Institute of Inspection Cleaning and Restoration Certification) to ensure the company is properly qualified.
- Check online reviews and get recommendations from friends or neighbors.
- Confirm that the company is licensed, insured, and experienced in water damage restoration.
Choosing a local provider is a great way to save money while effectively addressing water damage.
Partial DIY Approach with Professional Guidance
When is a Partial DIY Approach Appropriate?
A partial DIY approach is ideal for non-emergency water damage situations, where homeowners can handle some tasks themselves while leaving specialized work to professionals. This allows you to cut down on labor costs while still ensuring licensed experts handle critical aspects of the restoration.
Steps for a Partial DIY Approach:
- Rent Equipment: Industrial dehumidifiers, fans, and other drying tools can be rented from stores such as Home Depot. This equipment helps dry out affected areas at a lower cost.
- Hire a Licensed Mold Inspector: It’s crucial to have a professional mold inspector assess the damage and recommend the next steps. Mold can develop quickly in moisture-laden environments and should be treated by professionals.
- Hire Individual Contractors for Specific Tasks: Instead of opting for a full-service restoration company, you can hire specialists for certain jobs, such as drywall removal, mold treatment, or floor repairs.
Advantages of a Partial DIY Approach:
This allows homeowners to save money while ensuring that certified contractors complete essential parts of the remediation process, such as mold removal and structural repairs.
Multiple Quotes and Negotiation
Why Get Multiple Quotes?
Gathering quotes from several contractors allows homeowners to compare pricing, services, and timelines. This provides a better understanding of the overall cost and gives you the leverage to negotiate for a lower price, especially for larger projects.
Tips for Negotiating with Contractors:
- Be upfront about your budget and ask if there is any flexibility in pricing.
- Mention that you are considering other quotes, as this might encourage contractors to offer better rates or additional services.
- Make sure all aspects of the job are included in the quote to minimize the chances of unexpected costs later.
Phased Approach to Water Damage Remediation
Why Consider a Phased Approach?
It may make sense to break the restoration into phases for larger water damage projects. This approach allows you to spread the costs over time and address the most critical areas first.
How to Implement a Phased Approach:
- Begin with the most urgent issues, such as water extraction and drying.
- Once the critical areas are stabilized, repair damaged drywall, flooring, or any mold remediation.
- Continue addressing less urgent areas as your budget allows.
Benefits of a Phased Approach:
This method allows you to manage the financial burden more effectively while still ensuring that the most severe problems are handled promptly.
- Specialized Environmental Contractors
When to Choose Specialized Contractors?
If your water damage situation involves mold, asbestos, or hazardous materials, specialized environmental contractors are often a better option. These contractors focus on environmental hazards and offer more tailored solutions for complex problems.
Examples of Specialized Contractors:
- MG Remediation: Known for handling complex cases requiring detailed, specialized solutions, particularly for environmental hazards.
- Brickley Environmental: Specializes in mold, asbestos, and lead abatement alongside water damage restoration.
Advantages of Specialized Contractors:
For water damage involving environmental concerns like mold or asbestos, hiring specialized contractors can be more cost-effective than using a general water damage restoration company. Their focused expertise ensures that hazardous materials are dealt with correctly, which could save you money in the long run by preventing future health or structural issues.
Guaranteed Fixed-Price Remediation
What is Guaranteed Fixed-Price Remediation?
Some companies offer guaranteed fixed-price remediation, which gives homeowners an upfront, set cost for the entire restoration process. This pricing model eliminates the risk of unexpected costs and allows for better financial planning.
Benefits of Fixed-Price Contracts:
- Financial predictability: You’ll know exactly what the project will cost from the start.
- Protection from cost overruns: Unexpected problems won’t result in additional charges.
How to Find Companies Offering Fixed-Price Remediation:
When collecting quotes, ask contractors if they provide a guaranteed fixed-price option. This approach is particularly useful when the scope of the damage may not be fully known upfront, ensuring you avoid unforeseen costs.
Average Insurance Payout for Water Damage
Experiencing water damage in your home can be overwhelming, especially when it’s your first time dealing with an insurance claim. From understanding the extent of the damage to communicating effectively with your insurance company, the process can be complex. This guide should help you through the essential steps to navigate your water damage insurance claim, specifically focusing on flooring replacement and how to handle contractor estimates.
Water damage can disrupt your life in unexpected ways. A leaking toilet or a burst pipe not only affects your home’s structure but also poses challenges when dealing with insurance claims. If you’ve found yourself needing to replace flooring throughout your home due to water damage, you’re not alone.
Average Payout Amounts
The average insurance payout for water damage claims generally ranges between $11,000 and $12,500. Specific figures from various reports include:
- Approximately $11,600 as an average payout from one analysis.
- An average of $11,650 reported for claims between 2016 and 2022 by industry data.
- An average claim amount of $11,098 cited by another source.
- Around $12,500 for water damage and freezing incidents reported in 2023.
Factors Affecting Payouts
Several factors can cause the actual payout for water damage claims to vary widely:
Severity of Damage
- Extent of Damage: Water damage is classified into four categories, ranging from minor issues requiring repairs costing around $150 to severe cases exceeding $100,000 in repair costs.
- Affected Materials: Damage to structural components or high-end materials can significantly increase repair costs.
| Average Payout Amount | Year(s) | Description |
|---|---|---|
| $11,098 | Not Specified | Average insurance payout for water damage claims |
| $11,605 | Not Specified | Reported average payout amount |
| $11,650 | 2016-2022 | Average payout according to industry data |
| $12,514 | 2023 | Average payout for water damage and freezing incidents |
Understanding the Scope of Water Damage
Continuous Flooring Challenges
When water damage affects flooring that runs continuously through multiple areas of your home, matching the existing flooring becomes a significant challenge. Flooring materials may have been discontinued, or the new batches might not match due to variations in color or texture.
- Aesthetic Consistency: Replacing only the damaged sections can result in noticeable differences, affecting the overall look of your home.
- Property Value: Inconsistent flooring can potentially decrease your home’s value and appeal to future buyers.
Importance of Proper Restoration
Ensuring a home is returned to its pre-loss condition is crucial.
- Structural Integrity: Proper restoration addresses not just the visible water damage but also any underlying issues that could lead to future problems.
- Preventing Further Damage: Incomplete repairs may leave your home vulnerable to mold growth or other complications.
Initial Steps After Mitigation
Documentation
Thorough documentation is your ally in the insurance claim process.
- Photographs and Videos: Capture clear images of all damaged areas before any cleanup or repairs begin.
- Detailed Notes: Record dates, times, and descriptions of the damage and any conversations with professionals.
Communication with Insurance
Early and clear communication sets the tone for your claim.
- Notify Promptly: Inform your insurance company about the damage as soon as possible.
- Understand the Assessment: Request a copy of the initial assessment and ask questions if anything is unclear.
Gathering Contractor Estimates
How Many Estimates to Obtain
Obtaining multiple estimates provides a comprehensive view of the repair costs.
- Recommended Number: Aim for at least three estimates from reputable contractors.
- Variety of Perspectives: Different contractors may offer various solutions or notice details others miss.
Ensuring Detailed Estimates
A detailed estimate helps both you and your insurance company understand the scope of work.
- Itemized Costs: Each estimate should break down labor, materials, and any additional fees.
- Explanations for Full Replacement: Contractors should provide written explanations if they recommend replacing all flooring due to matching issues.
Comparing Estimates
Evaluate each estimate carefully.
- Scope of Work: Ensure all necessary repairs are included.
- Price Variations: Understand why costs differ—higher estimates may include more comprehensive work.
Submitting Estimates to Your Insurance Company
Providing All Estimates
Transparency is key in the claims process.
- Submit All Estimates: Providing multiple estimates shows due diligence on your part.
- Demonstrate Thoroughness: It helps the adjuster see the range of potential costs.
Organizing Documentation
Make it easy for your insurance company to review your information.
- Clear Presentation: Organize estimates in a logical order, highlighting key points.
- Include Contractor Statements: Attach any written explanations regarding the necessity of full flooring replacement.
Communicating the Need for Full Flooring Replacement
Contractor Statements
Professional opinions support your claim.
- Written Explanations: Contractors should detail why matching the existing flooring isn’t feasible.
- Expert Insights: These statements can persuade your insurance company to cover full replacement.
Policy Terms on Matching Materials
Understanding your insurance policy can make a significant difference.
- Review Your Policy: Look for clauses related to matching materials and uniform appearance.
- Policy Language: Some policies cover the cost to achieve a consistent look, while others may not.
Understanding Your Insurance Policy Coverage
Replacement Cost vs. Actual Cash Value
Know the difference between these two types of coverage.
- Replacement Cost: Covers the cost to replace damaged property with new items of similar quality.
- Actual Cash Value: Pays out the depreciated value of the damaged property.
Deductibles and Limits
Be aware of out-of-pocket costs and maximum payouts.
- Deductible: The amount you pay before insurance kicks in.
- Coverage Limits: The maximum amount of money a policy will pay for a covered loss.
Avoiding Common Pitfalls
Not Signing Contracts Prematurely
Patience can save you from financial pitfalls.
- Wait for Approval: Don’t commit to a contractor until your insurance company approves the estimate.
- Financial Risk: Starting work without approval may lead to expenses that aren’t reimbursed.
Insurance Company Contractors
Understand your rights regarding contractor selection.
- Your Choice Matters: You are typically not obligated to use the insurance company’s preferred contractors.
- Second Opinions: If the insurance company’s estimate seems low, getting independent estimates can support your case.
Maintaining Records
Keeping organized records is essential.
- Copies of Everything: Save emails, letters, and notes from phone conversations.
- Interaction Log: Document dates, times, and summaries of all communications.
When to Seek Professional Assistance
Public Adjusters
They can advocate on your behalf.
- Role: Public adjusters represent you, not the insurance company, in settling your claim.
- Fees: Typically charge a percentage of the claim payout; understand the costs involved.
Legal Advice
An attorney can provide guidance if disputes arise.
- Complex Situations: Legal assistance may be necessary if your claim is denied or if negotiations stall.
- Protecting Your Interests: A lawyer can ensure your rights are upheld under the policy.
Next Steps and Follow-Up
Staying Proactive
Regular communication keeps your claim moving forward.
- Follow-Up Calls: Check in with your adjuster periodically.
- Be Responsive: Provide any additional information promptly when requested.
Negotiation Strategies
Be prepared to advocate for fair coverage.
- Present Evidence: Use your documentation to support your claim for full flooring replacement.
- Professionalism Pays Off: Maintain a courteous tone in all communications.
Finalizing the Claim
Understand the settlement before agreeing.
- Review the Offer: Ensure it covers all necessary repairs.
- Disagreements: If you’re unsatisfied, discuss your concerns with the adjuster or consider professional help.
Dealing with water damage is stressful, but understanding the insurance claim process can alleviate some of the burdens. By thoroughly documenting the damage, obtaining detailed estimates, and communicating effectively with your insurance company, you increase the likelihood of a satisfactory resolution. Remember, it’s crucial to know your policy and advocate for restoring your home to its original condition.
Additional Tips and Resources
Checklist for Submitting an Insurance Claim
- Document all damage with photos and videos.
- Obtain at least three detailed contractor estimates.
- Review your insurance policy thoroughly.
- Submit all estimates and supporting documents to your insurer.
- Keep records of all communications.
Questions to Ask Potential Contractors
- Are you licensed and insured?
- Can you provide references from previous clients?
- Do you have experience working with insurance claims?
- How do you handle situations where materials cannot be matched?
Understanding Insurance Terminology
- Deductible: The amount you pay out-of-pocket before insurance coverage applies.
- Depreciation: The decrease in property value over time due to wear and tear.
- Exclusion: Specific conditions or circumstances not covered by the policy.
How to Fix Water Damaged Wood
Water damage to wood can happen for various reasons, including floods, leaks, and condensation. This guide will walk you through understanding water damage, assessing the extent of the problem, preparing for repairs, and carrying out a step-by-step restoration process. Whether you’re dealing with a minor leak or severe water damage, this guide has you covered.
Understanding Water Damage on Wood
Water damage affects wood in different ways depending on the source and the wood type:
- Floods lead to immediate and extensive saturation, causing warping and compromising the structural integrity of the wood.
- Leaks are often gradual, leading to localized damage such as stains or mold growth over time.
- Condensation causes moisture buildup, which can lead to swelling, rot, or mildew, especially in high-humidity areas like basements or kitchens.
Different types of wood respond to water differently:
- Hardwoods like oak or maple are denser and more water-resistant but can still warp or swell with prolonged exposure.
- Softwoods like pine absorb water more quickly, making them more prone to swelling and deterioration.
- Engineered wood (e.g., plywood, particleboard) reacts based on its construction—veneers can separate, and layers may weaken when exposed to moisture.
| Wood Type | Water Sensitivity | Common Damage | Repair Tips |
|---|---|---|---|
| Oak (Hardwood) | Moderate (resistant to short-term exposure) | Warping, slight swelling | Dry immediately, sand, and refinish |
| Maple (Hardwood) | Low to moderate | Surface stains, slight warping | Sand stained areas, reseal with finish |
| Pine (Softwood) | High (absorbs water quickly) | Swelling, deep stains, rot | Dry quickly, apply wood hardener, replace damaged sections |
| Cedar (Softwood) | Moderate (naturally moisture-resistant) | Surface mold, minor swelling | Sand and apply mold-resistant sealant |
| Cherry (Hardwood) | Low | Staining, warping | Sand lightly, reapply stain and protective finish |
| Walnut (Hardwood) | Low to moderate | Staining, slight warping | Sand stained areas, apply protective varnish |
| Plywood (Engineered Wood) | High (susceptible to layer separation) | Swelling, separation of layers | Replace damaged sections, reseal |
| Particleboard (Engineered Wood) | Very high (quickly absorbs water) | Swelling, disintegration | Often requires replacement; seal exposed edges |
Assessing Water-Damaged Wood
Before beginning any repairs, you need to assess the extent of the water damage:
- Identify the source of water:
- Floods cause widespread and sudden damage, while indoor issues, like leaks from pipes, AC units, or faulty appliances, typically lead to more localized damage.
- Common areas to check for leaks include sinks, appliances, baseboards, and areas near windows.
- Stop the water flow:
- Immediately shut off any water sources, such as faucets, leaking appliances, or the central water supply. If the damage is due to flooding, remove water-soaked carpets or other materials that could trap moisture.
- Dry the wood thoroughly:
- Open windows for ventilation or use fans to increase airflow. Dehumidifiers and heaters can also speed up drying. Use a towel or a wet-dry vacuum to soak up any standing water.
- The faster you remove water, the less damage the wood will suffer. Prolonged exposure increases the risk of warping, mold growth, and structural weakening.
- Determine the type of water involved:
- Clean water (from rain or plumbing) is less harmful.
- Greywater (from appliances or sinks) and blackwater (from sewage or floods) pose more health risks and require careful handling due to contaminants.
Tools and Preparation for Repairing Water-Damaged Wood
- Moisture Meters: These devices help measure the moisture levels within the wood, which is critical for understanding the extent of saturation and knowing when the wood is dry enough for repair.
- Dehumidifiers and Air Movers: These help reduce humidity and increase airflow, essential for fast drying and preventing further mold or rot.
- Protective Gear: Wear gloves, masks, and goggles, especially if dealing with mold or contaminated water.
- Wet/Dry Vacuums: These are effective for quickly removing excess water from surfaces, reducing further damage.
- Proper Ventilation: Ensuring good ventilation helps disperse cleaning fumes and keeps the work area safe during the restoration process.
Step-by-Step Restoration Process for Water-Damaged Wood
After assessment and preparation, follow these steps to restore your wood:
Step 1: Drying the Wood
- Air drying is a slower but natural process. Keep windows open, use fans, and ensure good ventilation to allow moisture to escape.
- Dehumidifiers speed up the process by pulling moisture from the air, helping prevent mold and further damage. Drying thoroughly is crucial—if wood remains damp, it will continue to warp or deteriorate over time.
Step 2: Removing Mold and Mildew
- Protect yourself with gloves and a mask before handling mold.
- Use a vinegar solution or mildewcide to scrub away mold. Clean the area thoroughly to remove all traces of mildew.
- To prevent future mold growth, control moisture levels with dehumidifiers and improve air circulation in the affected area.
Step 3: Sanding and Smoothing
- Once the wood is fully dry, use coarse-grit sandpaper (60-100 grit) to remove damaged layers and rough spots.
- Gradually move to finer-grit sandpaper (120-220 grit) to smooth the surface, sanding along the grain for the best results.
- If the water caused staining, light sanding will help remove the top layer of discoloration.
Step 4: Applying Wood Preservatives and Sealants
- Choose between natural or chemical-based preservatives to protect the wood. Preservatives penetrate the wood and help guard against future moisture damage or decay.
- Follow the manufacturer’s guidelines for even application and make sure the wood is dry before applying sealants or finishes.
Step 5: Finishing and Refinishing
- Reapply wood stains or paints to restore the wood’s original color and protect its surface.
- Finally, apply a clear protective finish like polyurethane or varnish to shield the wood from future damage, UV exposure, and wear.
Tips for Preventing Future Water Damage
- Regular Inspections and Maintenance: Check areas prone to leaks (under sinks, near windows, around appliances) and repair any issues immediately to avoid future water damage.
- Ventilation and Humidity Control: Ensure proper ventilation in areas like bathrooms and basements. Use dehumidifiers if necessary to keep indoor humidity between 30-50% to prevent mold and moisture buildup.
- Quick Response to Water Spills or Leaks: Immediately dry any spills or leaks to prevent water from seeping into wood flooring or furniture. Swift action is key to minimizing damage.
When to Call a Professional
For extensive damage, especially to structural elements like beams or load-bearing floors, it’s essential to consult a professional. A licensed flooring or restoration expert can conduct a thorough inspection, provide an accurate quote, and work with insurance companies if needed.
How to Choose a Professional:
- Credentials: Verify their licensing, insurance, and certifications.
- Experience: Look for professionals with expertise in water damage restoration.
- References and Reviews: Check customer reviews or ask for references.
- Insurance Collaboration: Ensure they are experienced in working with insurance claims if you’re filing one.
Water Damaged Wood FAQs
Can wood recover from water damage?
- Yes, wood can recover if treated promptly. Immediate action, such as thorough drying and repairs, can restore the wood. However, severe or prolonged exposure can cause irreversible damage.
How do you fix a water-damaged wood finish?
- Lightly sand the affected area to remove damaged finish layers, clean the surface, let it dry completely, and reapply a finish matching the original type.
Can water damage in wood be reversed?
- Some water damage can be reversed with quick and appropriate action. However, extensive warping, rot, or mold may require replacement rather than repair.
Conclusion
By understanding the causes of water damage, following the proper assessment and restoration process, and taking preventive measures, you can restore and protect water-damaged wood effectively. For severe cases or structural damage, don’t hesitate to call in a professional to ensure the longevity of your home’s wood surfaces.
How to fix roof leak under solar panels
Discovering a roof leak is never a pleasant experience, and when solar panels are involved, the situation can seem even more daunting. While calling in professionals is always the safest and most recommended approach, there may be instances where you feel confident tackling the repair yourself. If you choose this path, proceed with utmost caution and prioritize safety at every step.
Disclaimer: This post is for informational purposes only. Working on roofs and electrical systems poses serious risks. We strongly advise consulting with or hiring qualified professionals for any repairs involving your roof or solar panel system. Proceed at your own risk.
Before You Start:
- Assess the Situation: Evaluate the severity of the leak, its location, and your comfort level with DIY repairs.
- Safety First: Prioritize safety by using fall protection equipment, secure ladders, and avoiding working alone.
- Gather Information: Research your specific roof type, solar panel model, and proper repair techniques.
Step-by-Step Guide
- Locate the Leak from Inside
- Trace Water Stains: Follow the trail of water stains, paint discoloration, or peeling paint on your ceiling and walls back towards their origin.
- Attic Inspection: Carefully access your attic and use a flashlight to visually inspect the underside of the roof for signs of water or damage. You can also check the attic floor for water stains or wet spots.
- Focus on Suspect Areas: Pay close attention to areas around penetrations (chimneys, vents, etc.), flashing, and valleys.
- Rainy Day or Hose Test: If necessary, conduct inspections during rain or perform a controlled hose test to pinpoint the exact location of the leak.
- Prepare for Roof Access and Repair
- Gather Tools and Materials: Assemble all the necessary tools and materials for the repair, including safety gear, roofing materials specific to your roof type, basic tools, and tarps or plastic sheeting to protect surrounding areas.
- Solar Panel Removal: If solar panels are obstructing the leak area, carefully disconnect and remove them, following manufacturer instructions and safety protocols. If unsure, seek professional assistance.
- Access the Roof and Pinpoint the Leak
- Careful Access: Use a secure ladder to access the roof, ensuring it’s on a stable surface and extends beyond the roofline.
- Visual Inspection: Once on the roof, carefully inspect the suspected leak area, looking for damaged or missing shingles, cracks, gaps in flashing, or other signs of damage.
- Probe Gently: If needed, use a flat pry bar to gently lift shingles or flashing to investigate further, being careful not to cause any additional damage.
- Repair the Leak
- Clear Debris: Remove any debris or damaged materials from the leak area.
- Address Specific Issues: Follow proper repair techniques for your specific roof type and the nature of the damage. This might include replacing damaged shingles, repairing or replacing flashing, sealing cracks or gaps, or addressing valley leaks.
- Thorough Sealing: Ensure all repairs are properly sealed to prevent future leaks.
- Reinstall Solar Panels (If Removed)
- Careful Reinstallation: Follow manufacturer instructions and safety protocols to reinstall the solar panels securely.
- Electrical Connections: Ensure all electrical connections are properly made and tightened.
- Professional Inspection (Recommended): Consider having a qualified electrician inspect the reconnected solar panels for safety.
- Post-Repair Cleanup and Monitoring
- Cleanup: Remove all debris and materials from the roof and surrounding areas.
- Monitor for Recurrence: Keep a close eye on the repaired area, especially during rainy weather, for any signs of recurring leaks.
How to find a roof leak
A leaky roof can turn from a minor annoyance into a major headache. Water damage, saturated structure, mold growth, and structural issues are just a few of the unwelcome consequences of an ignored leak. But don’t panic! Finding and addressing a roof leak early on can prevent costly repairs and protect your home. In this guide, we’ll walk you through the steps to pinpoint that pesky leak, even if you’re not a seasoned DIYer.
The Telltale Signs: How Do You Know You Have a Roof Leak?
Sometimes a leak makes its presence known loud and clear with a steady drip or a growing stain on your ceiling. But other times, the signs are more subtle:
- Obvious Clues: Water stains, dripping water, mold growth, peeling paint or wallpaper.
- Sneaky Suspects: Musty odors, increased humidity indoors, unexplained spikes in your water bills.
- Weather Watch: Pay attention! Leaks often worsen during or after heavy rain or snowmelt.
Gear Up: What You’ll Need for Your Leak-Finding Mission
Safety first! Before you embark on your roof inspection, make sure you have the right tools and gear:
- Safety Essentials: A sturdy ladder, shoes with good traction, gloves, and eye protection.
- Inspection Aids: A bright flashlight, binoculars (for those hard-to-reach spots), and a camera to document your findings.
- Optional Tools: A garden hose (for water testing) and a tarp or bucket to catch any drips.
Start Your Search Indoors: Clues from Below
Begin your investigation inside your home, where the effects of a leak are often most noticeable:
- Attic Adventure: Head to the attic with your flashlight and look for water stains, dampness, mold, or even daylight shining through.
- Follow the Trail: If you see any signs of water, try to trace it back to its source.
- Check Ceilings and Walls: Look for discoloration, bulging, or peeling paint that could indicate a leak.
Venture Outside (Safely!): Examining Your Roof
If the weather allows, head outside to inspect your roof. Remember, safety is paramount:
- Visual Inspection: Look for damaged or missing shingles, cracked flashing around chimneys or vents, and debris buildup in valleys.
- Zoom In: Use binoculars to get a closer look at higher areas without having to climb on the roof.
- Stay Grounded: Avoid walking on wet or damaged roofs; it’s simply not worth the risk!
Water Test: When You Need to Play Detective
If your visual inspections haven’t turned up the culprit, it’s time to bring out the garden hose:
- Teamwork Makes the Dream Work: Enlist a helper—one person on the roof with the hose, one inside to watch for leaks.
- Low and Slow: Start by soaking the suspected areas of the roof with the hose, working your way up methodically.
- Patience is Key: It may take a few minutes for the water to penetrate and reveal the leak.
Know When to Call in the Cavalry
Sometimes, it’s best to leave it to the professionals:
- Safety First: If you’re uncomfortable on a ladder or roof, or if the roof is steep or complex, call a pro.
- Unsolved Mystery: If you’ve exhausted your DIY efforts and still can’t find the leak, it’s time for expert help.
- Major Damage: If the leak is extensive or caused by structural issues, a professional roofer is essential.

What To Do If Your Toilet is Overflowing
When faced with a toilet overflowing with poop, quick and efficient action is crucial.
Here’s a prioritized list of steps to take immediately:
- Stop the Flow of Water
- Close the toilet flapper inside the tank to stop water from entering the bowl.
- Turn off the water supply valve behind the toilet if the water continues.
- Plunge the Toilet
- Use a flanged plunger to try and dislodge the blockage. Ensure a tight seal and plunge with forceful, direct movements.
- Shut Off Electricity in the Affected Area (if necessary)
- If the water threatens to reach electrical outlets or appliances, immediately shut off Electricity to the area at the breaker box.
- Protect Yourself
- Wear gloves, good eye protection, and a mask to avoid direct contact with contaminated materials.
- Contain the Spill
- Use towels or rags to contain the water, starting at the perimeter and moving inward.
- Clean and Disinfect
- Once the overflow stops, clean up the mess with a mop or wet vacuum. Then, thoroughly disinfect the area with bleach or an EPA-approved disinfectant.
- Ventilate the Area
- Open the windows or use fans to help dry the area quickly and reduce odors.
- Call for Professional Help if Needed
- If the blockage can’t be resolved or if there’s significant water damage, contact a professional plumber or water damage restoration service.
What to Know After a Toilet Overflow
After addressing the immediate crisis, it’s essential to understand the potential risks and steps for thorough recovery and prevention:
Health and Safety
- Pathogen Risk: Fecal matter increases the risk of exposure to harmful bacteria and viruses. Proper disinfection is crucial to eliminate health hazards.
- Mold and Mildew: Moist environments can lead to mold growth, posing health risks, especially to those with respiratory conditions. Monitor the area for signs of mold in the following weeks.
Structural Integrity
- Assess for Water Damage: Dirty water can seep into flooring and walls, which can cause structural damage over time. Inspect the area for any signs of deterioration and repair as necessary.
Prevention
- Regular Maintenance: Prevent future overflows by regularly cleaning your toilet and being mindful of what gets flushed. Only human waste and toilet paper should go down the drain.
- Plumbing Inspections: Inspect your plumbing system periodically to identify and fix any potential issues before they lead to another overflow.
Knowing When to Call Professionals
- Plumbing Issues: Persistent clogs or overflows may indicate deeper plumbing issues that require professional intervention.
- Water Damage Restoration: Significant overflows can cause extensive water damage, necessitating professional restoration services to prevent mold and ensure the area is properly dried and restored.
Wet Carpet Smell Health Risks
The discomfort of stepping onto a damp carpet is a sensation many of us are familiar with, yet the implications of this seemingly minor issue extend far beyond mere inconvenience. Wet carpets pose significant health risks, harboring mold, bacteria, and allergens that can seriously affect indoor air quality and personal health. This guide delves into the dangers lurking beneath wet carpets, offering insights into prevention, identification, and resolution strategies to protect your living environment. If you need to dry your wet carpet, we have an article on that, and also an article on how to diagnose a leak.
How Wet Carpets Can Make You Sick
The moisture in wet carpets creates an ideal breeding ground for harmful organisms:
- Mold Spores: Mold exposure can lead to respiratory issues, severe allergic reactions, and, in extreme cases, toxic reactions.
- Bacteria: Pathogens like E. coli and Salmonella can thrive in damp environments, causing serious health problems.
- Foul Odors: Musty smells from damp carpets can trigger headaches, dizziness, and nausea.
Common Causes of Wet Carpets
Wet carpets can result from various sources, including natural events, appliance leaks, and inadequate carpet cleaning methods. Preventative measures include regular inspections, utilizing entrance mats, and selecting proper carpet cleaning services.
What to Do If Your Carpet Gets Soaked
Immediate action is crucial. Start by blotting up excess water, then use fans and dehumidifiers to aid drying. Professional carpet cleaning is recommended for extensive water damage to ensure thorough drying and sanitation.
Deepening the Discussion
- Vulnerable Populations: Children, the elderly, and especially individuals with pre-existing conditions are particularly susceptible to health issues caused by mold and bacteria in wet carpets.
- Humidity’s Role: High indoor humidity can exacerbate carpet dampness and mold growth. Maintaining indoor humidity levels between 30-50% is crucial for prevention.
- Identifying Mold Types: Understanding the specific type of mold can help assess the risk level and determine the appropriate remediation strategy.
- Long-term Health Effects: Continuous exposure to mold and damp environments can lead to chronic health conditions, underscoring the importance of prompt action.
- Insurance Considerations: Familiarizing yourself with the details of your homeowners’ insurance policy regarding water damage and mold remediation can provide financial relief in addressing these issues.
- The Importance of Professional Assessment: Professional evaluations can uncover hidden damage and mold growth, offering effective solutions not immediately apparent to homeowners.
- DIY Cleaning Risks: Attempting to clean water-damaged carpets without proper techniques can lead to further damage and health risks, especially if the mold isn’t removed. Professional services ensure safety and effectiveness.
- Advancements in Carpet Care: Explore the latest in carpet cleaning and maintenance technologies, including eco-friendly and low-moisture options, to enhance indoor air quality and extend the life of your carpets.
Conclusion
The risks associated with wet carpets extend far beyond a simple nuisance; they pose serious health hazards that require immediate and effective action. By understanding the causes, recognizing the risks, and responding appropriately, you can ensure your home remains a safe, healthy environment. For significant water damage, consulting with professional carpet cleaning services is crucial to properly address and mitigate these risks. Stay informed, stay prepared, and ensure your home remains a sanctuary for health and comfort.