General
Water Damage Mitigation
When it comes to water damage in Meridian, you need the best in the business, and lucky for you, there are some fantastic water restoration companies in your area.
These pros know the ins and outs of water damage like the back of their hand. They’ve got the experience, the gear, and the skills to handle any water disaster, big or small. Whether it’s a burst pipe, a flooded basement, or some other watery nightmare, they’ve got you covered.
And you know what’s even better? They move fast! Time is of the essence when it comes to water damage. They’ll be on the scene pronto, tackling that water and preventing further damage like the superheroes they are.
Water Damage Meridian ID
Water damage restoration is an absolute game-changer when dealing with those pesky water issues. If you’re facing a watery nightmare, don’t fret! I’ve got the inside scoop on how the pros handle it.
Picture this: your place is hit by water damage, and you’re scratching your head, unsure where to begin. That’s when water damage restoration swoops in like a superhero! We’re talking about the whole package here – water remediation, removal, extraction, mitigation, and even flood cleanup.
You might think you can handle it, but water damage is a different beast. It’s like trying to tame a wild lion with a feather duster! DIY won’t cut it, pal. Let the experts with their super cool gear handle the mess.
Oh, and speaking of gear, these guys have some high-tech, severe toys! We’re talking about fancy dehumidifiers, powerful air movers, and all that jazz. You won’t find those babies in your regular toolbox, that’s for sure.
And hey, remember, water damage isn’t just about a little wet carpet. It can mess with your home’s foundation and structure, and that’s serious business. You don’t want to mess around with that stuff. Let the pros assess and fix it properly.
But here’s a pro tip: before they swoop in, take some snaps of the damage. Photos and videos, my friend! It’s like your golden ticket for dealing with the insurance folks. They’ll appreciate the evidence, trust me.
One more thing: drying is more complex than waving a towel around. It’s like a science experiment with all the right calculations and equipment. You want to avoid mold growth like the plague; these experts know how to do it right.
10 Essential Things You Should Know About Water Damage Restoration in Meridian ID
Please don’t take chances with your home; call in the experts and let them work their magic!
Gather ’round because I’m about to drop some wisdom bombs about water damage restoration that you need to know! So listen up and take notes:
- Speed is the Name of the Game: When it comes to water damage, time is your enemy. Act fast! The longer water sits, the more damage it does. So don’t procrastinate; call in the pros ASAP!
- DIY Dilemmas: I know you’re handy, but water damage is a beast. Don’t try to tackle it alone; you’ll likely make things worse. Please leave it to the pros who know the ins and outs.
- Hidden Dangers Lurk: Water can sneak into the tiniest cracks, causing hidden damage. Pros have the eye to spot those sneaky spots and deal with them before they turn into big issues.
- Contamination Can Be Nasty: If floodwater invades your home, it’s not just water you’re dealing with – it’s contaminated water. Yuck! Trust me, you want experts to handle that mess.
- Mold is a Nightmare: Water damage and mold go hand in hand. Mold can grow in as little as 24 hours after water intrusion. Not only that, but it can make you sick! The pros know how to stop it in its tracks and prevent a mold nightmare.
- Insurance Matters: Don’t worry about navigating the insurance maze alone. The experts have dealt with insurance companies countless times and can help you get the coverage you deserve.
- Advanced Tech is a Must: Those pros have high-tech gadgets that make water damage disappear faster than Houdini. You won’t find those tools in your toolbox!
- Restoration is an Art: It’s not just about cleaning up water; it’s about restoring your home to its former glory. The pros are artists when bringing your place back to life.
- Cost-Effective in the Long Run: Yeah, hiring pros may seem like an expense, but trust me, it’s an investment. Their expertise saves you from costly repairs down the road.
- Peace of Mind: When the pros take over, you can finally breathe easy. They handle the entire process, and you get the peace of mind of knowing your home is in good hands.
Water Restoration Process Meridian ID
Now, take your time with the terms; they’re just different names for the same superhero service. The key is understanding what they do and how they save the day.
First off, water damage restoration means a complete water cleanup from start to finish. The pros care for everything, from removing the water and drying up your belongings to putting everything back in its rightful place.
Water removal is like magic; it banishes water from your space with specialized gear like truck mounts, top-notch dehumidifiers, and powerful air movers. They make that water disappear faster than a magician’s trick!
Water extraction? It’s the same trick, my friend! Sometimes, they use that term when dealing with water that is invaded from outside. And boy, they know how to handle that situation like nobody’s business.
Now, water mitigation – this one is crucial. It’s all about preventing and reversing damage caused by water. Think of it as the ultimate solution to save your precious property from destruction.
And when the going gets tough and floodwater barges in, you’ve got flood cleanup to the rescue! When it comes to that contaminated water invading your space, leave it to the experts. They’ll sanitize, dry, and make your place shine again!
So, let me level with you – water damage is no joke. You might be tempted to DIY, but trust me, the pros shine here! They’ve got the knowledge, the tools, and the skills to handle any water disaster like pros.
Wrapping Up Water Damage Meridian ID
Don’t waste another minute. Make the call, get that professional opinion, and let the water damage restoration heroes save the day! You’ll thank me later when you see your place restored to its former glory. So pick up that phone and make the smart move – you won’t regret it.
Smoke Damage: Causes, Effects, and Restoration
Smoke damage is often an unfortunate consequence of fires, kitchen mishaps, or even long-term candle or fireplace use.
When something burns, tiny smoke particles and chemicals are released into the air, attaching themselves to surfaces throughout your home. Even if the fire is small or contained, the smoke can spread far beyond the immediate area, seeping into furniture, fabrics, and the very structure of your home. It can affect everything from your walls to your health, and it’s not something that should be ignored. Left untreated, smoke damage can lead to structural problems in your home and long-lasting respiratory issues.
Common Causes of Smoke Damage
There are several ways that smoke damage can occur, even if a large fire isn’t involved:
- House Fires: Whether big or small, house fires create large amounts of smoke that spread throughout the home. The materials that burn (wood, plastics, fabric) influence the type of smoke and how difficult it is to clean.
- Kitchen Fires: Protein-rich foods like meat can cause kitchen fires that leave invisible smoke damage but produce strong, lingering odors and yellowish stains.
- Electrical Fires: When wires or electrical components overheat and catch fire, the smoke produced is often thick, leaving behind sticky soot and a potent odor.
- Candles and Fireplaces: Even something as small as a candle or improperly maintained fireplace can cause gradual smoke damage over time, especially if ventilation is poor.
Types of Smoke Damage
Not all smoke is the same. Different types of fires create different types of smoke, and each type requires a specific approach to cleaning:
- Dry Smoke: Produced by fast-burning fires at high temperatures. Dry smoke leaves behind a powdery residue that is easier to clean but spreads widely throughout the home.
- Wet Smoke: Comes from slow-burning, low-heat fires. Wet smoke creates thick, sticky residue that is much harder to clean and clings to surfaces like walls and furniture.
- Protein Smoke: This is common in kitchen fires and often leaves an invisible film over surfaces, with an intense, unpleasant odor that is difficult to eliminate.
- Fuel Oil Smoke: When furnaces malfunction, they can release heavy, greasy soot that’s extremely hard to clean and creates a strong, chemical odor.
Short-Term and Long-Term Effects of Smoke Damage
Short-Term Effects:
- Discoloration: Smoke can quickly stain walls, ceilings, and fabrics, turning them yellow or black.
- Odors: Smoke leaves behind strong odors that permeate structures and can be difficult to remove without proper cleaning techniques.
- Health Irritation: Even short-term exposure to smoke particles can cause coughing, respiratory issues, throat irritation, and other health issues.
Long-Term Effects:
- Permanent Staining: If smoke damage isn’t addressed promptly, the discoloration can become permanent, requiring expensive repairs or replacements.
- Structural Damage: Over time, smoke particles can penetrate deep into surfaces, causing them to weaken or deteriorate.
- Chronic Health Issues: Prolonged exposure to smoke residue can worsen asthma, allergies, and create other respiratory conditions.
Health Risks of Smoke Damage
The damage smoke does to your home is just the beginning—smoke damage also poses significant health risks, particularly when it lingers in the air. Even after a fire is put out, smoke particles, chemicals, and toxins can remain in your home, contaminating the air.
- Respiratory Problems: Breathing in smoke particles can lead to coughing, shortness of breath issues, and exacerbation of asthma and allergies.
- Toxic Chemicals: Smoke contains volatile organic compounds (VOCs), which can lead to long-term health effects, especially for children, the elderly, and pets.
- Impact on Vulnerable Individuals: People with preexisting respiratory conditions, young children, and elderly individuals are especially at risk from smoke damage exposure.
DIY Smoke Damage Cleanup Tips
If you’re dealing with mild smoke damage, there are some steps you can take on your own before calling in professionals. Here are a few tips to help you get started:
- Immediate Steps: First, ventilate the area as much as possible. Open windows and use fans to circulate fresh air. Wear protective masks to avoid inhaling harmful particles.
- Cleaning Surfaces: Use dry cleaning sponges to wipe walls and ceilings, as these are designed to lift soot without pushing it deeper into the material. For fabrics and upholstery, vacuum with a HEPA filter to remove particles.
- Dealing with Odors: Baking soda and vinegar are your best friends when it comes to neutralizing smoke odors. Leave open boxes of baking soda around the affected areas, and use vinegar to wipe down hard surfaces.
- What to Avoid: Never use water to clean smoke damage on porous surfaces (like drywall) as it can cause the soot to smear, making it harder to remove.
When to Call a Professional
While some smoke damage may be manageable on your own, there are certain signs that indicate it’s time to bring in the experts:
- Persistent Odors: If you can’t get rid of the smoke smell after several attempts, professionals can use tools like ozone treatments to eliminate it.
- Widespread Soot Coverage: If soot has spread throughout your home, especially in hard-to-reach areas, professional cleaners have specialized equipment to handle it.
- Structural Damage: If walls or ceilings are visibly damaged or discolored beyond what basic cleaning can fix, restoration experts are needed to repair or replace those materials.
Professionals use industrial-strength cleaning agents and deodorizing equipment like thermal fogging and ozone treatments to fully remove both visible damage and hidden particles.
Smoke Damage Restoration Process
The restoration process for smoke damage involves several key steps that professionals will take to ensure your home is safe and clean:
- Assessment and Inspection: A thorough inspection is done to assess the damage and identify which type of smoke is present.
- Cleaning and Odor Removal: Specialized cleaners and deodorizing agents are used to eliminate both soot and lingering odors. This may involve cleaning air ducts, carpets, and upholstery.
- Repairs and Restoration: For severe cases, damaged areas of your home (such as drywall or insulation) may need to be replaced to fully restore the space.
Smoke Damage Prevention Tips
- Regular Maintenance: Ensure that smoke detectors are working and that fireplaces, chimneys, and electrical systems are regularly inspected.
- Safe Cooking Practices: Stay near open flames while cooking and keep a fire extinguisher nearby to quickly handle small fires.
- Proper Ventilation: If you regularly use candles or fireplaces, make sure your home is properly ventilated to prevent long-term smoke buildup.
Roof Storm Damage
Storms can wreak havoc on your home, with the roof being one of the most vulnerable areas. Understanding how to spot roof storm damage, prevent it where possible, and take the right steps after a storm can help homeowners protect their biggest investment—their home.
In this post, we’ll explore the different types of storm damage, how to identify the warning signs, preventive measures to take, and what to do when your roof has been hit by severe weather.
Common Types of Roof Storm Damage
Storms come in many forms, and so does the damage they cause. Here are the most common types of roof damage you might face after severe weather:
Wind Damage
- High winds will rip shingles off a roof or loosen them, exposing your roof to further damage. Wind can also cause debris, like tree branches, to hit your roof, potentially cracking shingles or puncturing the surface. Even if shingles are still in place, wind can weaken them over time, making future storms more hazardous.
Hail Damage
- Hailstones may look small, but they can cause substantial damage to your roof, especially if they’re large or accompanied by strong winds. Hail can dent metal roofs, crack tiles, or bruise asphalt shingles, compromising their ability to protect your home from water infiltration.
Water Damage
- Heavy rain is another major threat. If water pools on your roof because of poor drainage or leaks through small cracks, it can cause extensive damage to the roof’s structure and the home beneath it. Water damage often leads to mold, rot, and weakened roofing materials, making repairs not just necessary but urgent.
Debris Damage
- Storms can send all sorts of debris—tree branches, leaves, and even small objects—flying onto your roof. Large debris can puncture or tear through roofing materials, while smaller debris might clog gutters, leading to water pooling and leaks.
How to Spot Roof Storm Damage
Identifying storm damage quickly can save you from more costly repairs later. Here’s what homeowners should be on the lookout for, both outside and inside their homes:
- Exterior Signs:
- Missing or damaged shingles.
- Dents or impact marks from hail or debris.
- Strong winds often cause lifted or curling shingles.
- Damaged roof flashing or vents.
- Fallen debris on or around the roof.
- Gutters that are loose or detached.
- Interior Signs:
- Water stains or discoloration on ceilings and walls.
- Drips or leaks inside the home, particularly after heavy rain.
- A musty smell or visible mold can indicate water intrusion.
- Peeling paint or bubbling wallpaper, both of which are signs of moisture build-up.
If you spot any of these warning signs, it’s time to take action and get a professional inspection.
Preventing Roof Storm Damage
While you can’t stop a storm from happening, you can take steps to reduce the risk of damage to your roof. Here are a few ways to protect your roof from the elements:
Regular Roof Inspections
- Having your roof inspected at least once a year or after major storms is a good idea. A professional roofer can spot issues that might not be visible from the ground, such as small leaks or weakened shingles that could become a bigger problem later on.
Tree Maintenance
- Trim branches that hang over your roof. Strong winds can cause branches to fall, damage your shingles, or puncture the roof. Keeping trees pruned reduces the risk of debris falling onto your roof during a storm.
Gutter Cleaning
- Make sure gutters are clear of leaves, twigs, and other debris. Clogged gutters can back up, overflow, and seep into the roofline, and walls. Regularly cleaning your gutters ensures proper drainage and reduces the risk of water-related damage.
- Roof Reinforcements
- For homes in areas prone to strong storms, consider reinforcing your roof with impact-resistant shingles or storm straps that help secure the roof to the structure of your home. These upgrades can provide extra protection against wind and debris.
What to Do After a Storm: A Homeowner’s Guide
Check for Damage Safely
- Before inspecting your roof, make sure the storm has passed and it’s safe to go outside. Start by doing a visual inspection from the ground—look for missing shingles, debris, or other visible signs of damage. Avoid climbing onto the roof unless you’re trained, as it may be unsafe after a storm.
Document Everything
- Take excellent photos and videos of visible damage outside and inside your home. Documenting the damage will be essential when filing an insurance claim and discussing repairs with contractors.
Call a Professional Roofer
- Even if you don’t see obvious signs of damage, it’s wise to call a professional roofer for a thorough inspection. They can identify hidden damage and recommend the necessary repairs before small issues become larger, more expensive problems.
Contact Your Insurance Company
- Contact your homeowner’s insurance company if the storm has caused significant damage. Provide them with your documentation and ask for guidance on the claims process. They may send an adjuster to inspect your home and verify the damage.
Make Temporary Repairs
If there’s an active leak or significant damage, you may need to make temporary repairs. Keep receipts for any temporary fixes, as your insurance may reimburse them.
Choosing a Trustworthy Roofing Contractor
Verify Licensing and Insurance
- Always choose a contractor who is licensed, bonded, and insured. This will help protect you if something goes wrong during the repair process and ensures the roofer meets local standards.
Read Reviews and Get References
- Check reviews and ask the contractor for references from previous customers. A reputable roofer will have a good history of satisfied clients and successful jobs.
Get Multiple Quotes
- Contact at least three different contractors to compare pricing, scope of work, and materials used. This will help you find the best deal without compromising on quality.
- Avoid Storm Chasers
- After a storm, be wary of door-to-door contractors who offer quick, cheap repairs. These “storm chasers” may not be licensed or experienced and could leave you with subpar work that costs more to fix later.
Sudden Loss of Water Pressure In Whole House
Experiencing a sudden loss of water pressure in your entire house can be inconvenient and concerning. When the water flow slows down to a trickle or stops altogether, it affects daily activities like showering, washing dishes, and laundry. In this guide, we will explore the common causes behind a sudden loss of water pressure, provide troubleshooting tips, and help you identify potential solutions.
1. Identify the Problem’s Scope:
- Check multiple faucets/fixtures: Note if low pressure affects the entire house or specific areas.
- Recent plumbing work? If yes, suspect a disrupted/closed valve.
2. Eliminate the Simplest Causes:
- Main water shut-off valve: Located near your water meter, ensure it’s fully open.
- Individual fixture valves: Check the valves under sinks/toilets to ensure they’re open.
- Clogged aerators/showerheads: Unscrew, soak in vinegar, then reattach.
- Water heater shut-off valve: (If only hot water is affected) Ensure it’s fully open.
3. If the Problem Persists, Dig Deeper:
- Check for leaks: Both inside (under sinks, basement) and outside (hose bibs, sprinklers).
- Well system (if applicable): Check pump functionality and water levels.
- Municipal water supply: Call your provider and inquire about outages/issues.
4. When to Call a Plumber:
- No identifiable cause: After the above checks, if the problem remains.
- Pressure-reducing valve (PRV): If you have one, suspect it’s malfunctioning.
- Main water line issues: Any suspicion of damage/blockage in the main line.
- Lack of confidence: If DIY isn’t your forte, calling a pro is safer.

Causes of Low Water Pressure
Here are some of the most common culprits behind weak water flow:
Plumbing Issues:
- Clogged pipes: Mineral deposits, debris, or corrosion can build up within your pipes over time, restricting the flow of water and causing low pressure.
- Leaky or damaged pipes: Leaks in your plumbing system allow water to escape before reaching its intended destination, leading to a noticeable drop in pressure.
- Corroded pipes: Older homes with galvanized steel pipes are susceptible to corrosion, which can significantly reduce the pipes’ diameter and restrict water flow.
- Poor plumbing design: Sometimes, the problem lies in the design of the plumbing system itself, with undersized pipes or inefficient layouts limiting water pressure from the outset.
Water Source Issues:
- Well, problems: If your home relies on a well, low pressure can stem from issues with the pump, low water levels in the well, or a clogged well screen.
- Municipal supply problems: Occasionally, the issue might lie outside your home, with problems like main breaks or maintenance work affecting the municipal water supply and causing low pressure in your area.
Other Factors:
- Closed or partially closed valves: Check the main shut-off valve near your water meter, as well as individual fixture valves and the water heater shut-off valve, to ensure they’re fully open.
- Malfunctioning pressure regulator: If you have a pressure-reducing valve installed, it might be faulty or set too low, limiting water pressure throughout your home.
- High demand: Simultaneous use of multiple fixtures can strain the system, leading to temporary low pressure until the demand decreases.
- Clogged fixtures: Mineral deposits can accumulate in aerators and showerheads, restricting flow and reducing pressure at those specific points.
How To Stop Groundwater Seepage
Welcome to our guide on how to stop groundwater seepage and protect your property from water damage. Groundwater seepage can be a persistent issue affecting buildings, but with the right strategies, you can effectively mitigate and prevent this problem. This post discusses practical solutions to address groundwater seepage, ensuring your property’s long-term integrity and dryness.
Understanding Groundwater Seepage
Groundwater seepage is when water from the surrounding soil infiltrates your building through the foundation or basement walls. It occurs due to various factors, including high water tables, heavy rainfall, inadequate drainage systems, or foundation cracks. By understanding the nature of groundwater seepage, you can make informed decisions on how to combat and prevent its occurrence effectively.
How to Stop Groundwater Seepage
1. Install a Comprehensive Exterior Drainage System:
A well-designed exterior drainage system is crucial for redirecting water away from your foundation. This system typically includes a combination of components such as French drains, downspout extensions, and slope correction. French drains consist of perforated pipes installed around the perimeter of the foundation, which collect and redirect water to a safe location. Downspout extensions ensure that water from the roof’s gutters is discharged away from the building, preventing pooling near the foundation. Additionally, correcting the slope around your property directs water to flow away from the foundation, reducing the risk of groundwater seepage.
2. Apply Exterior Waterproofing:
Exterior waterproofing involves creating a barrier to prevent water from infiltrating the foundation walls. This process typically includes excavating the soil around the foundation to expose the walls. Once exposed, a waterproof membrane or coating is applied to seal the foundation and provide a protective barrier against water penetration. By effectively sealing the exterior foundation walls, you can significantly reduce the chances of groundwater seepage.
3. Improve Grading and Landscaping:
Proper grading and landscaping play a crucial role in preventing water accumulation near the foundation. Ensure that the ground slopes away from your property, directing water to flow away from the building rather than toward it. This can be achieved by regrading the landscape, creating swales or berms, and installing appropriate drainage systems. Additionally, consider installing gutter systems that collect rainwater and direct it away from the foundation. By managing surface water effectively, you can minimize the risk of groundwater seepage.
4. Seal Foundation Cracks and Openings:
Identifying and sealing foundation cracks and openings is essential in preventing groundwater seepage. Conduct a thorough inspection of your foundation walls, both on the interior and exterior, to identify any visible cracks or gaps. Use high-quality sealants or epoxy specifically designed for foundation repair to fill these openings. By sealing foundation cracks, you create a solid barrier against water intrusion, reducing the chances of groundwater seepage.
5. Install Interior Drainage Systems:
In cases where exterior solutions may be challenging or insufficient, installing an interior drainage system can effectively manage groundwater seepage. This involves creating a trench along the perimeter of the basement or crawl space and installing a drain pipe connected to a sump pump. The interior drainage system collects water that seeps through the floor or walls and directs it to the sump pump for removal. By effectively managing interior water intrusion, you can mitigate the risks associated with groundwater seepage.
Water Seeping Through Floor After Rain
One crucial factor to consider is the water table. The water table refers to the level at which the ground becomes saturated with water. The risk of groundwater seepage is elevated in areas with a high water table. When the water table rises, it exerts pressure on the foundation and basement walls, leading to water infiltration. This can result in dampness, leaks, and potential damage to the structural integrity of the building.
Another aspect to be aware of is the role of precipitation. Heavy rainfall can significantly impact groundwater levels and increase the likelihood of seepage. When the soil becomes saturated with rainwater, excess water can find its way into your property through cracks, gaps, or porous materials. It’s important to monitor the weather conditions, especially during periods of intense rainfall, as they can exacerbate groundwater seepage issues.
Furthermore, poor drainage systems can contribute to groundwater seepage problems. If your property lacks adequate external drainage or has improper grading, it can lead to water pooling near the foundation. This accumulated water can exert hydrostatic pressure, pushing water through any available openings into your building. Addressing and improving drainage systems is crucial to minimizing the risk of groundwater seepage.
Lastly, foundation cracks and defects are common entry points for groundwater. Over time, foundation walls can develop cracks due to settlement, shifting soil, or temperature fluctuations. These cracks create pathways for water to seep into your property. Identifying and repairing foundation cracks is essential in preventing groundwater infiltration and minimizing the potential for water damage.
The Bottom Line
Groundwater seepage poses a serious threat to the integrity of your property. However, armed with knowledge and the right strategies, you can create a dry and secure environment within your building. Remember, the prevention and mitigation of groundwater seepage require proactive measures. Regular inspections, maintenance, and prompt action are key to maintaining a dry and structurally sound property.
We hope this guide has equipped you with the knowledge and confidence to address groundwater seepage effectively. By taking proactive steps to protect your property, you are safeguarding your investment, ensuring the comfort of occupants, and preserving the longevity of your building.
If you have any further questions or require professional assistance, don’t hesitate to reach out to experts in the field. Stay proactive, stay informed, and enjoy a water-free environment in your property for years to come!
Water Coming Through Floor
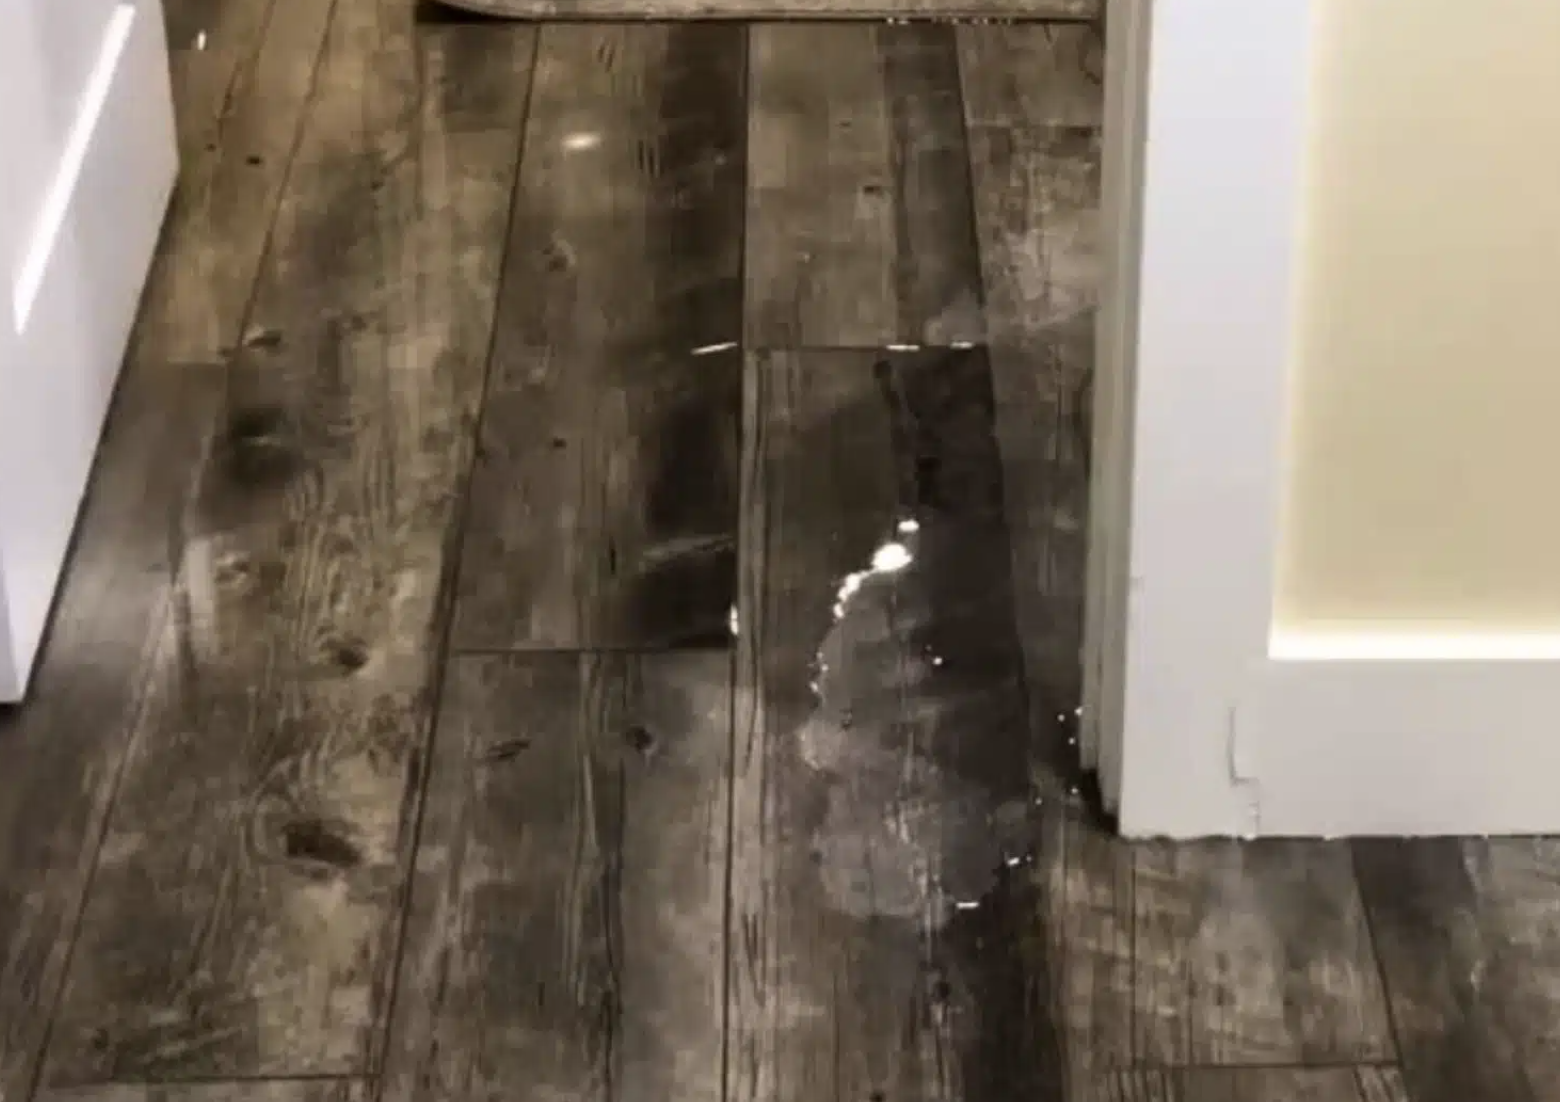
Water seeping through your floors can be a homeowner’s worst nightmare — especially when you can’t tell where it’s coming from or how to stop it. Left unchecked, water intrusion leads to structural damage, mold growth, and repairs that cost thousands.
The good news: most causes are fixable if you act fast.
Here’s what to do right now, how to find the source, and the exact tools and fixes that work.
🚨 Step 1: Damage Control (Do This Right Now)
Before you diagnose anything, limit the damage. Every minute counts.
1. Shut Off the Main Water Supply
If this is a burst pipe or appliance leak, turning off your main valve could stop it instantly. Your shutoff valve is usually on the basement wall, in a crawl space, near the water heater, or near the street meter. Turn the valve clockwise to close it.
Not sure which valve is yours? A water shutoff valve wrench makes it easy to turn stubborn or recessed valves — worth keeping in your toolkit.
👉 Get a water shutoff valve wrench on Amazon
2. Cut Power to the Wet Area
Water and electricity are a deadly combination. Flip the breaker to any room where water is near outlets, appliances, or extension cords. Do not step into standing water if the power is still on.
3. Remove Standing Water Immediately
The faster you dry things out, the less damage you’ll face. Mold can start growing in as little as 24–48 hours.
Your best tool here is a wet/dry shop vac — it removes gallons of water fast and handles debris that would clog a regular vacuum. Towels, mops, and fans help too, but a shop vac does the heavy lifting.
👉 See top-rated wet/dry shop vacs on Amazon
Once you’ve removed the standing water, set up a high-velocity air mover fan to dry out floors, walls, and baseboards. Regular box fans work in a pinch, but dedicated air movers dry 3–4x faster and help prevent mold.
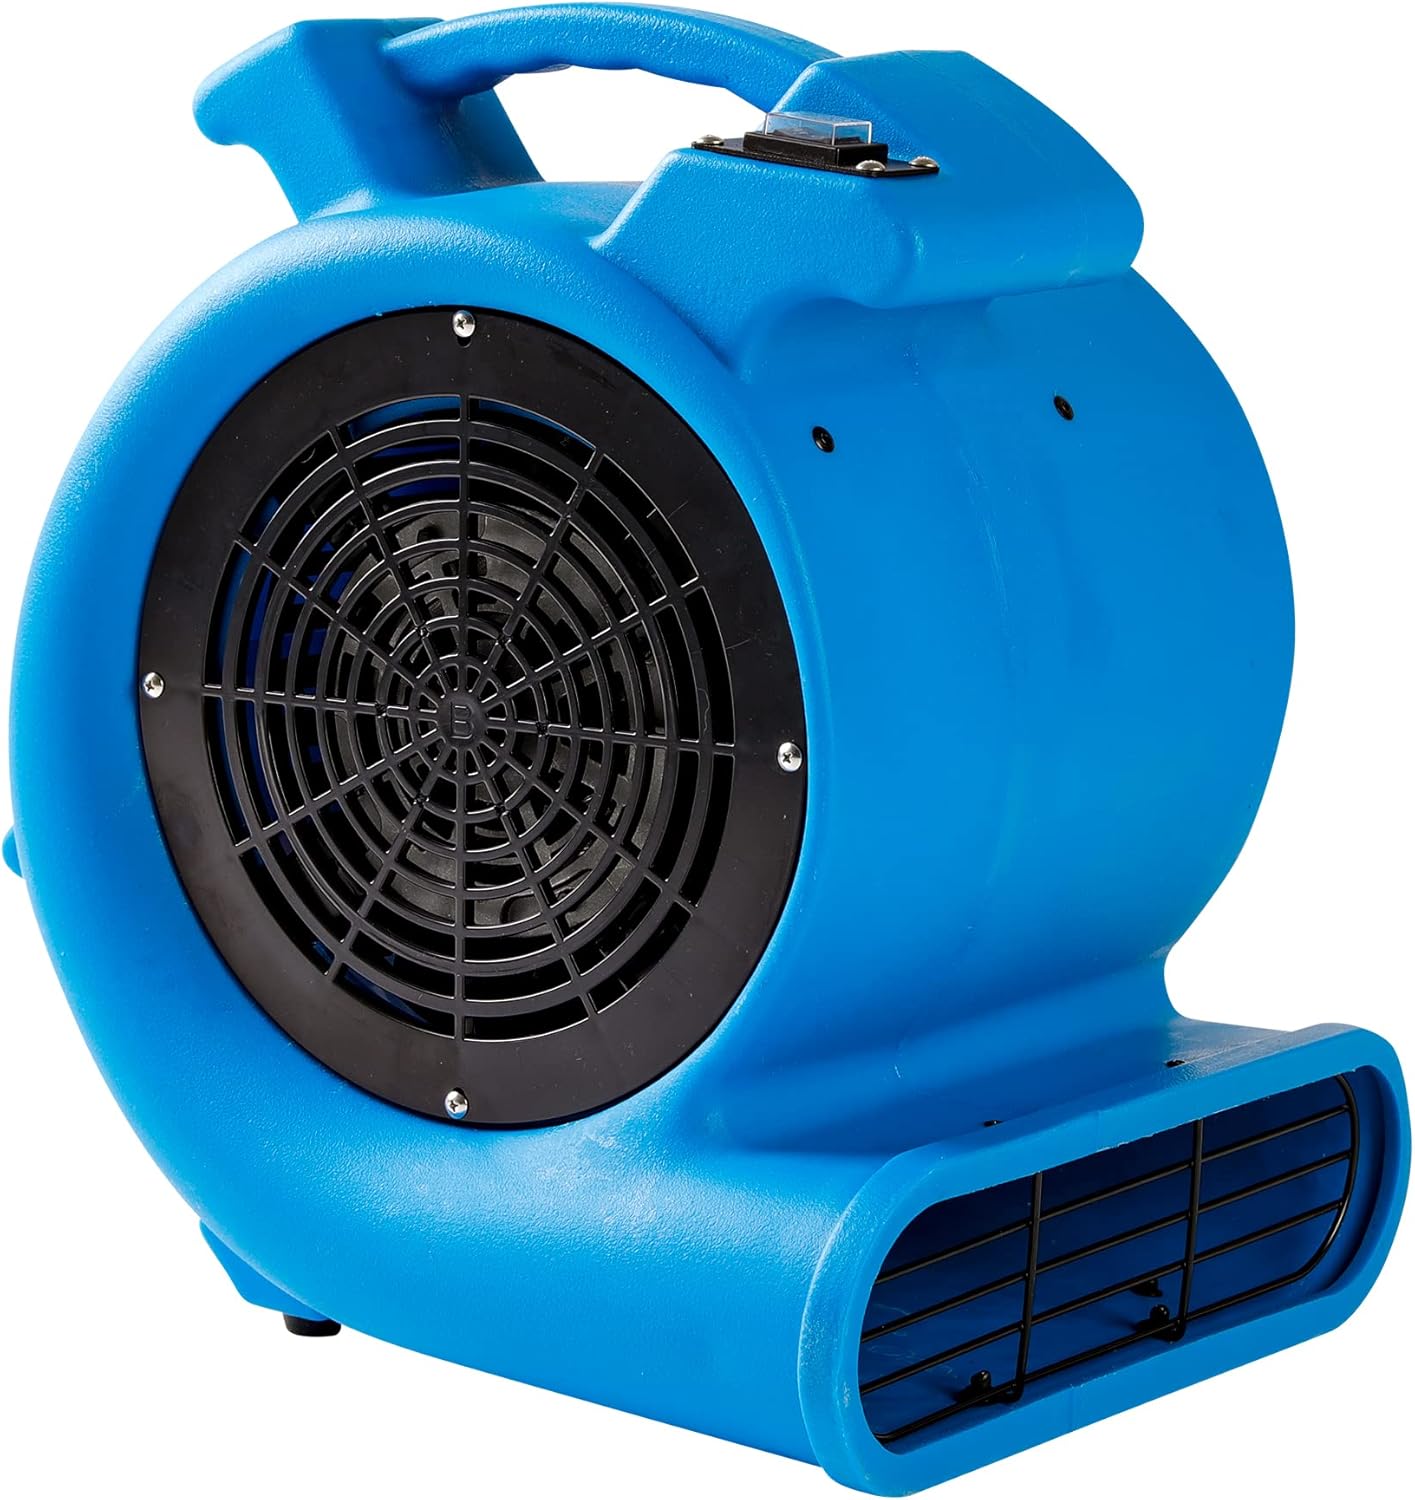
👉 See air mover fans on Amazon
4. Move Furniture and Valuables
Water wicks upward quickly. Get rugs, couches, boxes, and wood furniture off wet floors and onto dry ground. Even items that look dry on top may be absorbing water from below.
5. Document Everything for Insurance
Before you clean up too much, grab your phone and photograph where water entered, all damaged items, and wet walls or flooring. This documentation makes insurance claims significantly easier.
Now that the immediate crisis is under control, let’s figure out why this is happening.
Why Is Water Coming Through My Floor?
Here are the six most common causes. Match the symptoms to your situation to narrow it down fast.
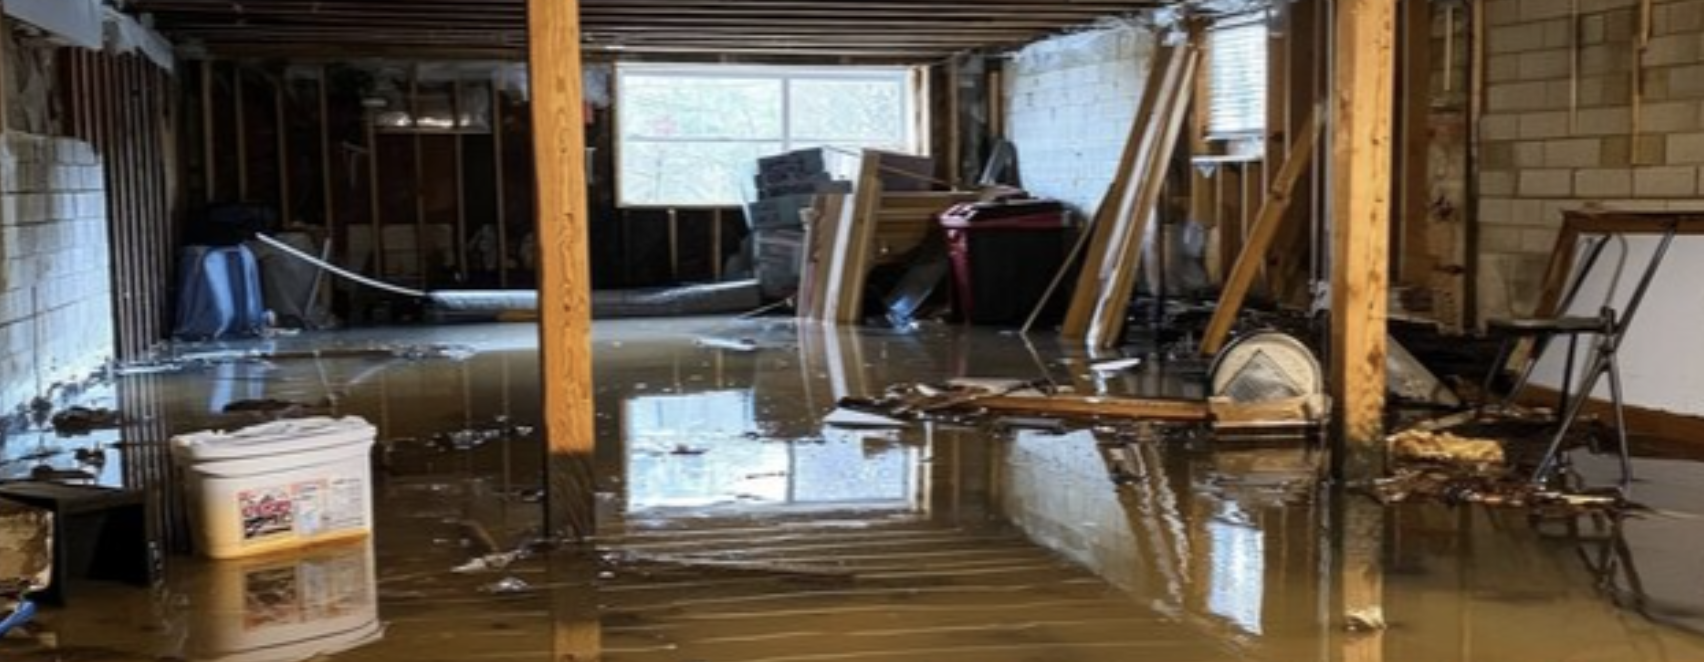
1. Heavy Rain or Groundwater Pressure (Most Common in Basements)
After heavy storms, water accumulates around your foundation and pushes inward through tiny cracks — this is called hydrostatic pressure.
Signs: water appears only after rain, basement floor feels damp or “sweaty,” water seeps along edges or cracks, sump pump is struggling or not running.
The fix: Improve exterior drainage first (see fix section below), then address waterproofing and sump pump solutions.
2. Burst or Leaking Pipe Under the Slab
If water appears with no rain, suspect plumbing.
Signs: constant water that won’t stop, warm spots on the floor, higher-than-normal water bill, water meter still spinning when all fixtures are off.
The fix: Call a plumber for a pressure test. This is high urgency — a slab leak can waste hundreds of gallons a day and undermine your foundation.
Click here to stop water seepage
3. Foundation Cracks
Concrete naturally cracks over time due to settling, temperature changes, and soil movement.
Signs: visible cracks in walls or floor, damp seepage lines along cracks, worse during storms.
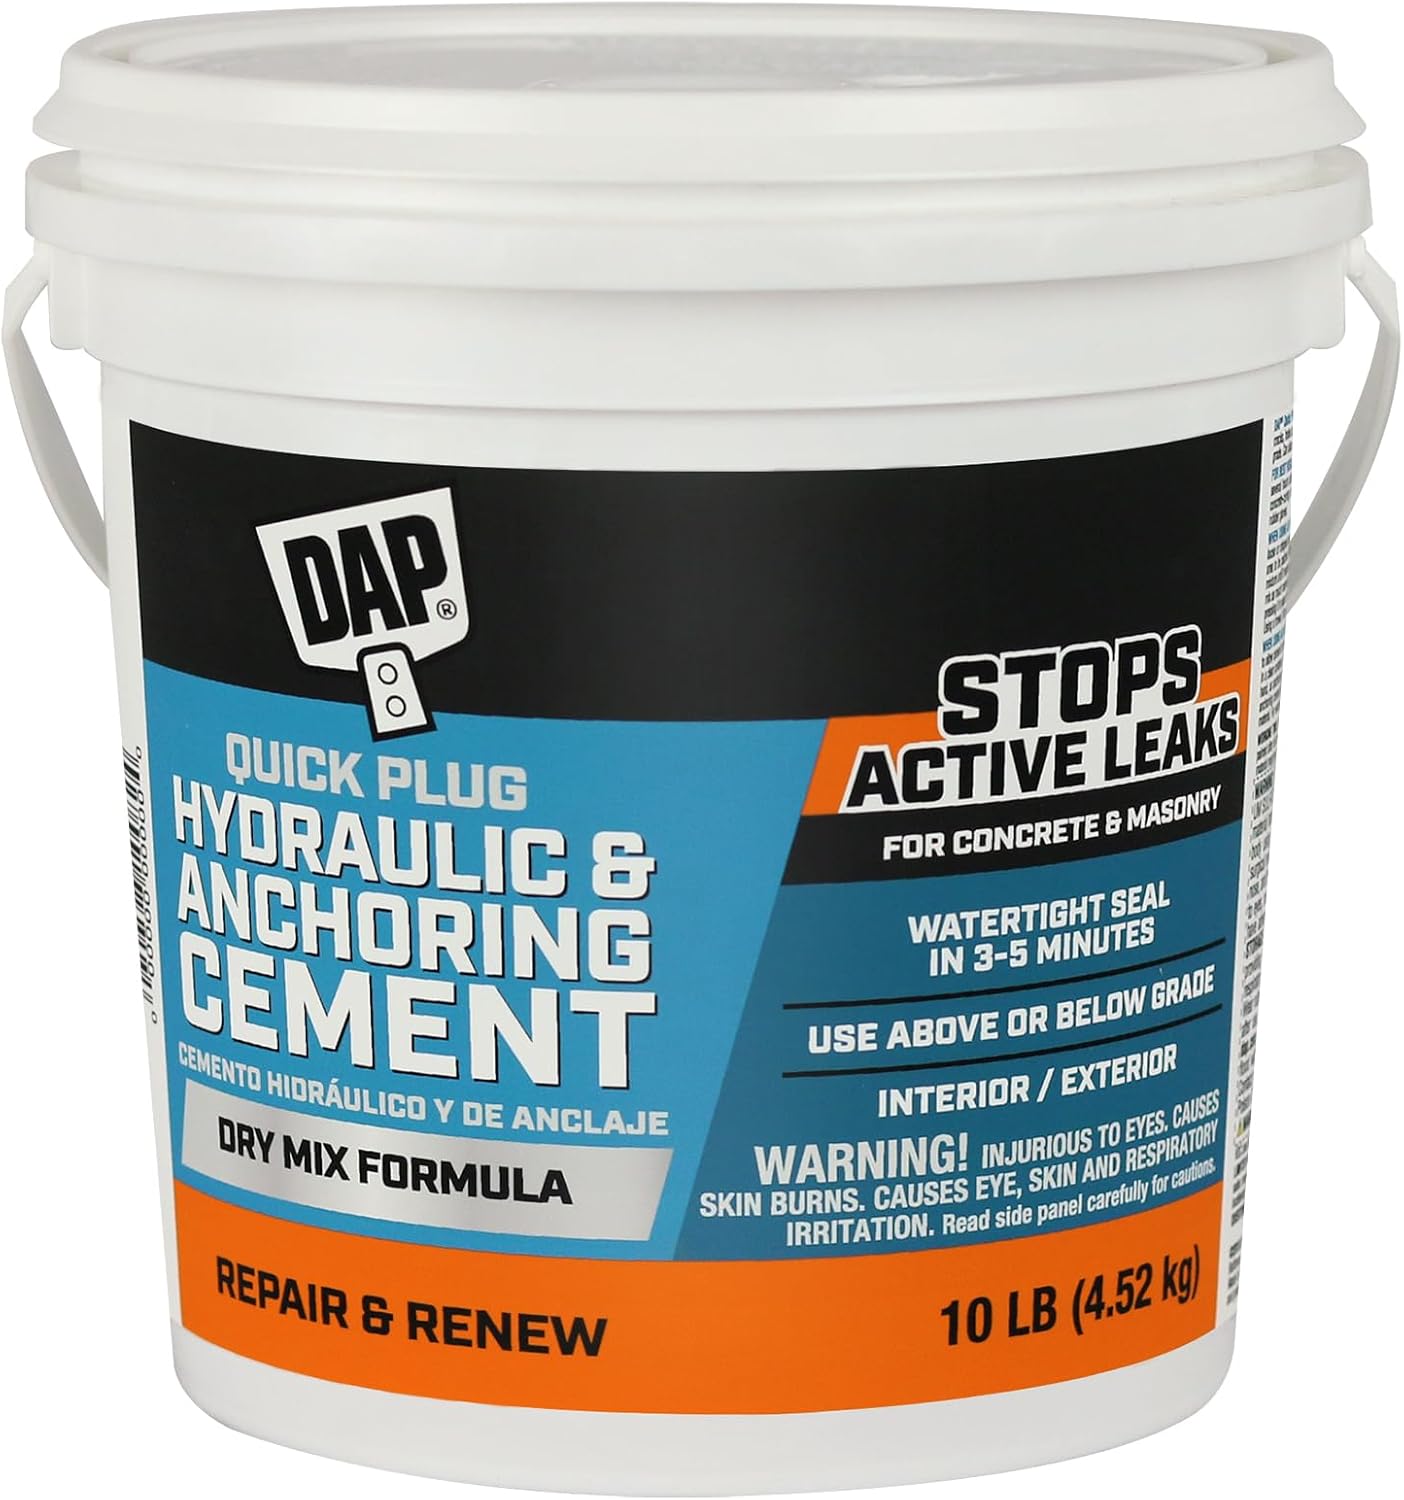
The fix: Small cracks can be sealed with hydraulic cement or concrete epoxy — both are affordable DIY fixes. Larger or expanding cracks need a foundation specialist.
👉 Get hydraulic cement on Amazon — sets in minutes, even underwater
👉 Get concrete crack epoxy on Amazon — best for hairline to medium cracks
4. Sump Pump Failure
If you have a basement pump, this is one of the most frequent culprits for floor flooding.
Signs: pump not running, humming but not actually pumping, sump pit overflowing.
The fix: Repair or replace the pump immediately. If your pump is more than 7–10 years old, replacement is often smarter than repair. And always pair it with a battery backup (see prevention section below) — power outages and heavy storms often happen together.
5. Appliance Overflow
Sometimes the simplest answer is the right one.
Check: washing machine hoses, water heater, dishwasher, and refrigerator water line.
The fix: Replace rubber hoses with braided stainless steel hoses — they’re far more durable and resist bursting. This is one of the cheapest and most effective upgrades you can make.
👉 Get braided stainless steel washing machine hoses on Amazon
6. Sewer Backup (Serious — Call a Pro)
If the water smells foul or looks dark/gray, stop immediately and call a professional. Do not attempt to clean this yourself.
Signs: foul smell, slow drains throughout the house, toilets gurgling, black or gray water.
This water is contaminated and poses a serious health risk. A licensed plumber or restoration company is the only safe option here.
Quick Diagnostic Tests (10 Minutes)
Before calling anyone, these four simple tests can help you identify the source — and save you money on the service call.
Paper towel test: Dry the floor completely, then lay paper towels around suspected areas. Check back in 15–30 minutes to see where moisture appears first. This tells you the direction water is traveling.
Water meter test: Turn off every faucet and water-using appliance in the house. Check your water meter. If it’s still moving, you have an active leak in your plumbing system.
Rain correlation test: Does the water only appear during or after storms? If so, you’re almost certainly dealing with groundwater pressure or a foundation/drainage issue — not plumbing.
Smell test: Clean, odorless water points to plumbing or groundwater. A foul or sewage smell means sewer backup — call a pro immediately.
These clues save significant time and money when you do call a professional, because they can skip the initial diagnostic work.
How to Fix It (Based on the Cause)
Groundwater or Rain Seepage
Start with the free/cheap exterior fixes first — they solve the problem for the majority of homeowners:
Extend downspouts at least 6–10 feet away from your foundation. Most basement flooding happens because downspouts dump water right next to the house. A simple downspout extension redirects thousands of gallons per year away from your foundation.

👉 Get a downspout extension on Amazon
Clean your gutters — clogged gutters overflow and dump water directly at your foundation line.
Regrade soil so it slopes away from the house, not toward it.
If exterior fixes aren’t enough, consider a sump pump, interior French drain system, or professional foundation waterproofing.
Slab or Pipe Leak
This requires a licensed plumber. They’ll typically do a pressure test and may use a thermal camera to pinpoint the leak. The fix usually involves repairing the pipe or rerouting it above the slab. DIY rarely works for under-slab leaks.
Foundation Cracks
For small, non-expanding cracks: hydraulic cement or concrete epoxy (linked above) works well as a DIY fix. For larger cracks, cracks that are growing, or any sign of foundation movement, call a foundation specialist.
Appliance Leak
Replace worn hoses, tighten loose fittings, and swap rubber for braided stainless steel. This is a cheap fix — don’t delay it.
Recommended Tools to Prevent Future Water Damage
Once you’ve fixed the immediate problem, these tools provide early warning and protection so you never deal with this again. Even one or two of these can save you thousands in future damage.
Smart Water Leak Sensors
These small devices sit on the floor near water heaters, washing machines, sump pumps, and other risk areas. When they detect moisture, they send an instant alert to your phone — so you catch leaks in minutes instead of hours or days.
👉 See top-rated smart water leak sensors on Amazon
Automatic Water Shutoff Valve
Pairs with leak sensors to automatically shut off your main water supply when a leak is detected. This is the single best upgrade for preventing catastrophic water damage — especially when you’re away from home.
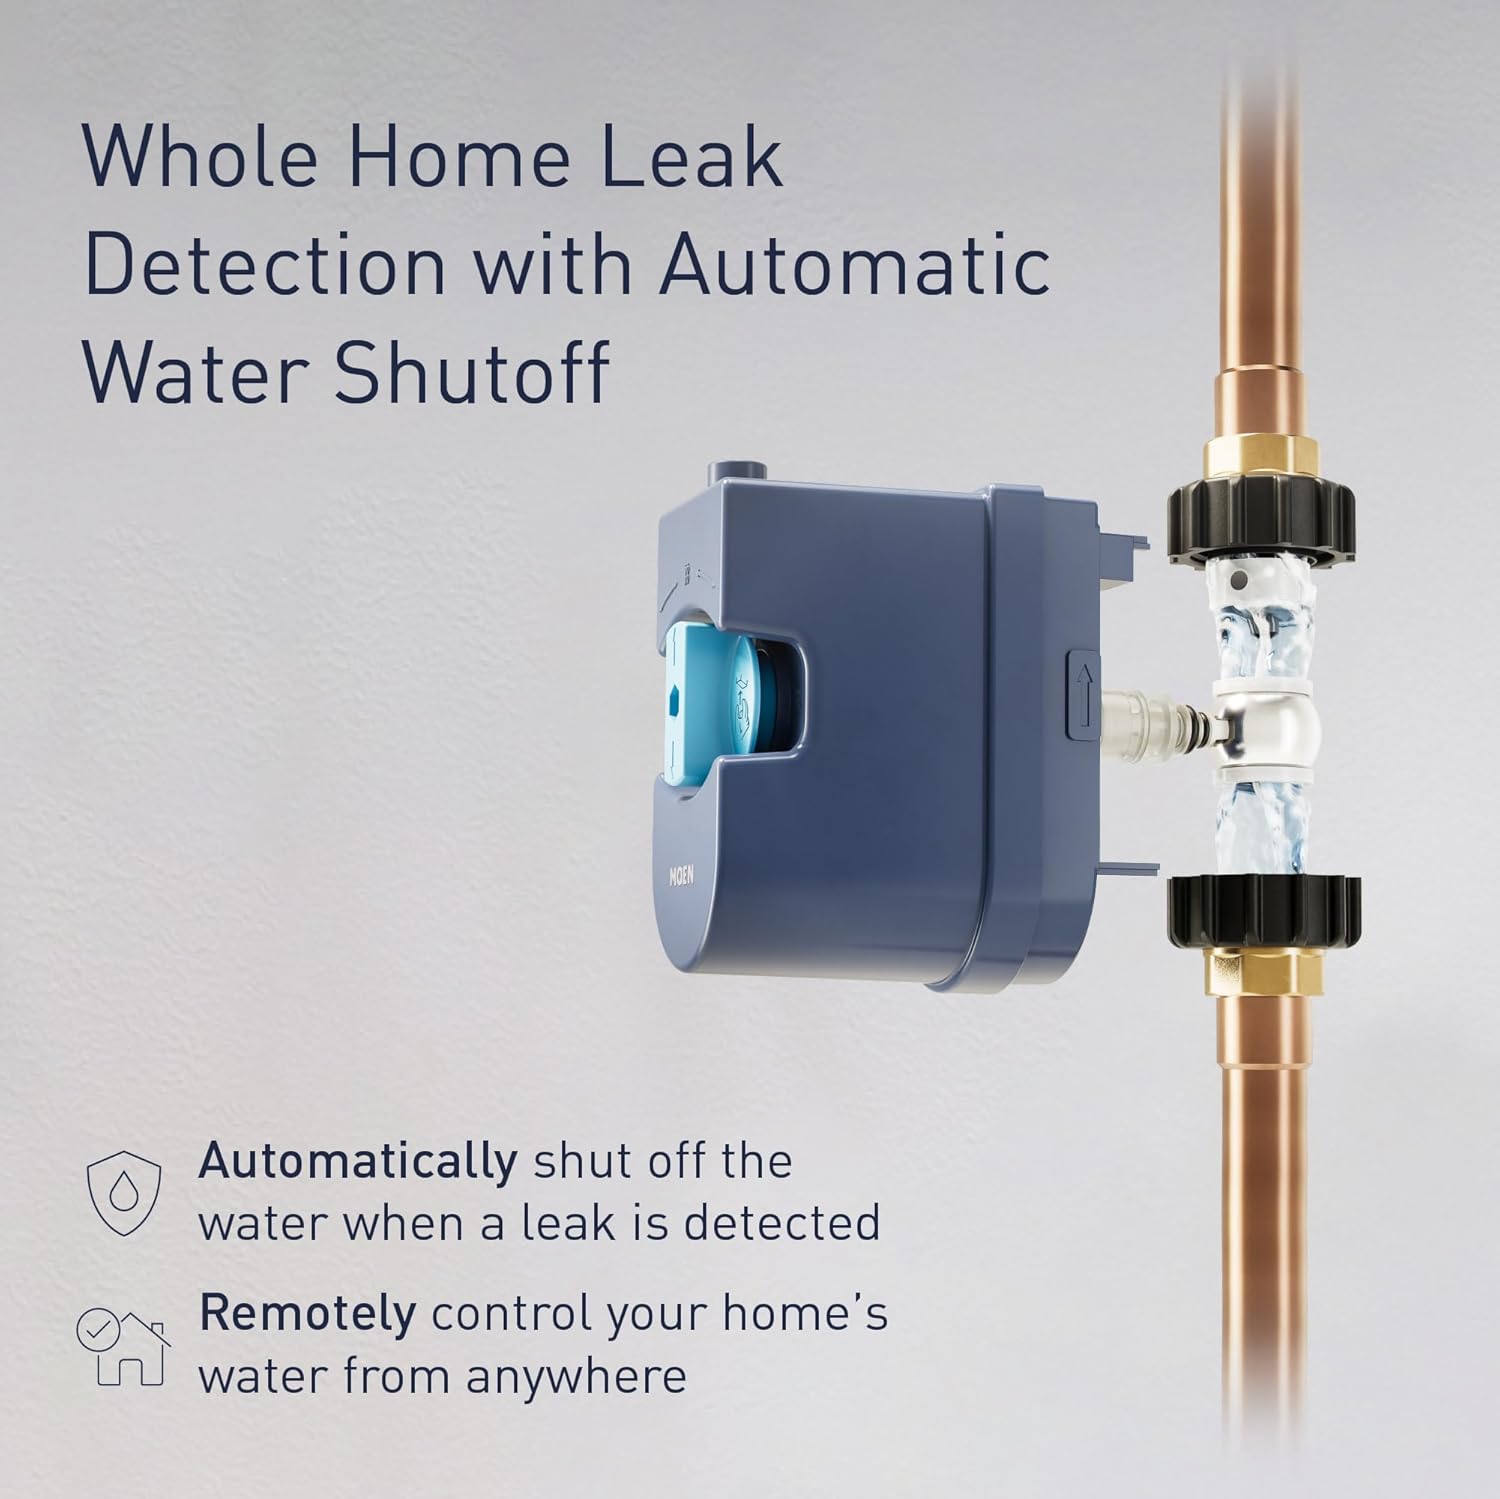
👉 See automatic shutoff valves on Amazon
Battery Backup Sump Pump
Power outages and heavy storms tend to happen at the same time — exactly when your sump pump needs to work most. A battery backup keeps your basement dry even when the power goes out.
Dehumidifier
After any water event, humidity lingers — and mold thrives in damp air. A good dehumidifier keeps basement humidity below 50%, which is the threshold where mold struggles to grow.
👉 See top-rated basement dehumidifiers on Amazon
When to Call a Professional Immediately
Some situations are beyond DIY. Call a professional right away if you’re dealing with any of these: water that keeps returning after cleanup, a suspected slab leak, sewage smell, visible foundation shifting or movement, electrical risk from water near wiring, or more than 1–2 gallons of standing water.
Early professional intervention is almost always cheaper than waiting. A $300 service call now can prevent a $5,000+ restoration project later.
How Much Does This Typically Cost?
| Problem | Typical Cost |
|---|---|
| Small plumbing repair | $150–400 |
| Sump pump replacement | $800–2,500 |
| Foundation crack sealing | $500–2,000 |
| Slab leak repair | $1,000–4,000+ |
| Major waterproofing | $3,000–10,000+ |
| Full water damage restoration | $2,500–7,500+ |
The pattern is clear: catching problems early is always cheaper. A $15 leak sensor or a $30 pair of braided hoses can prevent thousands in repairs.

Annual Prevention Checklist
Once the problem is fixed, spend 30 minutes once a year on these tasks to keep water out for good:
- Clean gutters and check for proper drainage
- Extend downspouts at least 6 feet from the foundation
- Test your sump pump by pouring water into the pit
- Inspect washing machine, dishwasher, and water heater hoses for bulging or cracking
- Seal any new cracks in basement walls or floor
- Verify leak detectors have fresh batteries and are positioned correctly
- Check the grading around your home — soil should slope away from the foundation
A 30-minute annual inspection can prevent thousands in water damage. Set a calendar reminder for spring and fall.
Frequently Asked Questions
Q: How does sloped landscaping cause water to seep through the floor?
A: If your yard slopes toward your house, rainwater flows directly at the foundation. Over time, this saturates the soil and increases hydrostatic pressure — the force that pushes groundwater through cracks in your basement floor and walls. If a neighbor’s yard slopes toward yours, their runoff compounds the problem. Regrading the soil so it slopes away from the house is one of the most effective (and cheapest) fixes.
Q: What are two signs of a main water line break?
A: A sudden drop in water pressure and unexplained pooling water in your yard — especially near where the main line enters your home. If you notice both, contact your water utility or a plumber immediately.
Q: How does hydrostatic pressure cause basement floor leaks?
A: Hydrostatic pressure is the force that saturated soil exerts against your foundation. When the ground around your home absorbs heavy rain or snowmelt, pressure builds up and forces water through any crack, joint, or weak point in your basement floor or walls.
Q: Why is it important to clean clogged gutters?
A: Clogged gutters overflow and dump water directly at your foundation — exactly where you don’t want it. This increases soil saturation and hydrostatic pressure, which drives water into basements and crawl spaces. Clean gutters twice a year (spring and fall) to prevent this.
Q: How can I detect a leak in my underfloor heating system?
A: Look for unexplained warm spots on the floor and monitor your water bill. A hidden underfloor heating leak causes localized warmth above the damaged pipe and a gradual increase in water usage. A plumber with a thermal imaging camera can confirm the exact location.
Q: What immediate steps should I take when I discover water seeping through the floor?
A: First, shut off the main water supply to rule out plumbing leaks. Then cut power to affected rooms for safety. Remove standing water with towels or a shop vac, move valuables off wet floors, and photograph everything for insurance before cleaning further. Speed matters — mold can begin growing within 24–48 hours.
Q: What’s the difference between a French drain and a trench drain?
A: A French drain is a buried, gravel-filled trench with a perforated pipe that collects and redirects groundwater below the surface. A trench drain (also called a channel drain) is a surface-level channel that catches and diverts water runoff from above ground. French drains solve subsurface water problems; trench drains handle surface water.
Q: How can a high water bill indicate water seepage?
A: A sudden spike in your water bill — without any change in your usage habits — often signals a hidden leak in your plumbing. Pipes running under floors or through walls can leak for weeks before water becomes visible. The water meter test (described above) can confirm this in minutes.
Q: Why is proper ventilation important after a water seepage incident?
A: Even after standing water is removed, moisture remains trapped in flooring, drywall, and subfloor materials. Without proper airflow, this moisture creates the perfect conditions for mold growth. Use fans, open windows, and run a dehumidifier until humidity drops below 50%.
Q: When should I contact a water damage restoration professional?
A: Call a professional if the affected area is larger than about 10 square feet, you see or smell mold, the water is contaminated (sewage), or you can’t identify the source. Restoration professionals have industrial-grade drying equipment and moisture meters that detect hidden water behind walls and under floors — problems that are easy to miss on your own.
Final Thoughts
Seeing water come through your floor is stressful — but the majority of causes are fixable, especially if you act quickly.
Stop the water → Diagnose the source → Fix the cause → Prevent it from happening again.
Handle it early and you’ll save money, protect your home, and avoid the kind of damage that turns a simple repair into a major renovation. The tools linked above are a smart starting point — a few dollars in prevention can save thousands in restoration.
How to Fix a Roof Leak: A Step-by-Step Guide
Roof leaks are not just an inconvenience—they can cause extensive damage if left untreated. Whether it’s a minor drip during heavy rain or a more persistent issue, fixing a roof leak promptly is essential to prevent further problems like mold, structural damage, and costly repairs.
Identifying the Source of the Leak
Sometimes, the source of the leak is obvious, but other times, it may take some investigation.
- Start with an Inspection: Begin by inspecting your attic for water stains, musty odors, or bulging drywall. These are clear signs that water is entering your home. Next, move outside and carefully check your roof for missing or damaged shingles that look out of place, cracked or missing flashing, or any other signs of wear.
- Common Leak Sources:
- Roof Penetrations: Areas where chimneys, vents, or skylights protrude through the roof are frequent leak points because the seals around them can degrade over time.
- Damaged Shingles: Missing, curled, or cracked shingles allow water to penetrate the roof.
- Damaged Flashing: Flashing, the metal strips that seal roof joints, can rust or become damaged, allowing water in.
- Plumbing Vent Boots: These rubber or metal boots around vent pipes can crack or deteriorate, leading to leaks.
- Roof Valleys: The areas where two roof sections meet can develop cracks over time.
Tips for Locating Hidden Leaks: Water can travel along roof decking before entering your home, so the leak inside your house may not directly correspond to the entry point on the roof. You can trace the leak by following the water stains back to their highest point. Using a garden hose to simulate rainfall in suspected areas can also help you pinpoint the exact location of the leak.
Tools and Materials You’ll Need for Roof Leak Repair
Before you start, make sure you have the right tools and materials to repair your roof.
- Basic Tools:
- Hammer
- Utility knife
- Pry bar
- Caulk gun
- Screwdriver
- Materials:
- Roofing cement
- Roofing nails
- Replacement shingles
- Flashing
- Vent boots
- Roof sealant
- Optional Materials for Larger Jobs:
- Ladder
- Safety harness
- Tarps to protect areas during repair
- Roofing tape (for temporary fixes)
Step-by-Step Guide to Fixing Common Roof Leaks
Now that you’ve identified the source of the leak and gathered your tools, let’s go over how to fix some of the most common types of roof leaks.
Fixing Damaged or Missing Shingles
- Lift the Shingle: Use a pry bar to gently lift the damaged shingle, being careful not to damage the surrounding shingles.
- Remove Nails: Use a pry bar to remove the nails securing the damaged shingle. You may need to remove a few surrounding shingles to access the nails properly.
- Install the New Shingle: Slide the replacement shingle into place and nail it down securely.
- Seal the Edges with Roofing Cement: Apply roofing cement to the edges of the new shingle to ensure it stays in place and to prevent water from seeping in.
- Repairing Flashing Around Roof Penetrations (Chimneys, Vents, Skylights)
- Inspect the Flashing: Look for cracks, gaps, or rusted areas in the flashing.
- Remove the Damaged Flashing: Use a pry bar to carefully remove the damaged flashing, being mindful of surrounding materials.
- Install New Flashing: Cut new flashing to replace the old and secure it with roofing nails.
- Seal with Roofing Cement: Apply roofing cement or roofing caulk around the edges of the flashing to seal the area and prevent leaks.
- Replacing Damaged Plumbing Vent Boots
- Remove the Old Vent Boot: Use a pry bar to remove nails and lift the old vent boot off the vent pipe.
- Install the New Boot: Slide the new vent boot over the pipe and secure it with roofing nails.
- Seal the Edges: Apply roofing sealant around the edges of the boot to ensure a watertight fit.
- Sealing Cracks in Roof Valleys
- Clear Debris: Remove any leaves, dirt, or debris from the valley to access the damaged area.
- Apply Roof Sealant: Use a caulk gun to apply roofing sealant to seal cracks or gaps in the valley.
- Install New Valley Flashing (for severe damage): If the damage is extensive, you may need to install new flashing along the valley. Nail the flashing in place and seal the edges with roofing cement.
- Temporary Fixes While Waiting for a Professional Repair
If you can’t immediately fix the roof leak yourself or need professional assistance, there are temporary fixes you can use to minimize damage.
- Roofing Tape: This waterproof tape can be used to temporarily seal leaks until a permanent repair can be made.
- Tarp: Cover the damaged area of your roof with a tarp, and secure it with roofing nails to keep it in place during storms. Be careful using weights or bricks as wind can lift the tarp and fling the bricks down at anything (and anyone) down below.
Keep in mind that these are short-term solutions. A permanent fix should be made as soon as possible to prevent further damage.
Preventing Future Roof Leaks
Prevention is always better than repair.
- Regular Roof Inspections: Inspect your roof twice a year, particularly after storms, to spot potential issues before they become serious.
- Clean Gutters: Clogged gutters can cause rain water to back up onto the roof, seeping into the attic and walls. Seasonally clean the gutters to ensure proper drainage.
- Trim Overhanging Trees: Branches hanging over your roof can damage shingles or drop debris that clogs gutters, so keep them trimmed back.
- Address Small Issues Early: If you notice damaged shingles or loose flashing, fix it right away. Small repairs are much cheaper and easier than dealing with extensive water damage later.
When to Call a Professional Roofer
While many small leaks can be fixed with a bit of DIY effort, some situations require the help of a professional roofer. Here’s when you should consider calling in a pro:
- Extensive Damage: If a large section of your roof is damaged or the leak is severe, a professional roofer should have the tools and experience to fix it properly.
- Structural Issues: If the leak has caused significant structural damage, it’s best to consult with a roofing contractor.
- Safety Concerns: If you’re uncomfortable with heights or unsure of your skills, it’s safer to hire a professional.
When choosing a roofer, look for someone with good reviews, a proven track record, and proper licensing and insurance. Ask for recommendations from friends or on trusted platforms like Reddit.
The Ultimate Guide to Water Mitigation: Protect Your Home from Water Damage
Water damage is one of the most common and costly issues homeowners face. From unexpected leaks to natural disasters, unwanted water can wreak havoc on your property. In this comprehensive guide, we’ll delve into what water mitigation is, the steps you should take when facing water damage, and how to safeguard your home against future incidents.
Understanding Water Mitigation
Water mitigation is the practice of reducing and preventing the impact of water damage after a flood, leak, or any event where water invades unwanted areas of your home. The primary goal is to act swiftly to minimize damage, and begin the restoration process to bring a property back to its pre-damage condition.
The Importance of Immediate Action
- Prevent Structural Damage: Water can weaken the structural integrity of a home, affecting walls, floors, and foundations.
- Avoid Mold Growth: Mold can start developing within 24 to 48 hours in moist conditions, leading to health risks.
- Save on Repair Costs: Prompt action can significantly reduce the cost of repairs and restoration.
- Protect Personal Belongings: Quick mitigation efforts can help salvage appliances, furniture, electronics, and cherished items.
Common Sources of Water Damage
- Burst Pipes: Often caused by freezing temperatures or aging plumbing systems.
- Appliance Leaks: Malfunctions in washing machines, dishwashers, or water heaters.
- Roof Damage: Missing shingles or damaged flashing allowing water intrusion.
- Natural Disasters: Heavy rains, hurricanes, or floods overwhelming drainage systems.
- Sewage Backups: Blocked or damaged sewer lines causing wastewater to enter your home.
Steps to Take When Facing Water Damage
- Prioritize Safety
- Shut Off Power: Turn off electricity in affected areas to prevent electrical hazards.
- Wear Protective Clothing: Use gloves, boots, and masks to protect against contaminants, especially if sewage is involved.
- Avoid Contaminated Water: Stay clear of water that may be contaminated with chemicals or pathogens.
- Stop the Water Source
- Turn Off Water Supply: Locate and close the water main valve if a pipe has burst.
- Temporary Repairs: Use tarps or sealants to patch leaks in roofs or broken windows until permanent fixes can be made.
- Assess the Situation
- Determine Extent of Damage: Identify all affected areas and the severity of the damage.
- Document Everything: Take detailed photos and notes for insurance claims.
- Remove Standing Water
- Extraction: Use pumps and wet/dry vacuums to remove as much water as possible.
- Seek Hidden Moisture: Check behind walls and under floors, as water can seep into unseen areas.
- Dry and Dehumidify
- Increase Airflow: Open windows and doors if weather permits, and set up fans to circulate air.
- Use Dehumidifiers: These devices help remove moisture from the air, speeding up the drying process.
- Monitor Progress: Regularly check moisture levels to ensure thorough drying.
- Clean and Sanitize
- Dispose of Damaged Materials: Remove items that cannot be salvaged, such as soaked carpets or insulation.
- Clean Surfaces: Use appropriate cleaning agents to remove dirt and prevent microbial growth.
- Sanitize Affected Areas: Apply disinfectants to eliminate bacteria and prevent mold.
- Restore and Repair
- Structural Repairs: Fix damaged walls, floors, and other structural components.
- Replace Damaged Items: Install new carpeting, drywall, or fixtures as needed.
- Final Inspection: Ensure all repairs meet safety standards and that your home is fully restored.
When to Call in Professionals
While some minor water issues can be handled on your own, professional assistance is crucial in certain situations:
- Contaminated Water: If the water is from a sewage backup or contains harmful chemicals.
- Extensive Damage: Large areas affected or significant structural damage.
- Mold Presence: Visible mold growth requires expert remediation.
- Specialized Equipment Needed: Professionals have access to industrial-grade equipment for effective mitigation.
Selecting a Trusted Water Mitigation Company
- Check Credentials: Look for companies with certified technicians and a solid reputation.
- Experience Matters: Choose providers with a proven track record in handling similar situations.
- Availability: Emergencies can occur anytime; select a company that offers 24/7 services.
- Insurance Assistance: Some companies help navigate the insurance claims process, easing your burden.
Preventing Future Water Damage
Routine Maintenance
- Inspect Plumbing Regularly: Check for leaks, corrosion, and signs of wear.
- Maintain Your Roof: Replace missing shingles and repair damaged flashing promptly.
- Clean Gutters and Downspouts: Ensure they are clear of debris to facilitate proper drainage.
Home Improvements
- Install Sump Pumps: Especially important for homes with basements prone to flooding.
- Set Up Water Leak Detectors: Early detection devices like a water alarm can alert you to leaks before they cause major damage.
- Consider Backflow Valves: These prevent sewage from backing up into your home during heavy rains.
Landscaping Tips
- Grade Your Property: Ensure the ground slopes away from your home’s foundation.
- Use Proper Drainage Solutions: Install French drains or swales to divert water away.
Understanding Your Insurance Coverage
- Review Your Policy: Know what types of water damage that are covered. Flood damage from a natural disaster for instance, might not be covered by a regular policy.
- Keep an Inventory: Document your belongings with photos and receipts to streamline the claims process.
Frequently Asked Questions
Q: How quickly should I deal with water damage?
A: Immediately. Prompt action can prevent mold growth and reduce the extent of the damage.
Q: Can I handle water mitigation myself?
A: For minor incidents involving clean water, you might manage on your own. Extensive damage or contaminated sewage water should be handled by professionals.
Q: What are signs of hidden water damage?
A: Look for unexplained increases in your water bill, musty odors, discoloration on walls or ceilings, and warped flooring.
Q: How do I prevent mold after water damage?
A: Ensure all affected areas are thoroughly dried, maintain low indoor humidity, and consider using mold-resistant products during repairs.
How Long Does It Take For Pipes To Freeze And Burst?
As temperatures start to plummet, one of the biggest concerns for homeowners is the potential for their pipes to freeze and burst. It’s a problem that can cause significant water damage, costly repairs, and a lot of headaches. But how long does it really take for pipes to freeze and, more importantly, burst? In this post, we’ll explore the factors contributing to frozen pipes, how long the process takes, and how to prevent it from happening in your home.
How Freezing Temperatures Affect Pipes
Water freezes at 32°F (0°C), but when it comes to pipes, the real danger kicks in when temperatures drop to 20°F (-6.7°C) or below. At this point, water inside your pipes begins to freeze, and as it turns into ice, it expands. This expansion creates a significant amount of pressure inside the pipes, which can cause them to crack or burst.
Not all pipes react to freezing temperatures in the same way. The material of your pipes plays a big role in how quickly they freeze and whether they’ll burst. PEX piping, for example, is flexible and resistant to corrosion, so it’s less likely to burst. Galvanized steel pipes, common in older homes, are durable but prone to corrosion, which weakens them over time and makes them more susceptible to freezing and bursting.
How Long Does It Take for Pipes to Freeze?
So, how long does it actually take for pipes to freeze? The answer depends on a few factors, but in general, pipes can freeze in as little as 6-8 hours when exposed to temperatures below freezing, particularly in poorly insulated or unheated areas.
- Insulation: Pipes that are insulated take longer to freeze. Those without insulation are more vulnerable, especially in basements, crawl spaces, or attics.
- Ambient Temperature: The colder it is, the faster your pipes will freeze. Prolonged exposure to sub-freezing temperatures accelerates the process.
- Water Flow: Pipes with stagnant water freeze faster than those with a small flow of water. Keeping water moving, even at a trickle, can help prevent freezing.
Different materials also play a role. Copper pipes tend to freeze faster due to their high thermal conductivity, while PEX pipes take longer thanks to their flexibility and better insulation properties.
Freezing Risk Threshold:
| Temperature | Risk of Freezing Pipes | Notes |
|---|---|---|
| 32°F (0°C) | Moderate | Water begins to freeze, insulation is key to prevention. |
| 20°F (-6.7°C) and below | High | Pipes are at significant risk, especially if uninsulated or exposed. |
| Below 0°F (-18°C) | Severe | Pipes can freeze quickly (within 6 hours) in unheated and exposed areas. |
High-Risk Pipe Locations:
| Location | Vulnerability | Preventative Measures |
|---|---|---|
| Unheated Attics and Basements | High | Insulate pipes, seal air leaks, apply heat cables. |
| Crawl Spaces | High | Insulate and consider heating these areas if possible. |
| Pipes Along Exterior Walls | Moderate to High | Insulate walls, install foam pipe covers, ensure proper ventilation. |
| Outdoor Faucets and Spigots | High | Disconnect hoses, cover spigots, shut off water supply to outdoor lines. |
Why and When Do Frozen Pipes Burst?
Interestingly, pipes don’t usually burst at the exact moment they freeze. Instead, they tend to burst when they start to thaw. Here’s why: as water freezes inside the pipe, it creates an ice plug. This plug prevents water from flowing, but more importantly, it traps the water that remains in the pipe. As the water freezes and expands, it pushes against the pipe walls, creating pressure. Once the ice thaw and the water moves again, that trapped pressure can lead to a burst.
The risk of bursting is especially high in galvanized steel or polybutylene pipes. They are more prone to wear and leaks. PEX pipes, due to their flexibility, expand and contract more with temperature changes, making them less likely to burst.
High-Risk Areas for Frozen Pipes
Certain areas in your home are more vulnerable to freezing pipes than others. These include:
- Unheated Spaces: Pipes in unheated areas such as basements, attics, garages, and crawl spaces are the most susceptible to freezing. These areas often have little to no insulation and are exposed to cold drafts.
- Pipes Along Exterior Walls: Pipes running along poorly insulated exterior walls are at higher risk of freezing, as they are directly exposed to cold air.
According to Residential Plumbing: A Comprehensive Guide, these areas are often overlooked when insulating pipes, but they are where most freezing problems begin.
Preventing Pipes from Freezing and Bursting
The good news is that there are several effective ways to prevent your pipes from freezing and bursting:
- Insulation: Wrap vulnerable pipes in foam insulation or use pipe sleeves. Pay special attention to pipes located in unheated areas like attics and basements.
- Heat Cables or Heat Tape: Install heat cables or tape along exposed pipes, especially in colder regions. These provide a steady source of warmth to the pipes during freezing temperatures.
- Let Faucets Drip: A small trickle of water flowing through pipes can prevent them from freezing. Moving water takes longer to freeze than still water.
- Maintain a Consistent Temperature: To help prevent indoor pipes from freezing, keep the thermostat set at 55°F (13°C) or higher, even when you’re not home.
- Seal Air Leaks: Look for gaps or cracks around pipes where cold air might enter, especially in areas like the basement or attic. Sealing these gaps with caulk or insulation can help keep the cold air out and the warmth in.
What to Do If Your Pipes Freeze
If you discover that your pipes are frozen, act quickly to prevent them from bursting.
- Shut Off the Water Supply: This is the most critical first step. If the pipe has already burst, shutting off the water will prevent flooding and minimize damage.
- Thaw the Pipe Safely: Use a hairdryer, space heater, or hot towels to gradually warm the frozen section. Start near the faucet and work your way toward the frozen part. Never use an open flame to thaw pipes, as it can cause the pipe to burst or even start a fire.
- Open Faucets: Open all faucets that are connected to the frozen pipe so that water can flow as the ice melts. It will also keep pressure low in the pipes, which will help prevent a burst.
If you can’t locate the frozen section or are unsure how to safely thaw it, it’s best to call a professional plumber to handle the situation.
Recognizing Frozen Pipes
It’s not always easy to know when your pipes are frozen, but there are a few telltale signs to look out for:
- No Water Flow: If you turn on a faucet and no water comes out, it’s a clear sign that the pipe may be frozen.
- Unusual Sounds: If you hear banging, rattling, or gurgling noises when turning on a tap, this could also indicate a frozen pipe.
Materials Overview and Pipe Replacement Considerations
When it comes to plumbing, the type of pipe material you have plays a big role in how they’ll react to freezing temperatures. Here’s a quick rundown:
- Copper: Traditional and durable, but more prone to freezing and bursting.
- PEX: Flexible, resistant to bursting, and a good option for cold climates.
- Galvanized Steel: Common in older homes but prone to corrosion and bursting.
- Polybutylene: Now obsolete due to its tendency to leak when exposed to chlorine.
| Pipe Type | Material Characteristics | Freezing Susceptibility | Best Uses | Lifespan | Notes |
|---|---|---|---|---|---|
| Copper | Durable, corrosion-resistant, high thermal conductivity | High (freezes faster) | Drinking water, hot water supply | ~50 years | Expensive, prone to freezing but less likely to burst quickly. |
| PEX (Cross-Linked Polyethylene) | Flexible, resistant to corrosion, color-coded for hot/cold | Low (expands without bursting) | Hot and cold water lines, easy to install | ~50 years | Best for freezing conditions due to flexibility. |
| PVC (Polyvinyl Chloride) | Lightweight, rigid, cannot handle high temperatures | Moderate (insulate well) | Cold water lines, drainage | ~25-40 years | Suitable for cold water but not hot water applications. |
| CPVC (Chlorinated PVC) | Similar to PVC, but can handle higher temperatures | Moderate (insulate well) | Hot and cold water supply | ~50 years | Better for hot water applications than PVC. |
| Galvanized Steel | Heavy, durable, prone to rust over time | High (especially if corroded) | Older homes, rarely used in new installs | ~20-50 years | Prone to corrosion and often replaced in modern homes. |
| Polybutylene | Lightweight, prone to failure, leaks when exposed to chlorine | High (frequently bursts) | Obsolete | N/A | No longer used due to frequent failure and leaks. |
| ABS (Acrylonitrile Butadiene Styrene) | Strong, black plastic, used for drainage systems | Low (if properly installed) | Drainage and vent lines | ~50 years | Not UV-resistant, not for water supply. |
| Stainless Steel | Corrosion-resistant, durable, expensive | Low | Exposed plumbing, gas lines | ~50+ years | Used in high-corrosion or aesthetic applications. |
| Cast Iron | Durable, sound-dampening, prone to rust | Moderate (due to thickness) | Drainage and waste systems | ~50-100 years | Heavy, used in older homes, very durable but can rust. |
If your home still has galvanized steel or polybutylene pipes, you might want to consider replacing them with more modern, freeze-resistant materials like PEX.
Caldwell, ID – Mold Remediation Caldwell

Water woes within a dwelling can spell significant damage and pose notable health risks. Whether it springs from floods, leaks, burst pipes, or overflows, the urgency to manage the situation is paramount. Let’s wade through the essentials and optimal practices for managing unwanted indoor water, focusing on the diverse scenarios where it can become a challenging adversary.
The Imperative: Swift Action Against Indoor Water
- Minimize Damage: Immediate action curtails the extent of damage and mitigates potential mold growth and structural impairments.
- Address Electrical Hazards: Standing water can present electrical dangers, necessitating caution and potentially requiring professional intervention.
Stepping Stones: Initial Steps in Water Management
- Source Identification: Determine and halt the water source promptly.
- Professional Assistance: In uncontrollable scenarios, enlist the help of professional water management services.
Water Damage in Caldwell: A Significant Adversary
- Pervasive Threat: From leaking roofs to overflowing sinks, water damage can originate from myriad sources, posing threats to structures and personal property.
- Prevention and Preparedness: Ensuring structural maintenance, vigilance for potential water-related issues, and having a professional water damage restoration company’s contact details are pivotal preventative and responsive strategies.
Flood Cleanup in Caldwell, ID: Navigating Through Indoor Flooding
- Sources and Threats: Indoor flooding, stemming from rainfall, plumbing failures, or appliance issues, can wreak havoc on dwellings.
- Urgent Response: Immediate action involving water source management, standing water removal, and drying processes is crucial.
- Preventative Measures: Utilize strategies like sump pump installation and regular leak checks to mitigate the risk of indoor flooding.
Sewage Backup Cleaning in Caldwell, ID: Navigating Through the Unpleasant
- Potent Hazards: Sewage flooding indoors can catapult a dwelling into a hotbed for health risks and substantial property damage.
- Expert Intervention: Professional engagement is non-negotiable due to the substantial risks involved in sewage cleanup.
- Preventative Oversight: Regularly inspecting and maintaining sewage systems are paramount to avert catastrophic sewage flooding events.
Crawlspace Cleaning in Caldwell, ID: Ensuring the Foundations are Sound
- The Significance of Crawlspaces: Acting as a buffer and utility access point between the ground and the first floor, maintaining crawlspaces is pivotal.
- Issues and Implications: Water in crawlspaces can instigate structural issues, mold, and pest infestations.
- Strategies for Management: Adequate drainage, regular inspections, and sealing any potential entry points for water are vital in managing crawlspace health.
Conclusion: Anchoring a Home Against Water and Sewage Threats
Navigating through the challenges presented by unwanted indoor water and sewage requires a blend of swift action, preventative strategies, and professional intervention. A comprehensive approach involving immediate response to issues, regular maintenance and inspection of home systems, and establishing a relationship with professional cleanup and restoration services ensures a robust defense and effective response to water and sewage challenges. This holistic methodology safeguards the structural integrity of the dwelling, protects the inhabitants from health risks, and ensures a swift return to normalcy following any unwanted water events.